COMS documentation (all)
1. Getting started
With the exception of emails, which are configured on the Emails page, all of the configuration tasks are accomplished on the Configuration page, which can be accessed by administrators after logging onto their account.
The following provides an overview of the tasks needed to set up a site and can be used as a check list for the configuration. Implementation details are provided in the sub menus.
General functions
- Input the conference descriptors
- Title, venue, dates, conference website.
- Styling
- Create a banner and set the colour scheme.
- Languages and texts
- Select the language/s of the site. Add your own. Edit texts seen by the users
Module activation and configuration
- Participants
- Set up forms and upload buttons to collect personal data from the users. Flag users for participation, based on various criteria (as a result of a selection process; as a result of a registration process; after confirmation is received from the users).
- Submissions
- Set up the submission form and activate upload buttons to collect documents associated with the submission.
- Reviews
- Set up the review form and select options to guide the review assignment function.
- Payments
- Activate up to five registration forms and connect your account to the COMS system.
Administrators
- Create admin accounts
- Upload admin accounts or assign the admin function to existing users.
Emails
- Set general parameters
- Define the sender email. Set a signature to be inserted in all emails.
- Activate and edit email templates
- Automatic emails, bulk emails, email alerts.
Access control
- Set access permissions
- Set timers on functions accessed by the users, to enforce deadlines.
- Control disclosures
- Select the data, if any, that should be shown to the users (reviews, feedback, presentation details).
Test the configuration
- Test data
- Create test data (users, submissions, reviews) to test your setup and delete them before going live.
- Checking users' accounts
- Access users' accounts to verify that the set up is correct.
1.1. First steps
The conference descriptors, basic email parameters and languages should be set at the start of the configuration, as they are important, yet easy to overlook.
Input the conference descriptors
- Go to Configuration / General functions / Conference descriptors.
- Input the conference title, venue, dates and website.
- There are placeholders for these data which can be inserted in texts and emails, for instance
{conference-dates}. - In the case of recurrent or multiple events that use the same configuration, placeholders allow organisers to reuse texts and emails from a previous or existing site without edits, by simply updating the conference descriptors.
Display useful information on users' accounts
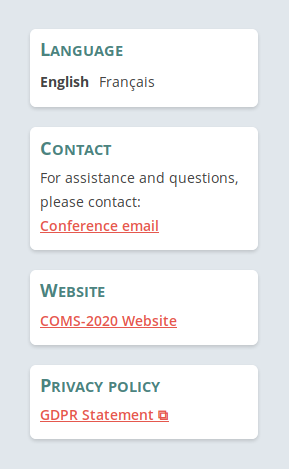
- The column on the right hand side of a COMS website features cards displaying useful data for the users. This column is seen both before and after login.
- Fig 1. shows an example of the right hand column, with the following cards:
- Language
- This card only appears if you activate more than one language on the site. It allows users to choose their preferred language. The system remembers the selected language for each user. You can activate or deactivate languages at Configuration / General functions / Language settings.
- Contact
- This card displays a link to the conference email address. It is only shown if an email address is provided at Configuration / General functions / Conference descriptors.
- Website
- This card displays a link to the conference website. It is only shown if the URL of the website is provided at Configuration / General functions / Conference descriptors.
- Privacy policy
- This card displays a link to your GDPR privacy declaration. It is only shown if you decide to publish it. The next section describes the function that allows editing and publishing of the declaration.
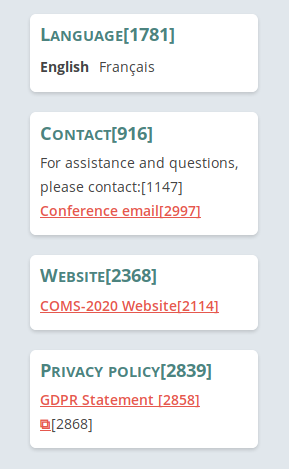
- If you need to modify the texts and headings that accompany the data shown on the cards, you can use the text-IDs shown in Fig 2. The page at Texts & translations / Identify and edit any text explains how to retrieve and edit these texts.
Publish a GDPR privacy statement
- Go to Configuration / General functions / GDPR Statement.
- You will find a ready-made statement that can be used as is, or can be edited to fit your needs, in the section labelled
3. Sample Privacy Statement. - If you decide to use it as is, you will need to provide the name of your institution, which will be inserted in the text. This can be done in the section labelled
2. Display the Privacy Statement on the login page. - Once the text is ready, you can activate its display on the site.
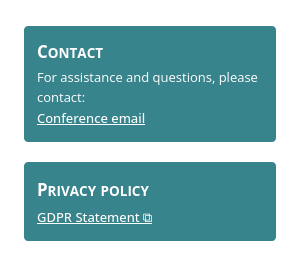
- It will appear as a link that leads to the prepared text, in the right column of all the pages seen by the users. It will also be seen in the right column, before login.
Insert a banner
 Basic knowledge of HTML/CSS is required.
- Go to Configuration / General functions / Banner.
- The top part of the site can be personalised with texts and pictures which can be uploaded to the site before being used.
- Templates for typical types of banners are provided (e.g. pure picture banner, logos on the sides and text in the middle).
Change the colour scheme
- Basic knowledge of HTML/CSS is required.
- Go to Configuration / General functions / Styling.
- You can modify the colour scheme of the site to match the banner or the conference website.
Select the languages of the site
- Go to Configuration / General functions / Languages.
- You can activate up to three languages.
- COMS maintains texts in English, German and French.
- It is possible to replace the default languages with others, or add another language.
- A translation module is provided to manage texts in all languages.
- The texts can be edited in all languages.
- Users can select their preferred language which will be remembered by the system. This is only relevant for sites that use more than one language.
Settings in the email module
- Go to Emails / Overview and settings.
- Set the sender of the emails ( important) - When users receive an email and reply, their email will be sent to this address.
- Set a global signature (optional) - You can set a signature to use in all emails. If you add the placeholder
{signature}to the text of the emails, this placeholder will be replaced by the recorded signature. - Receive copies of emails (optional) - You can input a list of email addresses that will receive copies of all the automatic emails generated by the system, to monitor activity.
Check access permissions
- Go to Configuration / Access rights / Access to functions & deadlines.
- Set the time zone.
- Review the permissions listed on that page. They determine whether users can access the various functions available to them (account creation form, submission form, payments etc).
- Note that you can control the permissions in three ways: you can deactivate a permission completely, you can make it available between two dates, or you can make it available without time restrictions. Time restrictions can be made to coincide with deadlines and are enforced automatically. For example, you can set a deadline for abstract submission on a given day at midnight. The deadline will be enforced at midnight in the time zone indicated at the top of the page.
- Throughout the life time of the site, it will be important to ensure that the permissions are set correctly. Many of them change with time. For example, you might decide to allocate reviews and invite reviewers to work on their assignments once the reviews have all been allocated. During the allocation process, you might want to bar access to the reviews. Before you email the reviewers and invite them to start reviewing, you might want to check that the reviews are accessible.
1.2. Texts & translations
Overview
- Accessing the text editing functions
- The text module, accessible at Configuration / Texts, can be used to edit texts displayed anywhere on the site.
- Use of an editor
- The texts can be edited and formatted with a
rich editoror directly as HTML in atext box. - Inserting images
- Images can be inserted in the texts. They need to be uploaded first to the COMS server. An upload button is provided.
- Providing reference documents for download
- You can upload documents to the COMS server. Once they are uploaded, a link to their location can be copied and pasted in texts and emails, allowing participants to download them.
- Editing more than one language
- If more than one language is activated, edits can be performed for all active languages.
- Translations
- If you use a language that is not one of the languages actively maintained by COMS, you can use the text module to retrieve English texts and translate them. The translations are input and saved on your account and do not require any download or upload of data.
Identify and edit any text
- Go to Configuration / Texts / Edit any text / 3. Switch on text identification and activate text identification. When this option is on, text identifiers are appended to the texts, between square brackets, as illustrated below:
Texts
Edit any text
Normal display Texts[804]
Edit any text[805]
Display with text identifiers - The numbers displayed between the brackets identify the texts and can be used to retrieve them for editing.
- Go to Configuration / Texts / Edit any text / 1. Edit a text and input the identifier of the text you want to edit in the edit box labelled "Text identifier", then click on the "Display" button to call the text into the edit box under it.
- Edit the text, click on "Update" and check the result.
- This function can be useful if you want to change several texts. After activating the display of all text-IDs, you can make a list of the text-IDs you need to edit.
Find a text and its ID through a search
- Go to Configuration / Texts / Edit any text / 2. Find the ID of a text and input a text, or part of a text, then click on the "Search" button.
- A list of IDs corresponding to all the texts that contain the text snippet will be displayed. These IDs can be used to edit the texts, as described above.
- This function can be useful if you want to change all instances of a text that is repeated throughout the site.
In-place editing
- Many of the simple display texts (instructions, headers), can be edited directly, in-place.
- To enable in-place editing, go to Configuration / Texts / In-place editing and activate the feature.
- Navigate to the text you want to edit. Texts that can be edited in-place are marked by a dashed frame (Fig.1). When you click inside the frame, an editor is activated, allowing you to modify the text. As soon as your edits are saved, the new text will replace the old one on all accounts.
- Note: the editor is only available to the user who activates the feature.
- As soon as edits are completed, go back to Configuration / Texts / In-place editing and deactivate the feature.

Edit a text on a form
- If the text is part of a form, for example a label or instructions ("Email", "Please only input a single email address"), it should be edited directly on the page dedicated to the setup of the form.
1.3. Reference documents
You can upload reference documents to the COMS server and let users download them.
Upload a document to the COMS server
Go to Configuration / Texts / Insert links & pictures / 1. Upload a document to the COMS server and use the upload button to upload any file to the COMS server.
Get the URL of the uploaded document
Once the document is uploaded, its URL will be printed at Configuration / Texts / Insert links & pictures / 2. List of uploaded documents. For example, if you uploaded a document titled PrivacyStatement.docx to https://conference-service.com/myconf2024/, the URL of the uploaded file will be https://conference-service.com/myconf2024/documents/PrivacyStatement.docx.
Copy this URL.
Create a download link for the document
Locate and edit the text that will include the link. This can be done at Configuration / Texts / Edit any text. If you are using the HTML editor, locate the link button in the toolbar of the editor and use it to create a link to the URL you just copied. In addition to the URL, you will need to provide a text for the link, for instance, Privacy statement. If you are using a simple text editor, you will need to use HTML tags to create the link.
Add a download link to an email
Go to Emails and locate the email template you want to use. Simply paste the URL you copied into the the body of the email. There is no need to add HTML tags.
1.4. GDPR
- The GDPR declaration, a document published by the organisers (the "controller"), informing participants of their rights regarding the collection of personal data.
- The GDPR agreement, a contract between COMS (the "processor") and the organisers that details the measures taken by COMS to implement the GDPR.
GDPR declaration
- Log in to your COMS account and go to Configuration / General functions / GDPR Statement.
- Input the name of your institute / organisation, to identify the "Controller" (owner of the collected data) in the declaration.
- Review, and optionally change, the text proposed for the declaration. This is a standard statement that can be used as found, or edited and adapted to your specific use case (Fig. 1).
- Activate the display of the text on users' accounts (Fig. 2). This will be displayed on the right hand side of the access page, as well as the page seen by participants after they log in, in a dedicated card element. Other data, i.e. link to the conference website and a contact email can be displayed as well.

1.5. Linking to your COMS site
This section shows you how to link your website to the access page of the COMS site.
Use of the site in one language
https://conference-service.com/coms_demoAbstract submission<a href="https://conference-service.com/coms_demo" target="_blank">Abstract submission</a>Use of the site in more than one language
If you use more than one language, you can add a parameter to the URL to open the site in the desired language.
For the English version, use:https://conference-service.com/coms_demo?lang=enhttps://conference-service.com/coms_demo?lang=dehttps://conference-service.com/coms_demo?lang=fr2. Recurring events
Many conferences reoccur at regular intervals, mostly annually or biennially. Even though their location and local organising committee might change with every edition, the different editions often share the same tested workflow. Moreover, a fraction of the participants might attend more than one edition of the event. COMS has options to reduce unnecessary work for both organisers and delegates, by allowing the configuration and users to be retained for recurring events.
- Reusing a configuration saves time for the organisers
- Recurring events that use COMS to handle their submissions and registrations can save time when setting up the site by copying an existing configuration from one site to the next. Organisers can use this initial setup as a starting point and make any necessary changes to suit their needs.
- Reusing existing accounts saves time for returning delegates
- Users' accounts can be copied from one site to the next. Returning users do not need to recreate their profile to access the new site.
- Benefitting from software updates
- As time goes, the COMS software evolves. As a result, each edition of an event, which uses its own dedicated COMS site, uses a slightly different version of COMS and can take advantage of the latest developments of the software. This does not prevent the transfer of the configuration and accounts from one site to the next.
2.1. Copying the setup of a site
When the configuration of a site is copied to another, the following data are transferred:
- Modules and functions
- The modules and functions used on the previous sites are activated, while those that were not, are left inactive. For example, if payments are in use on one site, they will be activated on the next; if a function used to select users for participation was activated, it will also be activated; if a custom form was used, it will be activated for use again; the same language/s will be activated etc.
- Forms and their setup
- All the forms that had been activated and configured for the previous edition will be activated and configured in the exact same way, with the same questions. The forms can be used as found, or can be modified in part. Typically, the topics used on the submission form might be changed, while the prices used on a registration form might be updated.
- Texts and emails
- Organisers spend time writing instructions, adapting the content of emails and creating content that is displayed on the site, sometimes in more than one language. All these texts are copied to the new site, as found. If they include references to locations and dates, they might need to be updated. They can, of course, also be changed or suppressed. Instructions for editing texts can be found at Texts & translations.
- Deadlines and access permissions
- Deadlines, which set time limits on various functions, are copied as found and are bound to be outdated on the new site. Access permissions, which control access to functions without taking time limits into account, might or might not be outdated. Both need to be reviewed. This can be done at Configuration / Access rights / Access to functions & deadlines.
2.2. Copying the users of a site
It is possible to transfer all, or some of the account found on a site to another site. The following describes the process:
- Initially the users are given an inactive status
- Initially, users that are copied to the new site are present, but not visible to administrators. If they log in to their account, their status is immediately activated and they become active users.
- Returning users can reuse the same password or reset it
- Users are able to log in with the password previously used. They are also able to reset a forgotten password by means of the password recovery function accessible under the login box.
- Administrators can send emails to inactive users
- A dedicated template, found at Emails / Bulk emails / Inactive accounts, can be used to send a bulk email to all inactive users, for instance to invite them to access the site. The list of recipients will gradually be reduced as users activate their account.
- Admins must decide whether to preserve or suppress users' functions prior to the transfer
- By default, users assigned specific functions, like reviewer or track chair, will retain them when transferred. Organisers will need to indicate whether these functions should be removed.
3. Accounts & user data
In setting up the site to manage participants' data, the first task is to configure the account creation form and related functions. There are, however, additional functions that can be used to gather personal data from the participants.
Used together, these functions can be useful for sites that focus on selecting participants for a summer or winter school, or for events with a strong social programme.
Account creation form
- This form is used to create a profile of the participants and provide them with a password to the site.
- It is possible to add any number of questions to the form.
Selecting participants
- Administrators can activate a function to flag users' participation in the conference.
- A participation status can be assigned to each user, based on various criteria: registration and payment status; confirmation by the users; acceptance or rejection by the organisers.
Activating additional forms
- Up to two forms can be activated and used to collect personal data from the participants.
- These forms are freely configurable.
- They can be used, for example, to register users to non-paying events (for instance workshops) or to collect travel details, résumés etc.
- Each form is accessed on a user's account through a dedicated tab.
Activating upload buttons
- Up to three upload buttons can be activated to collect personal documents from the participants.
- Typically, these are used to collect scans of student cards, curriculum vitae or proposals.
- Each upload button is accessed on a user's account through a dedicated tab.
- Functions are provided to manage the collected documents.
3.1. Functions on the site
List of available functions
Functions assigned at Participants / Accounts / Assign functions to users
With the exception of invited speakers, these functions are used to manage the site.- System administrator System administrators have access to all the functions on the site and have all privileges.
- Conference administrator Conference administrators have access to all the functions on the site and have almost all privileges. They cannot assign or revoke the functions of system administrators and cannot delete the accounts of system administrators. System administrators can optionally prevent conference administrators from accessing the configuration tab. When this is done, conference administrators are able to manage all the data (users, abstracts, reviews, payments etc) but cannot modify the setup of the site.
- Reviewer System administrators and conference administrators can assign the function of reviewer to any user. Reviewers can then be assigned submissions to review and to make recommendations for the selection of the submissions. Their assignments are listed on their account. They do not have access to the admin functions.
- Editor System administrators and conference administrators can assign the function of editor to any user. Editors can then be assigned submissions to edit. This function is useful to fix typing mistakes and formatting issues. Their assignments are listed on their account. They do not have access to the admin functions.
- Accountant System administrators and conference administrators can assign the function of accountant to any user. Accountants have access to the payment records, as well as file uploaded by users (e.g. scan of student card) on the Participants page.
- Registration desk System administrators and conference administrators can assign the function of registration desk to any user. These users have access to the check-in page on the Participants tab where they can register participants' arrival.
- Invited speaker System administrators and conference administrators can assign the invited speaker role to any user. This is done for filtering purposes, for example, to allow targetting the speakers by email.
Functions assigned at Submissions & reviews / Review supervisors and reviewers / Assign the functions
These functions are used for the review and selection of abstracts and papers.- Review supervisor System administrators and conference administrators can assign the review supervisor role to any user. Review supervisors can assign reviews and select submissions for acceptance. Typically, they only have access to a subset of the submissions and should not have access to submissions assigned to other review supervisors. The aim of this function is to divide the review and selection of submissions between serveral persons, which is useful if the number of submissions is too large for one person to manage.
- ReviewerSee above.
Functions assigned at Agenda & proceedings / Chairs & moderators / List the chairs and moderators
These functions are used in the agenda.- Invited speakerSee above.
- Session ChairSystem administrators and conference administrators can assign this role to any user when building the agenda. They do so, by selecting, for a given session, a user (or several users) in a dropdown of users. These users are then flagged as chairs for the session and included in the list of chairs that can be targetted by a bulk email.
- ModeratorSystem administrators and conference administrators can assign the moderator role to any user when building the agenda. They do so, by selecting, for a given session, a user (or several users) in a dropdown of users. These users are then flagged as moderators for the session and included in the list of chairs that can be targetted by a bulk email.
3.2. Account creation form
Find the required functions for the setup
Go to Configuration / Participants / Account registration form to configure the form.
Overview of existing fields
You can view and modify a list of fields included, or available for inclusion, on the form, at 1. Configure the form. It consists of a number of predefined fields that are commonly found on account creation forms, and optionally, of any number of user-defined fields (custom fields that are created by administrators). For each field, the following data are displayed:
- Field ID
- It uniquely identifies the field in the database. It is not used on the form, but can be used in your correspondence with COMS, to identify the field. Example: "105".
- Label
- It identifies the field on the form. Example: "Last name".
- Type
- This refers to the type of component:
[Edit box / Radio buttons / Check boxes / Drop down list / Date / Date & time / Separator / Text]. - Usage
- The usage attribute consists of a value chosen in a drop down list, among the following options :
[Not to be used / Optional / Required]. - Display order
- This refers to the position of the field on the form. It consists of an edit box that contains the order value of the field. The position of the field can be modified by modifying its order value.
- An edit button
- The edit button allows you to edit additional properties of the fields that are not displayed in the overview list described above. For example after clicking on the button, you can edit instructions for the field (e.g., "Please provide a single email address") or edit the options of a drop down.
- A delete button
- A delete button is provided to remove user-defined fields. Predefined fields cannot be deleted. Note: When you delete a field, all the data collected for this field are deleted too. To suppress a field from a form, without erasing the corresponding data, it is enough to switch the usage of the field to
Not to be used. - A clone button
- It allows you to duplicate an existing field. This can be handy if the field to be created is similar to an existing one. You can then edit the attributes of the new field and modify them as needed. The clone button is only available for user-defined fields.
Modify existing fields
- Modify the order of the fields
- Use the edit boxes in the column labelled
Display order. The edit boxes contain positive integers. Taken together, they form a sequence that defines the order of the fields on the form. - You can modify the order of the fields by modifying that sequence and saving it by using the button labelled
Update order, at the bottom of theDisplay ordercolumn. The digits forming the sequence should all be different. They do not need to be contiguous. In fact, it is recommended to define the sequence as10, 20, 30 .... It is then easy to insert a field between two others, by using an intermediary number (e.g. use 15 to place a field between the fields with display orders 10 and 20).
- Use the edit boxes in the column labelled
- Modify the usage of a field
- Select a suitable option in the drop down list located in the
Usage columnand click onUpdate usage, at the bottom of the overview, to save the change. - There are three options to choose from:
[Not to be used / Optional / Required]. TheRequiredoption will add a star next to the field, to indicate its mandatory status;Not to be usedwill remove the field from he form. If this is done at a stage where data have already been collected for that field, the data will not be erased. If the usage is later set to one of the other options, the data will be accessible again.
- Select a suitable option in the drop down list located in the
- Modify the label or instructions of a field
- Click the
Editbutton to access the edit boxes for the label and instructions of the field.
Edit button.Add a custom field to the form
- Go to 2. Add a component to the form, select a component in the list and click on Add this item to create a new field on the form.
- You will first have to input the attributes of the field (label, instructions etc.).
- After saving the form, the new field will be added at the bottom of the form.
- You can then adjust its position and usage in the overview list.
Add instructions above the form
Go to 3. Edit the instructions displayed above the form. An editor is available to help with the formatting of the text.
Set permissions to access the form
- Participants can access the form externally (when registering an account with the site) and on their account, once logged in, if they wish to modify their profile and other data contained on the form. Access rights can be set for both.
- Go to Configuration / Access rights / Access to functions & deadlines to set the permissions.
- Go to 2. Access to the forms on the login page / Activate the account creation form to control access to the account creation form (the external form). In order for the form to be accessible, you need to activate access and define a suitable period of availability. Typically, this period should coincide with the account registration deadlines.
- Go to 3. Accounts / Allow users to edit their own profile and set suitable permissions, including dates of availability, to control access to the form after login.
Set up a welcome email
- You can set up the site to automatically send a welcome email to users who have just created an account.
- For this, go to Emails / Automatic emails / Activate and edit the emails / 2. Registration with the system.
- Set the
Activatedropdown toYes. - Default texts for the subject line and content of the email are provided. They can be edited and adapted to your needs.
3.3. Selecting participants
You can activate functions to flag the users' participation status.
- These functions can be useful for selecting applicants who wish to take part in a course or a summer school.
- They can also be useful if participation requires confirmation by the delegates. In this case, their participation status can be set by administrators following their decision.
Activate and configure the participation function
- Go to Configuration / Participants / Participation status.
- Activate the selection function at 1. Activate functions to flag participation status.
- If payments are in use, you might want to automatically set the participation status to
Will participateas soon as the registration payment is completed. This can be done at 2. Set rules for automatic participant selection. - Edit the list of participation options at 3. Edit the drop down list of participant status . By default, the options are set to
[Undecided / Will participate / Will not participate / Waiting list]. You can, however extend or shorten the list. You can also modify the options, for instance replaceWill participatewithAccepted.
Keeping track of participation
- Once the function is activated, you can set and track the participation status at Participants / Participation status.
- The page at Set participation status individually page contains a list of users and a dropdown of participation statuses that can be used to flag the users individually. A filter is also provided.
- The page at Set participation in bulk contains functions to set assign a status to multiple users. For example, you can synchronize participant selection with the paper selection status.
Sending emails to users based on their participation status
- You can send an email to the users flagged as
AcceptedorWill participateat Emails / Bulk emails / Conference participants / 2. Free-style email to accepted applicants. - You can send an email to the users flagged as
RejectedorWill not participateat Emails / Bulk emails / Conference participants / 3. Free-style email to rejected applicants. - An additional template can be found at Emails / Bulk emails / Hand-picked users. This template allows you to select the recipients base on their participation status in combination with other filters.
Exporting the data
- The export at Exports / Participants / Export to CSV or Excel / All system users contains the profiles of all the users, as well as their participation status.
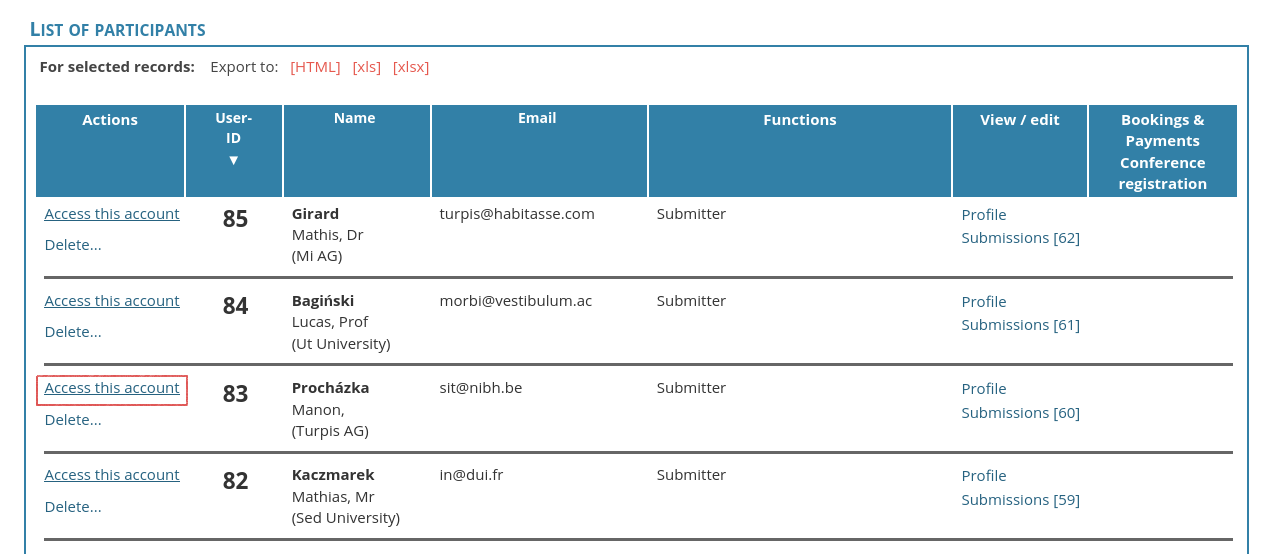
- To export a filtered list of the users, go to Participants / Accounts / View, edit user data / 2. Work on the selected records. This section lists the users. At the top of the list, you will find three export links:
For selected records: Export to: [HTML] [xls] [xlsx]. Before the export, you can select the records by using the filter at the top of the page.
3.4. Configurable forms
Up to two forms can be configured from scratch and made available to participants. These forms are accessible after login, from a tab located on the horizontal navigation bar at the top of the page.
Custom forms are typically used to create a questionnaire or register participants to free events, for instance workshops.
Find the required functions and activate the form
- Find the setup page
- Go to Configuration / Additional forms and access one of the two forms listed in the menu.
- Activate the form
- Begin by activating the form at 1. Activate the form and related functions. This is necessary to ensure that all related functions are available. Access to the form is not necessarily activated when this function is on, as this is done independently.
Name the form and add instructions
- Name the tab
- Go to 2. Texts / Name of the tab and input a suitable label to the tab that gives access to the form.
- Add a heading to the page
- Go to 2. Texts / Heading of the page and enter the heading displayed above the form.
- Add instructions
- Go to 2. Texts / Instructions and edit the instructions that will be displayed under the the heading. An editor is supplied to help formatting the text.
Configure the form
- Add fields
Go to 5. Add a component to the form and add fields to the form. To add a field, first select a suitable component in the drop down list.
Possible options are:
[Edit box / Drop down list / Radio buttons / Check boxes / Date / Date & time / Separator / Text].The separator is used to separate different sections on the form.
The text component can be used to insert a text in the middle of the form. The text can contain pictures and links.
- Configure the fields
After selecting a suitable component, you are presented with a form and can enter the main attributes of the field (label, instructions, height of an edit box, options of a check list etc.).
Other attributes, like the position of the field on the form can be set in the overview of the fields, at 4. Edit form components .
- View the form
- The form can be previewed at 6. View the form in its current state.
Add quotas
You can set quotas on any of the selection fields (radio buttons, check boxes and drop down lists).
In order to set a quota, go to Configuration / Quotas / Set limits on bookings.
When a quota is set on an option, this option will be greyed on the form as soon as the quota is reached. The text [Booked out] will be appended to the option.
Administrators can track quotas at Participants / Quotas.
Control access to the form
Go to Configuration / Access rights / Access to functions & deadlines / 7. Additional forms to enable access to the form. The following permissions can be set:
- Allow access to the page that contains the form
- This setting activates the tab leading to the form. If it is inactive, the tab is removed from the navigation bar. If it is active, you can also set a period of availability, to enforce deadlines.
- Allow delegates to edit the form
- This setting controls edits. If it is deactivated, users can see the form in read mode only. If it is active, they can edit it. Here too, you can set a period of availability.
Invite participants to fill in the form
If you want to contact the participants and invite them to fill in the form, you can send them an email.
For this, go to Emails / Bulk emails and look for an email that targets the appropriate group of participants (e.g. all users, submitters, reviewers).
If you do not find the appropriate email, you can use the template labelled Handpicked users which provides a filter to select the recipients.
Export the data
- Export to Excel or CSV
- Go to Exports / [Name of the form]: Export to CSV or Excel.
- Export to HTML
- Go to Exports / [Name of the form]: Export to HTML.
3.5. Document uploads
Up to three upload buttons can be activated, allowing participants to upload various documents.
Find and activate the relevant functions
- Locate the setup page
- Go to Configuration / Upload buttons and access one of the three menus in that section. Each leads to the setup of an upload button.
- Activate the button
- Activate the button, at 1. Activate the form and related functions, at the top of the page. This is necessary in order to switch on related functions, which would not appear otherwise. Activating an upload button does not necessarily enable its usage by participants.
- Control access to the upload tab
- Go to 2. Form access and make sure access is not enabled while you are configuring the upload function.
Name the tab, add a heading, add instructions
Go to 3. Texts.
- Name the button
- Input a name for the upload button, for instance
Student card. This name will be used to label the tab used to access the button. It will also be used in other functions, for instance on the exports page. - Page heading
- Input a heading for the page.
- Instructions
- Input instructions. These will appear below the heading and above the button
Control the type and size of the uploads
Go to 4. File upload options.
- Set the allowed file extensions
- Specify a comma separated list of allowed file extensions (e.g.
doc, docxorpdf). - Leave the box empty to allow all types.
- Specify a comma separated list of allowed file extensions (e.g.
- Set a size limit on the files
- The given limit applies to a single file, not to the total.
- If no limit is given, the limit set by the system will apply (about 50 MB). Please bear in mind that slow connections are likely to time out on large files.
Allow users to access the upload button
Go to Configuration / Access rights / Access to functions & deadlines and find the section relating to the upload button.
- Allow access
- Activate access at Allow access to the page that contains the upload button.
- Set dates of availability
- Set a suitable start and end dates for the period of availability.
Manage and download the files
Once the files start coming in, you might want to inspect or retrieve them.
- View, annotate and flag the files
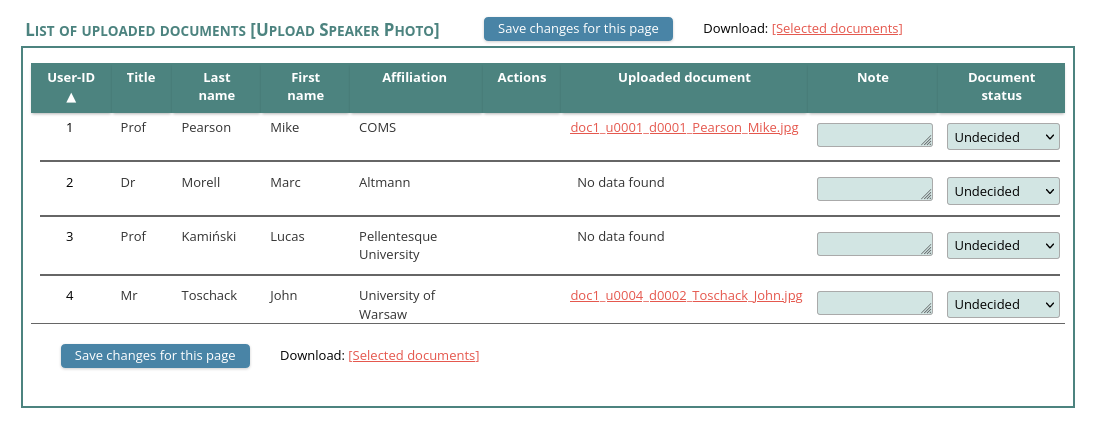
- Go to Participants / Uploaded documents / [Name of the upload button] to work on the uploads.
- You will be able to select files to work on, with the help of a filter, found at 1. Select the records to work on.
- You can view, annotate and set an acceptance status on each file in the section labelled 2. Work on the selected records.
- Download all or selected files
- On that same page, in the section labelled 2. Work on the selected records, at the top of the list of uploaded files, you will find a download link labelled
Download: [Selected documents]. - Clicking on this link will retrieve a zip file containing all the documents selected by the filter at the top of the page.
- To retrieve all files, be sure to clear the filter. You can save the zip on your computer and unzip it to get the individual files.
- On that same page, in the section labelled 2. Work on the selected records, at the top of the list of uploaded files, you will find a download link labelled
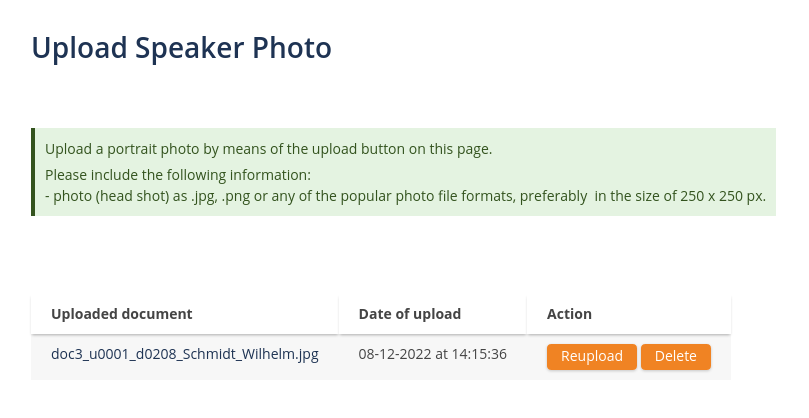
- Note
- When a user uploads a file, it is renamed by the software.
- The names of the downloaded files will all follow a determined scheme that contains the user-ID, the document-ID and the name of the user. Example:
doc1_u0010_d0005_Sorel_Guillaume.jpg.
3.6. Emails
Before setting up emails, be sure to set up general functions relating to the email module (sender, signature, language etc.). These functions are found at Emails / Overview and settings.
Automatic emails
Automatic emails are sent automatically by the system, in response to actions taken by the users. Their aim is to provide feedback and information. They are provided with pre-defined texts that can be edited and adapted to your needs.
- Locate the function
- Go to Emails / Automatic emails / Activate and edit the emails. All automatic emails are listed on that page, where they can be both activated (or deactivated) and edited.
- Activate useful emails
- Review the list of automatic emails and activate or deactivate those appropriate to the submission process:
- Automatic password recovery
- Registration with the system
- Creation of a new COMS user by a conference administrator
- Send an email to users who complete the upload of a document (up to three)
- Send an email to users who save a custom form (up to two)
- Edit the email templates
- Review the contents of the activated emails (body and subject line) and edit, if necessary.
Bulk emails
Bulk emails are one-off emails sent to a group of users at a time of your choosing. They can be found at Emails / Bulk emails and can be used to target any number of participants:
- Predefined groups of users
- All system users
- Conference participants:
- Email to a specific type of participants
- Email to accepted applicants
- Email to rejected applicants
- Inform/remind participants of the need to fill in a custom form
- Conference administrators
- Inactive accounts
- Hand-picked users
- You will be able to send an email to any user or group of users.
3.7. Access permissions
Locate the functions
Go to Configuration / Access rights / Access to functions & deadlines
Select the appropriate time zone
At the top of the page, at 1. Time zone.
Set permissions on functions accessed after login
Go to 3. Accounts and check the various options. Each option describes a function and lets you activate or deactivate access to it. If the function is activated, you can restrict access to a period of availability, which can be made to correspond with your deadlines.
- Allow delegates and submitters to log in
- When this function is deactivated, only administrators are able to log in. The following message is given to unprivileged users who attempt to log in:
Logins are currently reserved for administrators of the system. - Allow users to edit their own profile
- If this function is deactivated, users can view their profile, but cannot modify it.
- Additional forms / Upload buttons
- You can also set permissions to access and use the custom forms, as well as the upload buttons.
Activate / deactivate the account creation form
- This form is located on the login page and can be accessed by all. Deactivate it to prevent the creation of new accounts.
- To activate or deactivate the form, go to 2. Access to the forms on the login page / Activate the account creation form
3.8. Upload user accounts
Locate the upload function
- Go to Participants > Accounts / Create multiple accounts.
- This page contains all functions necessary for the upload, as well as
detailed instructions.
Download the Excel template
- It contains headings for all the fields relating to user profiles.
Input the profiles in the spreadsheet
- Each profile should occupy a row.
- Mandatory fields are marked in red.
- The column labelled
Functionsallows you to set the users' functions (e.g. system administrator, reviewer, session chair). - Save the data. The resulting file should have an
xlsxextension.
Upload the file
- Use the upload button to upload the Excel file to the database.
- On upload, the programme will check the data.
- If errors are detected, the file will not be processed.
- An error message and a detailed list of errors will be displayed.
Review the data and commit to the database
- If the data are parsed correctly, you will be able to review them before committing them to the database.
- You will also be able to decide whether or not to send a password to the newly created users.
- Once the upload is completed, its status is displayed, showing the range of user IDs created, the date of creation and whether emails were sent out.
3.9. Delete accounts
- Prepare a list of the user IDs you want to delete
- For example
233,4-10or3, 5, 11. - Find the delete function
- Go to Participants / Delete, enter the list in the edit box and click
Delete. - Review the list of users and confirm
- You will get a list with the details of the users you want to delete and will be able to either commit or cancel the deletion.
- Note
- All the data linked to these accounts will be deleted (profile, submissions, uploads, payment records).
3.10. Set up a survey form
After the conference, you might want to collect feedback from participants. The following is a step by step guide to configuring a questionnaire and collecting the data.Please note: As an option, it is possible to anonymize the questionnaires. This means that the data that are exported will not contain the names and other details identifying the users. Please contact COMS, prior to the setup, to activate this feature.
Activate the survey form
Go to Configuration / Additional forms and access one of the first two forms. Activate the form at Activate the form and related functions.
Configure the form
- Texts
Name the tab used to access the questionnaire on users' accounts.
Name the form.
Write instructions that will be displayed above the form.
- Form access
Activate the access tab on users' accounts.
Allow edits.
- Edit the form
This section lists the fields / questions included on the form.
At first, the form is empty, but as soon as fields are added to it, they can be edited in this section.
- Add an item to the form
Create the fields (edit boxes, check boxes, radio buttons etc.).
- View the form in its current state
The form you have just configured can be viewed at the bottom of the page.
Configure a feedback email
When users save their input on the questionnaire form, it is possible to send them a thank you email.
To activate and edit the thank you email, go to Emails / Automatic mail / Send an email to users who save the questionnaire form.
Import the users
This step is only relevant if you need to import the users who will be invited to fill in the survey form.
Please go to Participants / Accounts / Create multiple accounts to upload the users.
Invite participants to fill in the questionnaire
- Select an email template
- Go to Emails / Bulk emails and select a template that targets the appropriate users. Examples:
All system users will select all the users registered in the system,
Conference participants / Free-style email to accepted applicants will select users who have been flagged as accepted for conference participation,
Conference participants / Inform/remind participants of the need to fill in the Questionnaire form to select all non-rejected users,
Hand-picked users can be used if a specific group of recipients needs to be filtered.
- Edit the template
When editing the template, you can use the <quest-direct-access-url> placehoder to allow users to access the questionnaire tab directly, without having to log in.
When the emails are sent out, the placeholder will be replaced by a URL that contains the user's log in details.
Clicking on this link in the email will take them directly to the form.
- Save, preview test and send the emails
After saving the text of the template, please check the preview before sending the emails, to ensure that the placeholder is replaced correctly.
The access URL should look like this:
https://www.conference-service.com/myconf/quest.html?coms_direct_login=U2FsdGVkX18qmSmkVamBhdg5w8GCAcPNE6959nMaGLqBft1WakhzE11B6mZEFhy2The URL bit, on the right, contains login details and will be different for each user.
When the recipients click on this link, they will access the questionnaire directly, without having to log in. It is recommended that the email be tested first by sending it to your own account. You will be able to check that clicking the link leads you to the questionnaire.
Export the data
Go to Export data / Questionnaire to export the data to Excel or HTML.
If you have labelled the tab to something else than Questionnaire, look for the given label: Export data / Tab label.
4. Submissions
In planning the submission process, administrators have several different tasks at hand:
- Collect all the data required for the production of the proceedings and conference programme.
- Collect meta data that will help with the review and selection process.
- Collect data necessary for the management of the submissions, for instance, permission to print the abstracts. This can be achieved by adding custom fields to the submission form.
- Ensure that the submission process runs smoothly for the authors of submissions: to this end, emails have to be prepared and suitable access permissions must be set.
Steps required for the setup of the submission process
- Activate the submission module and set options for the submission process.
- Configure the submission form.
- Set up automatic emails that will be triggered when users submit an abstract and perform actions related to the submission.
- Set permissions on the functions related to the submission process. You will be able to control users' ability to create, edit and withdraw submissions, as well as their ability to upload files.
Collecting meta data
Meta data can be used to assist the distribution of submissions into sessions. They can also be exported to Excel (or other formats) for further processing.
- Presentation types
- You can create a list of presentation types, for instance, poster and oral, and allow authors of submissions to indicate their preferred type.
- The list of presentation types can be used to assist the distribution of submissions into the conference sessions. For example, if a session is defined as a poster session, you will only see submissions categorised as be posters when choosing submissions for inclusion into that session.
- When selecting submissions for acceptance or rejection, you can view the presentation types selected by the submitters and reassign them.
- Topics
- authors
- You can create a list of topics and allow of submissions to select suitable values for their abstracts.
- The topics can be classified into themes or tracks.
- You can assign some of these topics (or themes) to reviewers, as speciality topics, and distribute submissions by matching the topics selected on the submissions with the speciality topics assigned to the reviewers.
- The list of topics (or themes) can also be used to assist the distribution of submissions into the conference sessions. For example, you can assign a list of topics to a session. Only submissions assigned to these topics will be shown as candidates for inclusion into that session.
- When selecting submissions for acceptance or rejection, you can view the topics selected by the submitters and reassign them.
- Predefined keywords
- You can define a list of keywords and let submitters select any numbers of those keywords on the submission form.
- The chosen keywords will be shown to administrators when they select and classify the submissions.
- Free keywords
- You can let submitters input a comma-separated list of keywords on the submission form.
- The chosen keywords will be shown to administrators when they select and classify the submissions.
4.1. Options for the submission process
Before configuring the submission form, you should review and set options found at Configuration / Submissions / Options for the submission process.
Activate abstract submission
This is necessary in order to activate all the functions needed to manage submissions. If you do not use the submission module, make sure it is switched off, to avoid the display of unnecessary functions.
Allow the insertion of pictures in the abstract
- Submitters will be able to insert pictures in the text of the abstract, provided the text editor is activated.
- You can control the
types of picturesallowed and set a limit on theirnumberandsize.
Limit the number of abstracts per account
Leave empty if no limit is applied.
Activate the upload of extended abstracts
- Once activated, you can specify an
availability period, thetype of files allowedand asize limit. - The upload button will be displayed on the submission form and can be further configured at
Configuration / Submissions / Submission form. There you can position the button on the form, edit its label and decide whether it should be optional or mandatory.
Activate the upload of full-papers
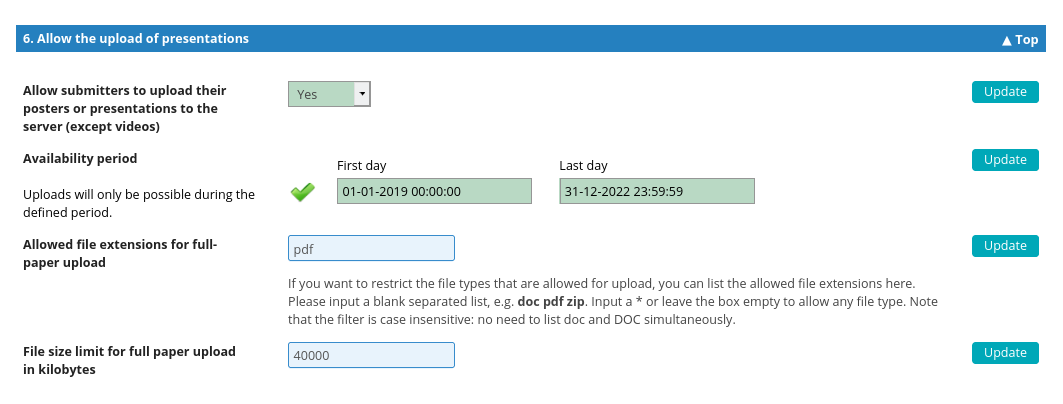
- Once activated, you can specify an
availability period, thetype of files allowedand asize limit. - The upload button will be displayed next to the submission form.
Activate the upload of presentations
- Once activated, you can specify an
availability period, thetype of files allowedand asize limit. - The upload button will be displayed next to the submission form.
Classify topics into themes
- Activate this option if you need a two-level classification of the topics. Switch it off for a simple list.
- The (themes and) topics can be input in the configuration of the submission form, at Configuration / Submissions / Submission form.
Require that presenting authors have an account with the system
- With this option, listed authors flagged as presenters will be required to have an account on the site.
- In most cases, the submitter is also the presenter, which automatically guarantees that the presenter has an account.
- In cases where this is not the case, the submitter will be required to supply an email address for the presenter and the software will use it to check that an account exists for this email.
- Setting this option allows you to check that presenting authors have paid their registration feed when creating the agenda.
4.2. Submission form
- The submission form contains a number of pre-defined fields that are standard parts of an abstract. These can be switched off, if not needed.
- In addition, administrators can add any number of custom fields to the form.
- Technically, it is possible to replace some of the standard fields with custom ones. For example, it is possible to replace the standard abstract title component with a custom edit box. However, since the standard fields all have special functions in the workflow (for instance in the review and selection process), as well as special attributes, it is usually preferable to use the standard fields whenever possible.
Locate the relevant functions
Go to Configuration / Submissions / Submission form to set up the form. Other pages in the Configuration / Submissions also provide needed functions for the setup.
List of pre-defined fields
The following describes the pre-defined fields, their attributes and special functions.
- Abstract title
- The title of the abstract can be input either as simple text in a simple
edit boxor by means of aneditorthat allows simple formattings (bold, italics, subscripts and superscripts). On request, other formattings can be added. - A size limit can be imposed on the title, either on the
number of wordsor thenumber of characters. - The title of the abstract is automatically displayed in various places, for example on users' accounts, in the overview list of their submissions. Search functions can also use the title, or part of a title, to locate a submission and its author.
- The title of the abstract can be input either as simple text in a simple
- List of authors and affiliations
- The listing of authors consists of two parts: a list of
affiliationsand a list ofauthors' personal details. - Submitters start by listing and numbering all the affiliations (organisations) and go on to list the authors.
- When listing the authors, submitters can list the affiliations associated with each author.
- Both the affiliations and authors' details consist of individual pre-defined fields that can be used or not in the setup. For example, it is possible to use a field to collect the email address of an author; the country and city of the affiliations can be collected. Administrators can also decide whether these fields are optional or mandatory.
- Administrators can
set a limit on the number of authorsthat can be listed. They can also allow the use of an "et al." check box. - Submitters can also indicate who, among the listed authors, will be the
presenterat the conference. - As an option, it is possible to
request that all presenters have an account on the site. This is useful if you need to check that presenters are duly registered for participation when creating the agenda. The software uses the email collected for the authors to enforce this requirement. - There are several formats available to display the authors and their affiliations.
- The listing of authors consists of two parts: a list of
- Abstract text
- The text of the abstract can be input either as simple text in a simple
edit boxor by means of aneditorfitted with a number formattings (bold, italics, subscripts, superscripts, bullet lists, links and others). On request, the list of allowed formattings can be adjusted. - A size limit can be imposed on the title, either on the
number of wordsor thenumber of characters. - The text of the abstract can be viewed by reviewers and administrators who select abstracts.
- The text of the abstract can be input either as simple text in a simple
- Pre-defined keywords
- Administrators can define a list of keywords to display as check boxes on the form and let users select any number of them.
- The selected keywords can be displayed in the overview list of submissions used for the selection and classification of the abstracts.
- Freely defined keywords
- Instead of (or in addition to) letting submitters choose keywords in a list of pre-defined items, you can let them input their own list.
- The freely selected keywords are also shown to administrators in the selection process.
- Themes & topics
- To help classify the submissions, you can activate a list of topics on the form, to let submitters indicate the topic/s that can be best associated with their submissions.
- The topics can be classified in different themes (or tracks).
- It is possible to let submitters indicate a second and third topic.
- The topics selected by the submitters are shown to administrators who can confirm their choice or reassign them to other topics.
- Presentation types
- You can activate a drop down list on the submission form, to let submitters indicate their preferred presentation type.
- If you have several presentation types, you can let submitters indicate a second and third choice.
- The preferences indicated by the submitters are shown to administrators, who can confirm their choice or reassign them to other presentation types.
- Once assigned, or reassigned, the presentation types can also be used to set constraints in the creation of the agenda: if you decide that a session will be a poster session and set the poster option as a constraint on that session, you will not be able to insert submissions that are not flagged as posters in that session. This type of constraint is mostly useful for large conferences, when administrators need to sift through a large number of submissions.
- Upload button for an extended abstract
- You can add an upload button to the submission form, to collect together with the abstract.
- If you make the button mandatory, users will only be able to submit the form if a file has been successfully uploaded.
- If the button is optional, users can submit their abstract without an upload. Once the abstract is submitted, they will find an upload button next to their submission and will be able to add the file.
- In the case of an optional upload, you can activate an automatic email that will be sent out to submitters who have created their abstract without an upload. This email will server as a reminder that an upload is still needed to complete the submission.
Select pre-defined fields
- Go to 1. Configure the form to include or exclude suitable pre-defined fields form the submission form. This can be done by means of the
usagedrop down. Save your selection. - Use the
Display orderto rearrange the fields on the form. - Access the attributes of the fields by means of the
Edit button, on the right hand side.
Add custom fields to the form
- Go to 2. Add a component to the form to add a custom field.
- Choose a field type in the drop down list and click on
Add this item. - Fill in he form by inputting the attributes of the field (label, instructions etc.) and save.
- As soon as you submit the form, the new field is added at the bottom of the form.
- Adjust the position and usage of the item in the overview of fields.
Add instructions
- You can add instructions that will be displayed above the form.
- Go to 3. Edit the instructions displayed above the form .
- Input the instructions in the edit box. Alternatively, activate the editor to input formatted text.
4.3. Extended abstracts
Extended abstracts are files that are collected at the time of the submission of the abstract. An upload button is added to the submission form, allowing submitters to create their abstract and upload the file in one step.
You can activate, configure and manage the upload of extended abstracts as follows:
Activate the feature
- To activate and configure the upload of extended abstracts, go to Configuration / Submissions / Options for the submission process / Allow the upload of extended abstracts.
Configure the uploads
- Once you activate the function, you can set size limits and file extensions constraints on the files.
Display the upload button on the submission form
- You can control access to the upload button by setting dates of availability.
- Within the availability period, an upload button will be displayed on the submission form.
- The appearance of the upload button on the submission form can be configured at Configuration / Submissions / Submission form / 1. Configure the form / 212 Extended abstract / Edit. You can position the button on the form, modify its label, add explanations and decide whether the upload should be optional or mandatory.
Download all or some of the extended abstracts
- To download all the extended abstracts as a zipped file, go to Exports / Submissions / Download uploaded files / Download [extended abstracts].
- You can download all or a subset of the extended abstracts as a zip at Submissions & reviews> Accept or reject submissions / 2. Individual assignments... / For selected records: Download: [extended abstracts].
- Prior to the download, you can use the filter, at the top of the page to select the extended abstracts to include in the zip file. Clearing the filter will select all the extended abstracts.
4.4. Full papers
Activate the feature
- To activate and configure the upload of full papers, go to Configuration / Submissions / Options for the submission process / Allow the upload of full papers.
Configure the uploads
- Once you activate the function, you can set size limits and file extensions constraints on the files.
Display the upload button on users' accounts
- You can control access to the upload button by setting dates of availability.
- Within the availability period, users get an upload button for their presentation on their submissions page.
- Note that it is only shown for accepted submissions. Others do not see a button.
- In order to check this, you can edit the submissions of a user with an accepted abstract and a rejected one at Participants / View edit user data.
Download all or some of the full papers
- To download all the full papers as a zipped file, go to Exports / Submissions / Download uploaded files / Download [full papers].
- You can download all or a subset of the full papers as a zip at Submissions & reviews> Accept or reject submissions / 2. Individual assignments... / For selected records: Download: [full papers].
- Prior to the download, you can use the filter, at the top of the page to select the full papers to include in the zip file. Clearing the filter will select all the full papers.
4.5. Presentations
Activate the upload of presentations
- To activate and configure the presentation upload function, go to Configuration / Submissions / Options for the submission process / Allow the upload of presentations. You will be able to specify the allowed file types (e.g. "pdf pptx") and set deadlines, if needed.
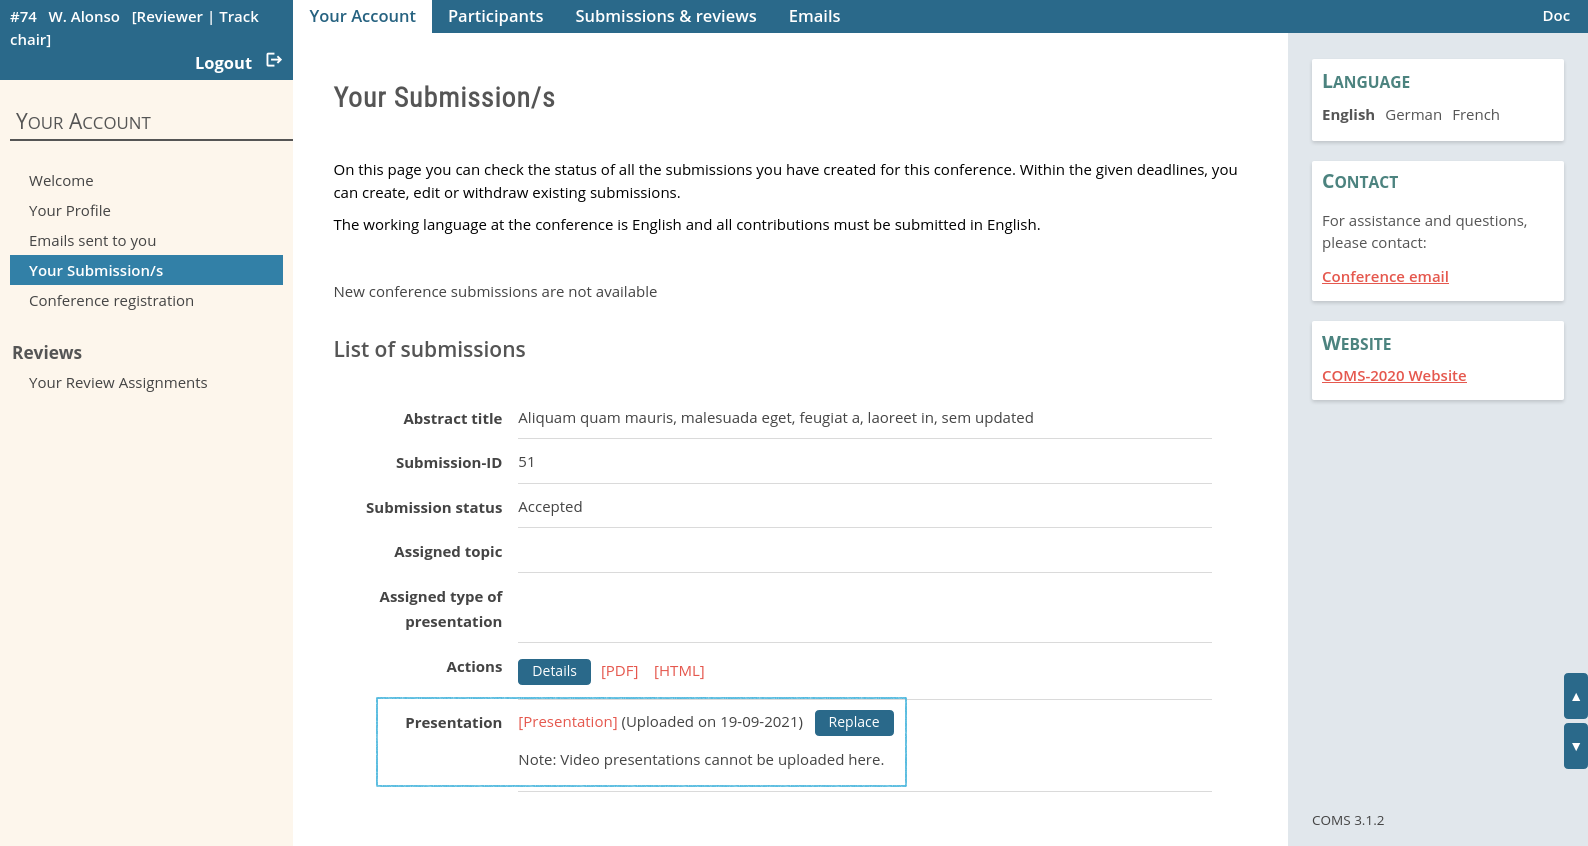
Set permissions for users' access
- The upload button is displayed on the users' submision page. Make sure that the page is accessible, by setting the right permissions at Configuration / Access rights / Access to functions & deadlines / Allow access to the submissions page.
- Make sure that the users can log in, access the submissions page and access the upload button, as shown in Fig. 2.
- All users will be able to access the submissions page, but the upload button will only be displayed for accepted submissions.

Check the setup
- You can check that the upload button is accessible by the users by logging in to one or two accounts at Participants / View edit user data.
- You can use the filter above the list, to select a user with an accepted abstract and another with a rejected one, then access their accounts to check that the setup is correct.
Invite the users to upload
- To send an invitation email to authors of accepted submissions, you can use the template at Emails / Bulk emails / Authors of submissions / 2. Email to all authors of accepted papers. This email contains a default text that can be edited. After saving your modifications, preview the emails and send them out.
- If you need to send an invitation email to any other group of users or to a single user, use the email at Emails / Bulk emails / Hand-picked users. A filter is provided to select the recipients of the email. The text of the email can be edited and previewed.
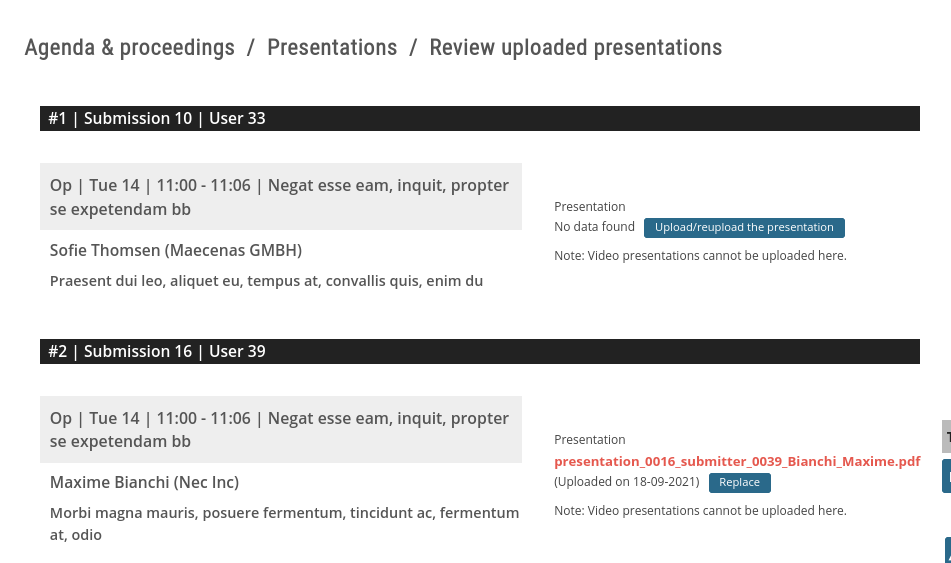
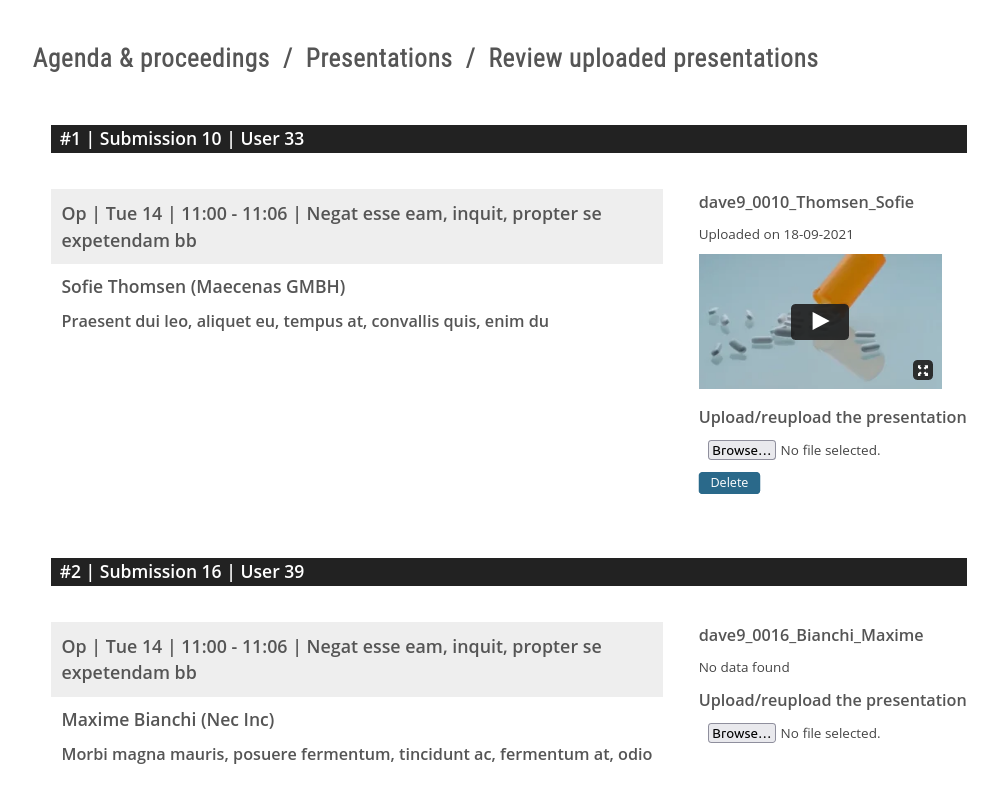
View and manage the presentations in the admin area
- To view the uploads, go to Agenda & proceedings / Presentations / Review uploaded presentations.
- You will be able to upload or reupload presentations on behalf of the presenters.
Download the presentations
- To download all the presentations as a zipped file, go to Exports / Submissions / Download uploaded files / Download [Presentations].
- You can download all or a subset of the presentations as a zip at Submissions & reviews / Accept or reject submissions / 2. Individual assignments... / For selected records: Download: [Presentations].
- Prior to the download, you can use the filter, at the top of the page to select the presentations to include in the zip file. Clearing the filter will select all the presentations.
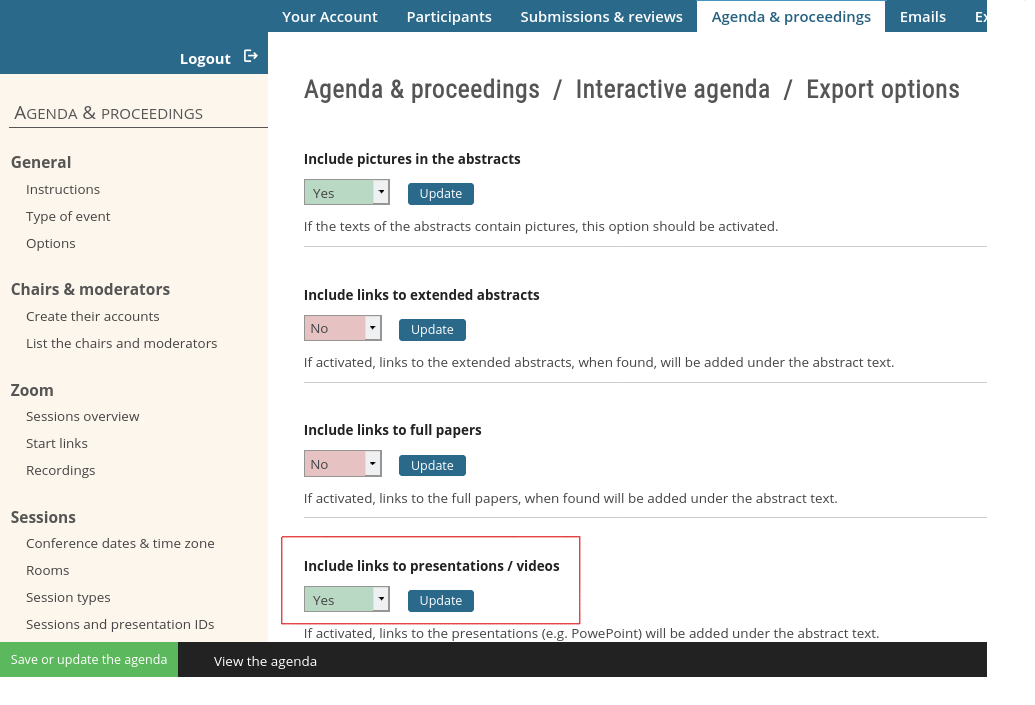
Insert the presentations in the agenda / remove the presentations
- To insert the presentations, go to Agenda & proceedings / Agenda / Export options, activate the insertion of presentations and recreate the agenda (button in the bottom left corner).
- Deactivate the insertion of the presentations and recreate the agenda to remove the presentations from the agenda.
4.6. Video presentations
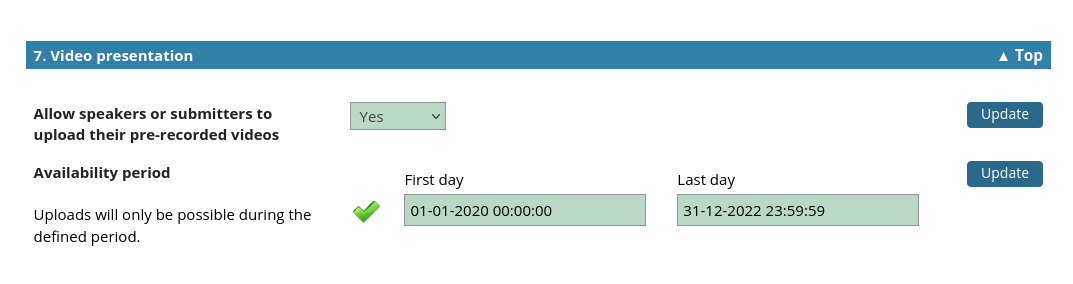
Activate the upload function
- To activate and configure the presentation upload function, go to Configuration / Submissions / Options for the submission process / Video presentation. You will be able to set deadlines, if needed.
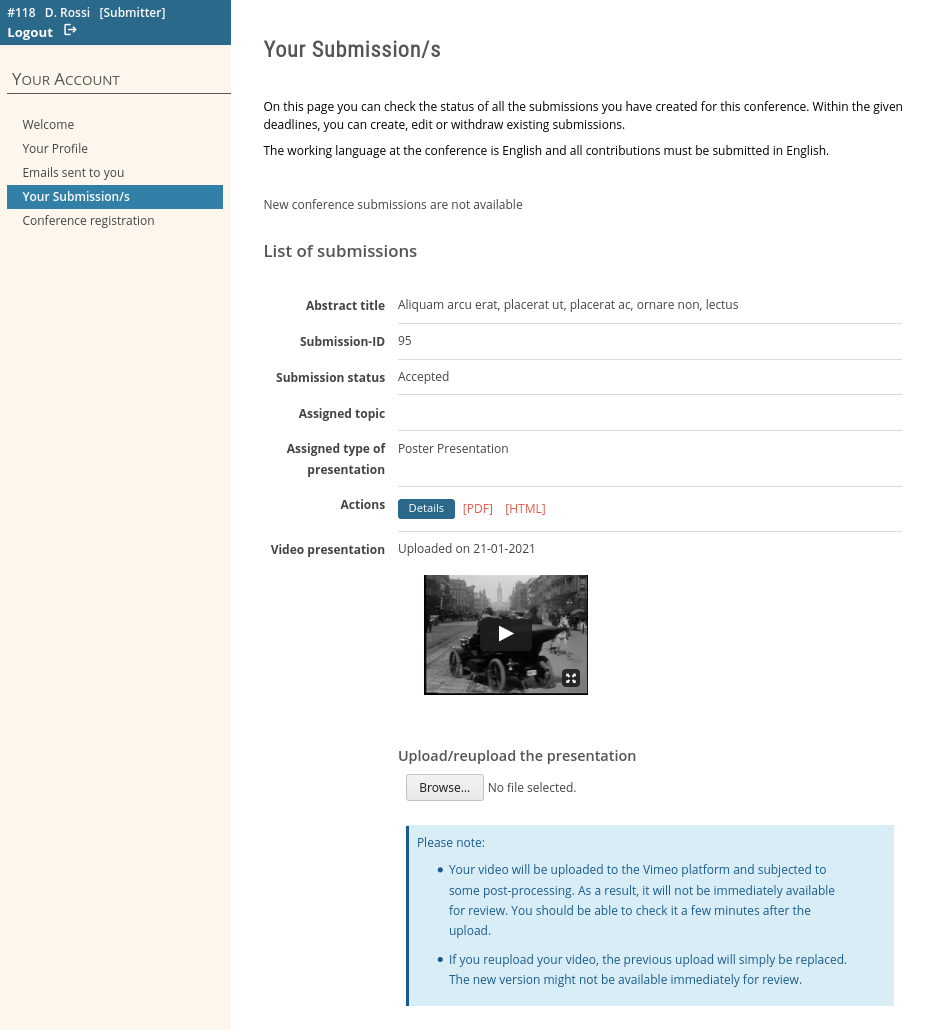
Set permissions for users' access
- The upload button is displayed on the users' submision page. Make sure that the page is accessible, by setting the right permissions at Configuration / Access rights / Access to functions & deadlines / Allow access to the submissions page.
- Make sure that the users can log in, access the submissions page and access the upload button, as shown in Fig. 2.
- All users will be able to access the submissions page, but the upload button will only be displayed for accepted submissions.
Check the setup
- You can check that the upload button is accessible by the users by logging in to one or two accounts at Participants / View edit user data.
- You can use the filter above the list, to select a user with an accepted abstract and another with a rejected one, then access their accounts to check that the setup is correct.
Invite the users to upload
- To send an invitation email to authors of accepted submissions, you can use the template at Emails / Bulk emails / Authors of submissions / 2. Email to all authors of accepted papers. This email contains a default text that can be edited. After saving your modifications, preview the emails and send them out.
- If you need to send an invitation email to any other group of users or to a single user, use the email at Emails / Bulk emails / Hand-picked users. A filter is provided to select the recipients of the email. The text of the email can be edited and previewed.
View and manage the presentations in the admin area
- To view the uploads, go to Agenda & proceedings / Presentations / Review uploaded presentations.
- You will be able to upload or reupload presentations on behalf of the presenters.
Insert the presentations in the agenda / remove the presentations
- To insert the presentations, go to Agenda & proceedings / Agenda / Export options, activate the insertion of presentations and recreate the agenda (button in the bottom left corner).
- Deactivate the insertion of the presentations and recreate the agenda to remove the presentations from the agenda.
4.7. Emails
Before setting up emails, be sure to set up general functions relating to the email module (sender, signature, language etc.). These functions are found at Emails / Overview and settings.
Automatic emails
Automatic emails are sent automatically by the system, in response to actions taken by the users. Their aim is to provide feedback and information. They are provided with pre-defined texts that can be edited and adapted to your needs.
- Locate the function
- Go to Emails / Automatic emails / Activate and edit the emails. All automatic emails are listed on that page, where they can be both activated (or deactivated) and edited.
- Activate useful emails
- Review the list of automatic emails and activate or deactivate those appropriate to the submission process:
- Registration combined with the submission of an abstract
- Acknowledge the submission of an abstract by an existing system user
- Alert user of failed abstract-file upload (this email will be triggered if the upload of an extended abstract is set to optional, and submitters create an abstract without uploading a file. It is meant to serve as a reminder that an upload is still due).
- Acknowledge the replacement of an extended abstract
- Full paper upload
- Presentation upload
- Acknowledge that a previously submitted full-paper has been replaced by a later version
- Send email on submission withdrawal
- Edit the email templates
- Review the contents of the activated emails (body and subject line) and edit, if necessary.
Bulk emails
Bulk emails are one-off emails sent to a group of users at a time of your choosing. Go to Emails / Bulk emails. There, you will find templates suitable for targeting authors and speakers. The configuration of these emails can be left out of the initial set up, as they are generally not needed until the review process has completed.
- Authors of submissions
- You will find several templates to target various groups of recipients:
- Free-style email to all authors
- Email to all authors of accepted papers
- Email to all authors of declined papers
- Free-style email to authors based on the presentation type
- Free-style email to participants without a submission
- Speakers
- You will be able to send an email to speakers based on their type of presentation, or to all speakers.
- Hand-picked users
- You will be able to send an email to any user or group of users.
4.8. Access permissions
Locate the functions
Go to Configuration / Access rights / Access to functions & deadlines
Select the appropriate time zone
At the top of the page, at 1. Time zone.
Set permissions on the submission functions
Go to 4. Submissions and check the various options. Each option describes a function and lets you activate or deactivate access to it. If the function is activated, you can restrict access to a period of availability, which can be made to correspond with your deadlines.
- Allow access to the submissions tab
- If access to the tab is denied, users will be unable to access any of the functions described below.
- Allow users to submit abstracts
- This option controls the availability of the submit button on the page.
- Users can edit their submissions after the deadline
- This option controls the edit button. If disabled, the button is removed and a submission can be viewed, but not modified.
- Users can withdraw their submissions after the deadline
- This option controls the withdraw button, which is removed when disabled. Users can still view and export the submission.
- Extended abstract upload
- With this option enabled, an upload button is displayed next to an existing submission, allowing users to upload, reupload and download an extended abstract. If disabled, they can only download an existing upload.
- Paper upload
- With this option enabled, an upload button is displayed next to an existing submission, allowing users to upload, reupload and download a full paper. If disabled, they can only download an existing upload.
- Presentations
- With this option enabled, an upload button is displayed next to an existing submission, allowing users to upload, reupload and download a Presentation. If disabled, they can only download an existing upload.
Activate or deactivate the public submission form
This refers to the submission form accessible without login.
Go to 2. Access to the forms on the login page / Activate the account creation & abstract submission form
4.9. Create a user's submission
- Go to Participants / Accounts / View, edit user data.
- Use the filter at 1. Select the records to work on to locate the user/s.
- For example, you can input the name of the user in the box labelled "Part of surname or first name" and click on "Apply filter".
- The filtered record/s are now displayed at 2. Work on the selected records.
- Once you have located the participant in the list, click on the link labelled "Submissions". This leads to a page listing the participant's submissions.
- On that page, you can submit an abstract, edit or withdraw an existing submission and upload a paper.
- The submissions and related functions remain accessible to administrators even if they are not accessible on participants' accounts.
4.10. Sanitize the submissions before printing
If you need to edit abstracts before sending them to the printer, you can use the editor function to distribute the editing tasks. The first step is to assign the editor function to the users who will perform the edits; the second is to assign submissions to the editors. You can then send an email to the editors, to invite them to start their tasks.
Assign the editor function
- Go to Participants / Assign functions to users and assign the editor function to all the users who will be editing the abstracts.
- A new tab, labelled
Editing taskswill be displayed on the editors' accounts. This tab will give access to the list of submissions assigned to these users for editing.
Assign submissions to the editors
- Go to Submissions & reviews / Editing of the abstracts / Assign edit tasks.
- On that page, you will be able to assign submissions to the editors, either automatically, or manually. Only one editor can be assigned to a given submission.
- The automatic function will distribute the tasks at random, but evenly among the editors.
- The manual assignment lists both the submissions and the editors as a matrix of radio buttons.
- An overview table of assignments is displayed at the bottom of the page.
Send emails to the editors
- Go to Emails / Bulk emails / Editors.
- This page contains several templates that target the editors. You can send an email inviting them to start their editing tasks, as well as a reminder of the deadline.
Monitor progress
- Go to submissions & reviews / Progress tracking / Edit tasks.
- This page displays the status of the tasks for all the editors.
5. Reviews
This section provides a quick description of the review process. Implementation details can be found in the sections that follow.
Create accounts for the reviewers and give them the reviewer function
- Create an Excel spreadsheet with the reviewers' profiles, which can be done on the Participants page, and upload it to the site.
- Create individual accounts on behalf of the reviewers, on the Participants page.
- Let reviewers create their own accounts.
Configure the review form
- This can be done at Configuration / Reviews / Review form.
- Starting from a preconfigured form, you can adapt it and extended it, to fit your workflow.
Choose a way of distributing the reviews
- Option 1: start assigning reviews once the submission process is over
- Manually, or
- Automatically
Once all reviews have been allocated, you can send an email to the reviewers, to invite them to start their reviews. - Option 2: start assigning reviews as soon as the submission process starts
- Manually, or
- Automatically
If you choose this option, you can allocate submissions as soon as they are created. An automatic email is sent out to the reviewers, as soon as you allocate them a review. If you remove an assignment, an automatic email is also sent out.
- bidding by the reviewers,
- the allocation of speciality topics to the reviewers,
- a set number of reviewers per submission.
Set options for the review process
- Options can be set at Configuration / Reviews / Options for the review process.
- Available options include: decide whether to use blind reviews; allow file downloads and uploads by the reviewers; activate bidding; detect conflicts, and more.
Control reviewers' access to their tasks
- You can set reviewers' permission to access their assigned reviews at Configuration / Access rights / Access to functions & deadlines / Reviews.
- If the reviews are preformed after all submissions have been collected, you might want to ensure that the reviews are not accessible before the review assignment process has been finalised.
- If the reviews can be performed during the submission period, you will need to ensure that the reviews are accessible during this period.
Invite reviewers to perform their reviews
- The configuration and sending of emails can be done on the Emails page.
- If the reviews start after the abstract submission period, you can send a bulk email to all reviewers, to invite them to start the review process, at Emails / Bulk emails / Reviewers / 2. Inform all reviewers about their task assignments.
- If reviews are already assigned during the abstract submission period, you can set up automatic emails to notify reviewers of their new assignments at Emails / Automatic emails / Send an automatic email to a reviewer as soon as a review is assigned to that reviewer .
Track progress and send reminders
- Once the reviews are started, you can follow their progress at Submissions & reviews / Progress Tracking.
- You can send reminders about the approaching deadline for the completion of reviews at Emails / Bulk emails / Reviewers / 4. Reminder email to all reviewers: deadline is approaching.
5.1. Set options for the review process
These can be set at Configuration / Reviews / Options for the review process.
Activate peer reviewing
This will activate a number of functions related to the review process. If you do not use reviews, it is recommended to disable the module, so that unwanted functions are not displayed throughout the site.
Allow reviewers to view and search all the submissions
This option is typically activated if reviewers are allowed to decide which reviews they might want to review (bidding).
Bidding process: activation and options
- Activate the bidding function
- Reviewers will get access to the list of submissions and will be able to indicate their preferences for each, by selecting an option in a drop down list:
[Yes / No / Maybe / Conflict]. - See bidding by others
- If this option is activated, reviewers biddings will be shown to all other reviewers.
- Default bid
- Set a default bidding option that will apply if the reviewers do not select an option. The default option can be any of the following:
[Yes / No / Maybe / Conflict]. Typically, the valueMaybeis chosen.
Options for review assignment
- Automatic conflict detection
- If a reviewer's email address is found in the list of authors of a submission, the reviewer will be flagged as having a conflict for that submission.
- Leave out accepted submissions
- This typically applies to the submissions of invited speakers.
- Leave out declined submissions
- Useful if you decide to reject a submission before the review process.
Blind review process
- Allow reviewers to see the list of authors
- Both the submitter an authors are hidden from view.
- Permit reviewers to see each others' reviews
Number of reviews per paper
This value, if given, is only used in the automatic assignment process.
Uploaded files (extended abstracts and full papers)
- Exclude incomplete submissions from the bidding process and the review process
- Allow reviewers to view extended abstracts
- Allow reviewers to view full papers
Proposed corrections by reviewers
This option allows reviewers to upload a file, for instance an MS-Word document, containing suggestions and corrections. Administrators can decide when to display them on the submitters' accounts.
5.2. Create reviewers' accounts
Before you can assign reviews, you need to get the reviewers into the system and make sure they are assigned the reviewer function. For this you have three options, which can be combined:
Let the reviewers create their own account
Once they have done this, you can assign them the role of reviewer at Participants / Accounts/ Functions at the conference.
Create individual accounts on behalf of the reviewers
- Go to Participants / Accounts / Create an account and fill in the account creation form.
- An email can be sent out to the new user as soon as the account is created.
- This email can be activated and edited at Emails / Automatic emails / Activate and edit the emails / 3. Creation of a new COMS user by a conference administrator.
- You can assign the role of reviewer to the new user at Participants / Accounts / Functions at the conference.
Create multiple accounts through an Excel upload
- This can be done at Participants / Accounts / Create multiple accounts.
- This function is particularly suitable if you have many reviewers to input.
- You can enter their reviewer role directly into the spreadsheet, so no need to assign it manually
- The reviewer function should be input in the spreadsheet as
Reviewer, in the column labelledFunctions.
5.3. Assign speciality topics to reviewers
This function is optional.
Locate the function and assign topics to the reviewers
- Go to Submissions & reviews / Reviews / Assign topics to reviewers. This page contains two components: a filter and a matrix. The matrix lists all the reviewers and topics. For each reviewer and each topic, you can check a box. Doing so will assign the topic to the reviewer. The filter, at the top of the page, can be used to filter the data, by restricting the reviewers and / or topics that are displayed in the matrix.
- If you are using a two-level classification (tracks and topics or themes and topics), you will find a second menu, Submissions & reviews / Reviews / Assign themes (or tracks) to reviewers. On this page, you can assign a whole theme (track) with all its topics to a reviewer.
5.4. Configure the review form
- The review form contains a number of pre-defined fields, with special functions. They can be switched off, if not needed.
- Administrators can add any number of custom fields to the form.
- All, or part, of the data collected on the review form can be disclosed to the authors of submissions. When designing the form, be sure to take the options for disclosure into account.
Locate the form configuration functions
Go to Configuration / Reviews / Review form to set up the form. This page contains an overview of existing components / fields included on the form, an edit box for instructions that are displayed above the form and a preview of the form.
List of pre-defined fields
The following describes the pre-defined fields, their attributes and special functions.
- Numerical criteria
- You can define up to 9 numerical criteria and let reviewers select a value in a drop down list, for each criterion.
- Weightings can be applied to the criteria.
- For each submission, individual scores, as well as average scores, will be displayed and exported to Excel (average of all reviewers per score; average of all scores and reviewers).
- Comment for the committee
- You can let reviewers input a textual appraisal in an edit box. Usually, this appraisal is not disclosed to the authors, but it can be.
- Accept or decline?
- You can define a drop down list of recommendations, for instance
[Accept / Decline / Ask for corrections]and collect the reviewers' opinions to guide your own decision. - Oral or poster?
- A second drop down list can be defined to collect recommendations on the type of presentation to assign.
- Feedback for the submitter
- Activate this field if you intend to provide comments from the reviewers to the authors of submissions.
- It is possible to disclose this comment without disclosing the rest of the review.
Modify the components of the form
- Overview of the form components
- Go to 1. Configure the review form . This section displays a list of all the fields that are included, or can be included, on the review form.
- Modifying the usage and display order of the fields
- The relative order of the fields, as well as their usage
[Required / Optional / Not to be used], can be edited directly in the overview list. After setting the desired values, click the save button, at the bottom of the list. - Editing other attributes of a field
- Locate the component you want to edit and click on the
Editbutton next to it. This will lead to a new page that lists the name, instructions and other parameters linked to the component, e.g.the options of a drop down list.
Add a component to the form
At the bottom of the overview list of components, you will find a drop down list of standard components: [Text box / Drop down list / Radio buttons / Check boxes / Date / Simple text / Separator]. After choosing a component, click the button labelled Add this item to add the component to the form. A form containing the parameters of the component will be displayed. After filling in the form, save it to add it to the form. Go back to the overview. The new component will be found at the bottom, where its usage and order can be modified.
5.5. Set reviewers' access permissions
Before inviting the reviewers to start their reviews, make sure that the reviews are accessible.
Locate the function
Go to Configuration / Access rights / Access to functions & deadlines
Select the appropriate time zone
At the top of the page, at 1. Time zone.
Set permissions on the review functions
Go to the Reviews section and check the various options. Each option describes a function and lets you activate or deactivate access to it. If the function is activated, you can restrict access to a period of availability, which can be made to correspond with your deadlines.
Check the setup
- You can check that the reviews are accessible by accessing a reviewer's account at Participants / View, edit users data.
- Use the
Functioncomponent of the filter to select the reviewers, then pick a reviewer in the list and access their account by clicking on the link labelledAccess this account. Go to their reviews page and check that the reviews are listed.
5.6. Set up the review assignment procedure
field-ID 239, "Status of this submission" on the submission form. If this field is enabled, the allocation of reviews will only consider submissions flagged as completed.Allocate reviews manually once all the submissions have been collected
- Step 1: Prepare the email templates
- Invitations and reminders can be edited and later sent in bulk to the reviewers at Emails / Bulk emails / Reviewers.
- Be sure to deactivate the sending of automatic emails at Emails / Automatic emails / Activate and edit the emails / Send an automatic email to a reviewer as soon as a review is assigned to that reviewer
- Step 2: Set reviewers' permissions to access the reviews
- You can control reviewers' ability to view and edit their assignments at Configuration / Access rights / Access to functions & deadlines.
- While reviews are being allocated, you might want to disable access, in case you decide to redistribute some of the assignments.
- Once the allocation is completed, you can enable access and send an invitation to start the reviews. As an option, you can set an availability period that matches your deadlines.
- Step 3: Check the constraints
- You can check that the automatic detection of conflicts is set at Configuration / Reviews / Options for the review process.
- If the reviewers are assigned speciality topics, you can check or assign them at Submissions & reviews / Review assignment / Assign topics to reviewers.
- If relevant, you can check that accepted and/or rejected submissions are excluded from the list at Configuration / Reviews / Options for the review process.
- Step 4: Assign the reviews
- To assign the reviews manually, go to Submissions & reviews / Review assignment / Assign reviews manually.
- In section 1, you can select the submissions and reviewers to work on (Fig. 1). If reviewers are given speciality topics, filtering by a topic will select the submissions and reviewers associated with that topic and leave out all others. This will help ensure that reviewers are only assigned reviews corresponding to their speciality.
- In section 2, you can allocate reviews for the selected submissions and reviewers.
- In section 3, you can get an overview of the number of assignments for each reviewer.
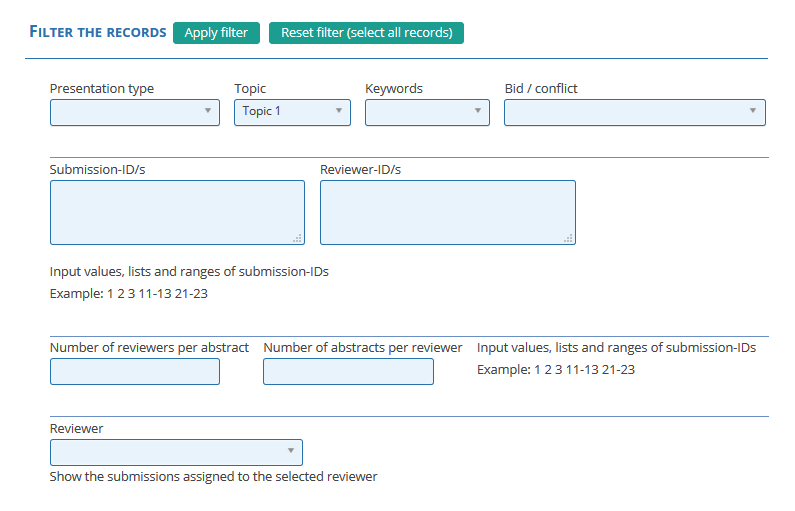
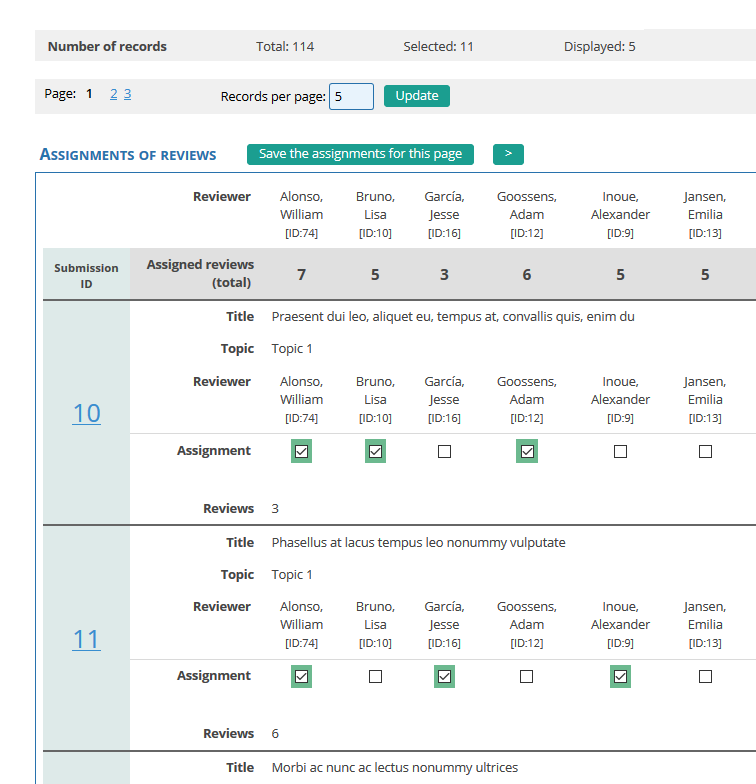
Allocate reviews automatically once all the submissions have been collected
- Step 1: Prepare the email templates
- Invitations and reminders can be edited and later sent in bulk to the reviewers at Emails / Bulk emails / Reviewers.
- Be sure to deactivate the sending of automatic emails at Emails / Automatic emails / Activate and edit the emails / Send an automatic email to a reviewer as soon as a review is assigned to that reviewer
- Step 2: Set reviewers' permissions to access the reviews
- You can control reviewers' ability to view and edit their assignments at Configuration / Access rights / Access to functions & deadlines.
- While reviews are being allocated, you might want to disable access, in case you decide to redistribute some of the assignments.
- Once the allocation is completed, you can enable access and send an invitation to start the reviews. As an option, you can set an availability period that matches your deadlines.
- Step 3: Check the constraints
- You can check that the number of reviewers per submission is correctly set at Configuration / Reviews / Options for the review process.
- You can check that the automatic detection of conflicts is set at Configuration / Reviews / Options for the review process.
- If the reviewers are assigned speciality topics, you can check or assign them at Submissions & reviews / Review assignment / Assign topics to reviewers.
- If relevant, you can check that accepted and/or rejected submissions are excluded from the list at Configuration / Reviews / Options for the review process.
- Step 4: Assign the reviews
- To assign the reviews automatically, go to Submissions & reviews / Review assignment / Assign reviews automatically. This page contains two buttons: one used to assign the reviews; the other used to clear assigned reviews. The following rules apply:
- When you click on the review assignment button, the software distributes the reviews at random. In doing so, it takes, as much as technically feasible, the constraints into account: the number of reviewers per submission; the speciality topics; detected conflicts; biddings, if relevant.
- The automatic assignment can be used incrementally. If you do not wait until the end of the submission process to allocate reviews, you can visit this page at regular intervals, say once a week, and assign reviews. The software will take existing assignments into account and apply the rules described above.
- Using the clearing button will result in existing assignments being removed, but only if these assignments have not been started. Reviews for which a status of
CompletedorUnder evaluationis found cannot be removed.
Allocate reviews manually after a submission is created
- Step 1: Prepare the email templates
- Activate the sending of automatic emails at Emails / Automatic emails / Activate and edit the emails / Send an automatic email to a reviewer as soon as a review is assigned to that reviewer
- The template for this email is pre-filled but can be edited. Please be sure to include the
{list_of_assigned_submissions}placeholder. It will be replaced, independently for each affected reviewer, by the list of their newly assigned reviews.
- Step 2: Set reviewers' permissions to access the reviews
- Make sure that reviewers can access and edit their assignments at Configuration / Access rights / Access to functions & deadlines.
- Step 3: Check the constraints
- You can check that the automatic detection of conflicts is set at Configuration / Reviews / Options for the review process.
- If the reviewers are assigned speciality topics, you can check or assign them at Submissions & reviews / Review assignment / Assign topics to reviewers.
- If relevant, you can check that accepted and/or rejected submissions are excluded from the list at Configuration / Reviews / Options for the review process.
- Step 4: Assign the reviews
- To assign the reviews manually, go to Submissions & reviews / Review assignment / Assign reviews manually.
- In section 1, you can select the submissions and reviewers to work on (Fig. 1). If reviewers are given speciality topics, filtering by a topic will select the submissions and reviewers associated with that topic and leave out all others. This will help ensure that reviewers are only assigned reviews corresponding to their speciality.
- In section 2, you can allocate reviews for the selected submissions and reviewers.
- In section 3, you can get an overview of the number of assignments for each reviewer.
Allocate reviews automatically as soon as a submission is created
- Step 1: Activate the option
- Go to Configuration / Reviews / Options for the review process and activate automatic assignments at 6. Automatic assignments.
- Step 2: Prepare the email templates
- Activate the sending of automatic emails at Emails / Automatic emails / Activate and edit the emails / Send an automatic email to a reviewer as soon as a review is assigned to that reviewer
- The template for this email is pre-filled but can be edited. Please be sure to include the
{list_of_assigned_submissions}placeholder. It will be replaced, independently for each affected reviewer, by the list of their newly assigned reviews.
- Step 3: Set reviewers' permissions to access the reviews
- Make sure that reviewers can access and edit their assignments at Configuration / Access rights / Access to functions & deadlines.
- Step 4: Check the constraints
- You can check that the automatic detection of conflicts is set at Configuration / Reviews / Options for the review process.
- If the reviewers are assigned speciality topics, you can check or assign them at Submissions & reviews / Review assignment / Assign topics to reviewers.
- If relevant, you can check that accepted and/or rejected submissions are excluded from the list at Configuration / Reviews / Options for the review process.
- Step 5: Tracking the reviews
- Assignments will be made automatically and displayed at Submissions & reviews / Review assignment / Assign reviews manually where they can be tracked and manually adjusted (e.g. you can set extra reviews).
- In section 1, you can select the submissions and reviewers to view (Fig. 1).
- In section 2, you can view or modify existing reviews for the selected submissions and reviewers.
- In section 3, you can get an overview of the number of assignments for each reviewer.
5.7. Send invitations and reminders to the reviewers
There are two options for notifying reviewers of their newly assigned tasks. One is used when the review process starts after the end of the submission period. The other is used when the assignments are performed gradually, during or after the submission period.
Case 1: reviews are assigned after the submission period
- Once all the reviews have been allocated, you can send an email to all the reviewers, to invite them to start their reviews.
- Before sending the emails, make sure that the reviews are accessible to the reviewers. First, go to Configuration / Access rights / Access to functions & deadlines / Reviews / Allow reviewers to access their reviews and make sure that the permissions are set correctly. You can set a period of availability, to coincide with your deadlines.
- Go to Emails / Bulk emails / Reviewers / Inform all reviewers about their task assignments to find the email template used to inform the reviewers of their allocated tasks.
- Edit the text of the email, if needed and save its content. Use the preview button to check the emails and the list of recipients. Finally, send the emails.
Case 2: reviews are assigned as soon as submissions are created
- In this case, emails are sent automatically to the reviewers, each time review assignments are saved.
- The emails sent out in response to the assignments can be edited at Emails / Automatic emails / Send an automatic email to a reviewer as soon as a review is assigned to that reviewer. This email template contains a text that informs the recipient of the new assignments. It contains a placeholder,
{list_of_assigned_submissions}, that will be replaced by the titles of the assigned abstracts or papers. This placeholder should not be removed. - When you save a set of assignments, each affected reviewer receives an instance of this email listing all the submissions just assigned.
- If you unassign a review, a notification email is also sent out, to inform the reviewer of the change. The template for this email can be found at Emails / Automatic emails / Send an automatic email to inform a reviewer that an existing assignment has been removed.
Send a reminder that the deadline for completing reviews is approaching
5.8. Track the progress of the reviews
- Go to Submissions & reviews / Progress Tracking / Reviews per reviewer. This page lists the assignments for each reviewer
[Total number, number of completed reviews / Number of reviews in progress / Number of reviews that are not started]. - Go to Submissions & reviews / Progress Tracking / Reviews per submission. This page gives an alternative view of the assignments. It list, for each submission, the names of the reviewers that are assigned to its review. It also shows the status of the review for each of the reviewer
[Completed / Under review / Not reviewed].
6. Abstract & paper selection
Setting up the selection process
- Step 1: decide what actions will be taken during the selection process
- Available options are:
- Assigning a selection status (always used).
- Assigning a presentation type (often used).
- Assigning a presentation topic (often used).
- Assigning the submission to a session (rarely used).
This option requires that you create a list of sessions in advance. As an alternative, you can create the programme at a later, separate stage.
- Step 2: define a list of selection statuses
- By default, available options are
"Accepted", "Declined","Ask corrections", but you can add or suppress options (e.g."Waiting list"). - You can define up to 10 statuses.
- By default, available options are
- Step 3: prepare emails to notify authors of submissions of the outcome of the selection process
- You can prepare an email for each status you define: an email for accepted submissions; an email for rejected submissions; an email to request corrections etc.
- Step 4: decide whether to send the emails at the end of the selection process or immediately after each decision
- Option 1: send notifications at the end of the selection process
With this option, no email is sent out when you perform your selection and classification tasks. You will have to send a bulk email for each selection status once all the submissions have been treated. - Option 2: send notifications immediately after your decisions
This option requires additional preparations.
- Option 1: send notifications at the end of the selection process
Selecting the submissions
- Option 1: selecting submissions individually
- This is the standard procedure, performed by going through the list of submissions, viewing the reviews, assigning a status, classifying the submission into a presentation type and/or topic and optionally sending a notification email.
- Option 2: selecting submissions in targeted
- For this option, you need to first select the submissions to work on and apply a selection status to those submissions. You can also assign them a presentation type and topic.
Other tasks
- The list of submissions can be filtered and sorted.
- The data to display in the list can be adjusted. For example, you can display the abstracts, reviews and keywords, or you can choose a more compact view.
- You can input comments for each submission and later disclosed these comments to the authors.
- You can export the submissions and the reviews to Excel, PDF and MS-Word.
- You can download the extended abstracts and full papers.
6.1. Setting up notifications
1. Sending a notification email after each decision.
2. Notifying the authors by sending bulk emails.
Sending a notification email after each decision (option 1)
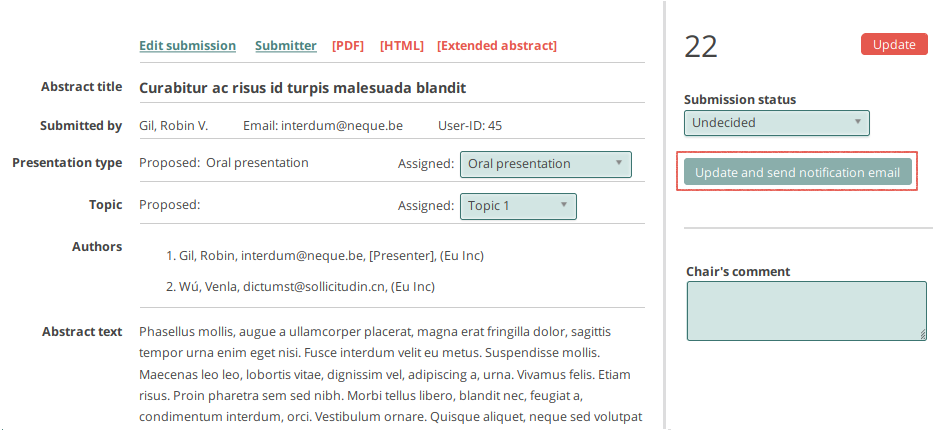
Notifying the authors by sending bulk emails (option 2)
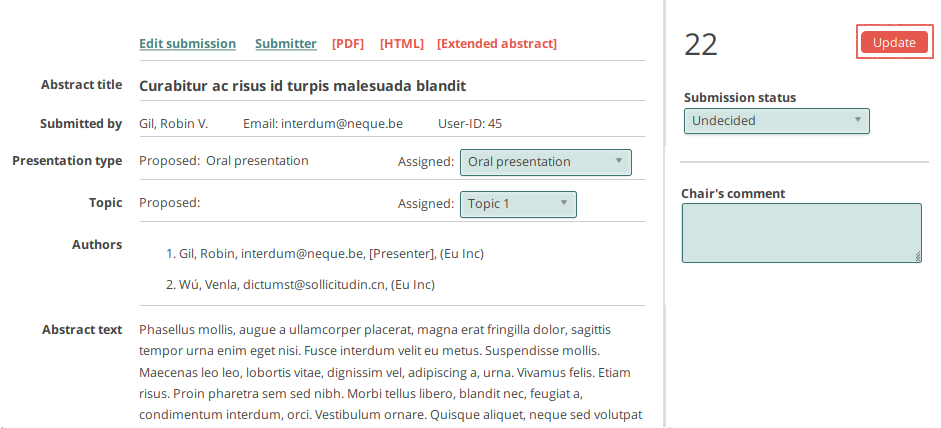
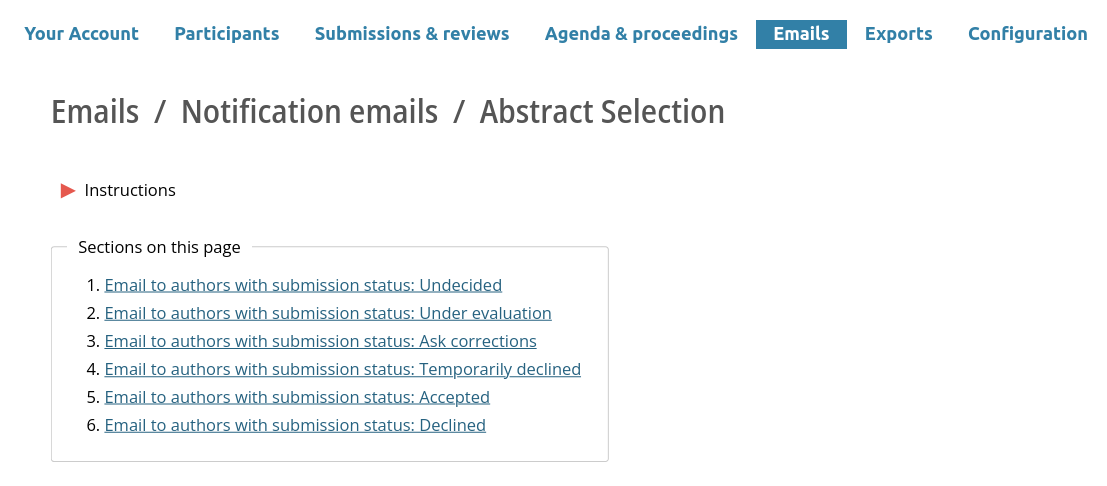
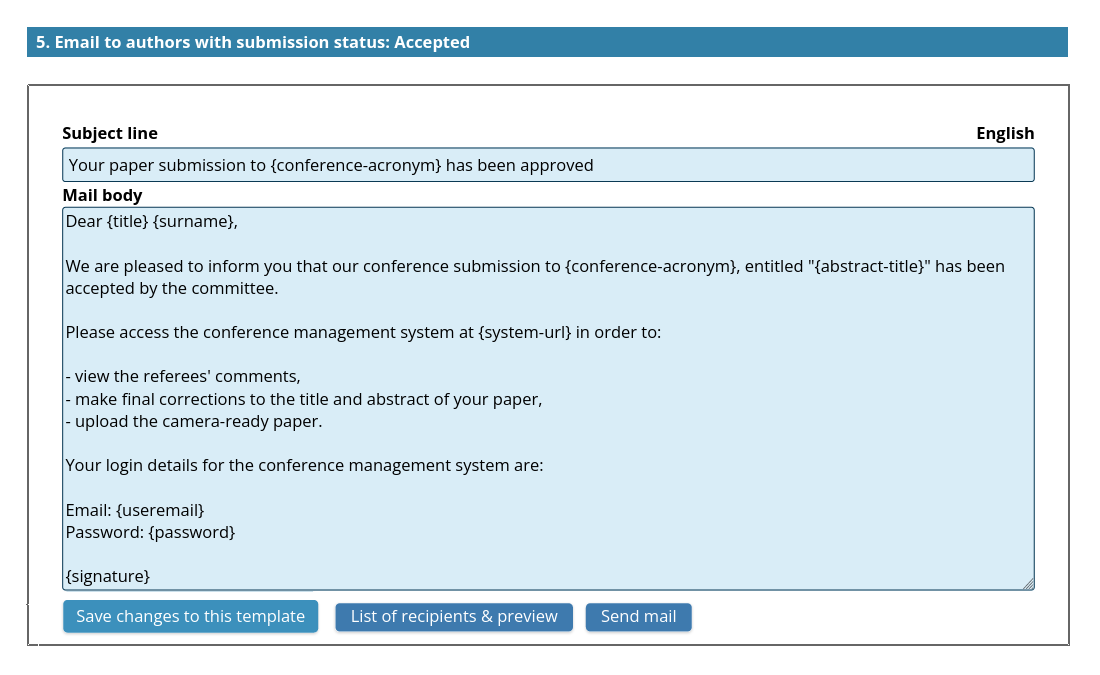
Setting up the workflow for options 1 and 2
- Whether you intend to send notifications individually (option 1) or in bulk (option 2), you will need to first define a list of statuses to use for the selection process ("Accepted", "Declined" and potentially others, like "Ask correction" or "Waiting list").
- You will then need to create or edit the content of the emails associated with each status.
6.2. Preparing the selection process
Locate the selection functions
- Go to Submissions & reviews / Abstract selection / Accept or reject submissions.
- This page contains a list of all the submissions, found at 3. Individual assignments: accept / reject submissions one by one and assign them to sessions and types of presentation . It contains functions that can be used to select the submissions and classify them into topics and presentation types, as shown in fig. 1.
Edit the dropdown of selection statuses
- The dropdown labelled
Submission status(Fig. 1) contains a list of statuses that can be assigned to the submissions. By default, the options included in this list are:[Undecided / Accepted / Declined / ask corrections]. The list can be extended to include additional options. This can be done in the configuration at Configuration / Abstract Selection / Submission status. - Fig. 2 shows the function used to define the options of the dropdown of selection statuses.
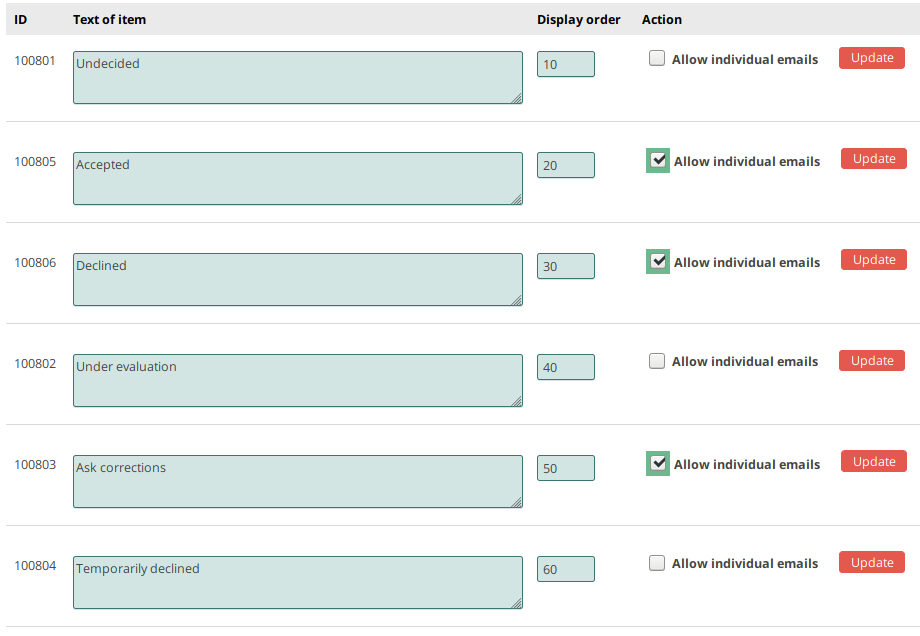
Enable automatic notifications when setting a selection status
- In addition to editing the options of the selection dropdown, you can allow, separately for each option, to automatically send a notification email to the submitter, as soon as a new status is saved. This can be done by checking the tick box labelled
Allow individual emailsdisplayed next to the option. - It is not necessary to allow automatic notifications for all statuses. Typically, the option
Undecidedor other temporary statuses do not need to send an email when set. When such statuses are assigned, the button labelledUpdate and send notification emailis greyed and it is not possible to use the button. For such cases, you can use the button labelledUpdate. - The status of a submission can be changed more than once. As a result, a submitter might receive more than one automatic notification. For example, a first email might be sent out when the status
Request corrections is set. A second notification might be sent again if the submission is later accepted. - The date and selection status are displayed for each submission after an automatic email has been sent.
- Fig.2 illustrates the selective enabling of notifications.
- If none of the notifications is enabled, the
Update and send notification emailbutton is not displayed. Notifications emails can then be sent in bulk, incrementally or in one go, at the end of the selection process.
Edit the notification emails
- The notification emails can be edited at Emails / Notification emails / Abstract Selection.
- An email template is provided for each of the options of the dropdown of selections statuses.
6.3. Selecting & classifying submissions
Prepare the functions for the selection process
- Locate the selection functions
- Go to Submissions & reviews / Abstract selection / Accept or reject submissions.
- This page contains all the functions needed to select and classify submissions.
- Use the filter to select submissions to work on
- The top of the page, at 1. Select the submissions, contains a filter that can be used to select the records to work on.
- If the filter is cleared, all records will be selected.
- Adjust the display of data
- At different stages of your workflow, you might need to use different types of data.
- Go to 5. Display options to select the data you want to display alongside the submissions.
- Available options are:
[Show abstract and authors / Show reviews / Show keywords / Show files to download]. - The selected options are remembered in the database and remain as set, until they are changed.
- Export the data if you want to work offline
- You can export the submissions and the reviews in various formats (see below for details).
- Email notifications
- You will need to prepare emails to inform submitters of your decision concerning their submissions.
- No emails are sent when you assign acceptance and rejection statuses to the submissions.
- Notification emails are sent independently, typically when the selection process is complete (see below for details).
Option 1: Select and classify submissions one at a time
- Go to 2. Accept, reject submissions one by one to find the list of submissions and the selection functions.
- The list should consist of all the records selected with the filter at the top of the page.
- It should show the data you selected for display.
- If you have chosen to display the reviews, these will be shown in detail for each reviewer, including comments and the marks given, if any, as well as their averages.
- Selection statuses
- A drop down list of selection statuses is shown for every submission.
- By default, the options in the drop down are:
[Undecided / Accepted / Declined / Under evaluation / Ask corrections / Temporarily declined]. These options can be modified to suit your needs. - To assign statuses, simply select suitable options for one or several submissions and press the save button at the top of the list.
- Themes / tracks, topics and presentation types
- If themes / tracks, topics and presentation types are used, drop down lists with options you have created, are displayed for each submission and can be used for assignment.
- If submitters and reviewers were asked to indicate their preferences for these data, their choices are also shown, to help guide your decisions.
- Conference sessions
- If sessions have been defined in the agenda module, a drop down list of sessions, identified by their titles or other attributes, is also shown, allowing you to classify the submissions into sessions at the time of the selection process.
- The alternative is to insert them at a later stage, using the agenda module.
Option 2: Select and classify submissions in bulk
- This function is useful if you perform the selection process offline, but want to input the results into the system.
- Go to 1. Select the submissions and set the filter to select the submissions you need to work on. Typically, you would input a list of submissions identified by their submission-ids and having the same status as well as (optionally) other common attributes (e.g. same track). This could be a list of submissions accepted as posters. Save the filter.
- Go to 3. Bulk assignments: assign a selection status, topic and presentation type to the filtered submissions. Set appropriate values in the drop down lists and save your selection. All the submissions selected by the filter will be assigned those values.
Option 3: Assign a selection status based on the average scores
- This function can be useful if you use numerical criteria when reviewing the submissions. The mean scores can be used to select the submissions for acceptance or rejection, based on cut-off values.
- Go to Submissions & reviews / Abstract Selection / Automatic selection. This page contains two histograms showing the number and percentage of submissions that are above (or below) a range of scores. These histograms can be used to set a threshold value to select a given number, or a given percentage of the submissions.
- After selecting a cut-off value for paper acceptance, enter this value in the box labelled
Select papers for acceptanceand save. All the submissions with a score greater or equal to this value will be set toAccepted. - A similar function is provided to assign a
Declinedstatus to some submissions. The cut-off value is independent of the cut-off value used for acceptance. It can be the same, smaller or even larger (in which case some accepted submissions will change status). - A function is provided to
clear all the assignments, allowing for a trial and error process, bearing in mind that no emails are fired as a result of the assignments. - After using the automatic assignment function, you can alter the results manually, at Submissions & reviews / Abstract selection / Accept or reject submissions / 2. Accept, reject submissions one by one.
Export the data
- Export filtered records
- At the top of the list, at Submissions & reviews / Abstract selection / Accept or reject submissions / 2. Accept, reject submissions one by one, you will find links to export and download data in bulk. These will export the records that are selected by the filter, at the top of the page. You can export the submissions to Excel, HTML and MS-Word and the reviews to Excel; you can download any documents uploaded by the submitters or the reviewers as a zip file.
- Detailed export of the reviews
- Go to Exports / Reviews / Export to CSV or Excel. You will be able to export the reviews with individual scores or with mean values.
Send email notifications
- Available templates
- Several email templates are available for communication with authors of submissions. They can be edited in advance or at the time they are needed. They can be found at:
- Emails / Notification emails / Abstract Selection. This page contains a template for each of the options available in the dropdown list of selection statuses (
"Undefined / Accepted / Declined / Ask corrections ..."). - Emails / Bulk emails / Hand-picked users. This template has a filter to allow a precise targeting of the recipients. For example, you can email individual authors or target authors of accepted posters.
- Emails / Notification emails / Abstract Selection. This page contains a template for each of the options available in the dropdown list of selection statuses (
- Edit and personalise a template
- Most of the templates are pre-filled with text that is suitable for their purpose. However, they can be edited and adapted to your needs. A number of placeholders can be inserted in the templates to personalise the emails. The list of available placeholders can be found at Emails / Overview and settings / Placeholders.
- Preview the emails
- After editing and saving a template, you can preview the emails by clicking the
List of recipients & previewbutton, to review the recipients and check that the placeholders are properly replaced. - Send the emails
- Press the
Send mailbutton to send the emails. You will be asked for confirmation.
Display the results of the review process on users' accounts
- Display the selection status
- Go to Configuration / Access rights Disclose key data to users / 2. Submission status and activate the display.
- Display the reviews or parts of the reviews
- Go to Configuration / Access rights Disclose key data to users / 3. Reviews and activate suitable data for display:
- Display reviews to submitters will display the entire review, for each reviewer, including the feedback.
- Display feedback to submitters will display the feedback, leaving out other parts of the review (scores, comments for the committee and other fields).
- Display proposed corrections to submitters If reviewers were allowed to upload documents with suggested corrections, these will be made available for download on the authors' accounts.
- The display of reviews, feedback and corrections are anonymised by default.
7. Agenda
7.1. Agenda overview
- It can be used to showcase the conference programme, as well its proceedings.
- Posters, video presentations and live sessions can be embedded.
- A search function and a bookmarking function are provided.
- A cover page and a footer with sponsors' logos can be added.
Example
Components of the agenda
1. Browse function
The agenda displays the conference programme using a three-level classification.
- Daily overviews: an overview of each day and its sessions (fig. 1).
- Session overviews: an overview of each session and its presentations (fig. 2). Presentations and Zoom sessions can be embedded on these pages.
- A page dedicated to the presentation: (fig. 3). Depending on availability, this can include: an abstract, a full-paper, a presentation (DOC, PDF, PPT, video).
Notes:
- It is possible to limit the display to a two-level classification that omits the detailed presentation pages.
2. Search function
If the detailed presentation pages are included in the agenda, a search function is automatically provided. It consists of a full-text search and a filter.
3. Bookmark function
A bookmark function is automatically included to build a personal agenda. Both the sessions and the presentations can be bookmarked.
4. Cover page
An optional cover page can be added to the agenda. This is typically used to provide an introduction, a description and instructions for the participants.
5. Footer
An optional footer can be added to all the pages of the agenda. This is typically used to display the sponsors' logos.
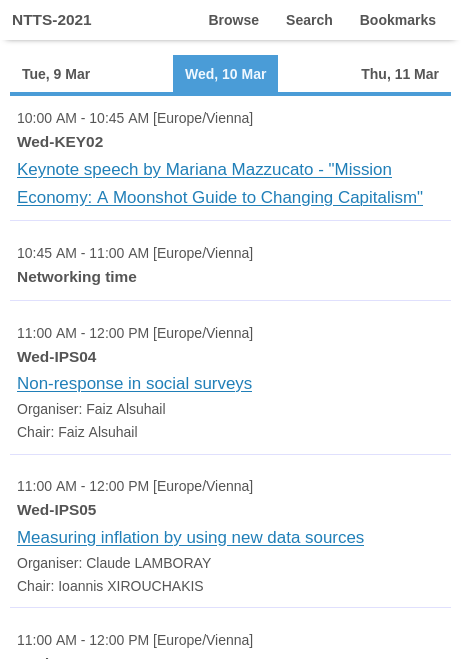
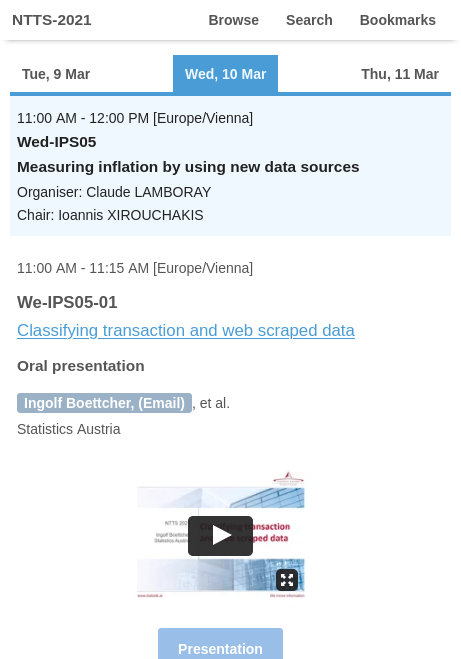

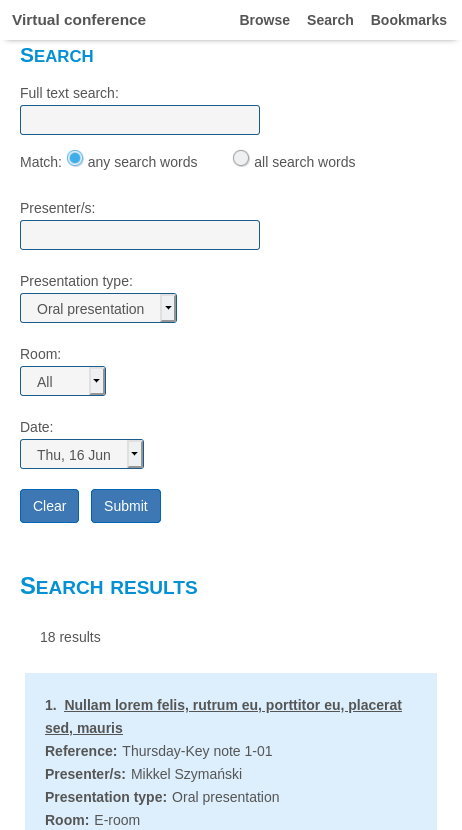
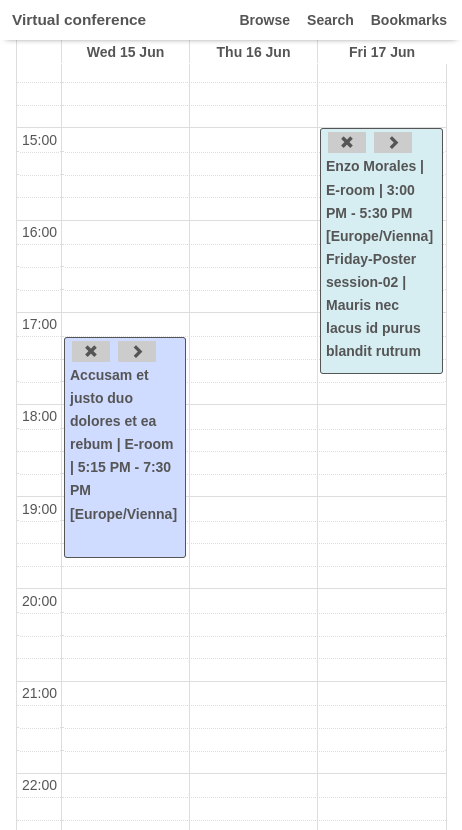

Creating the agenda: quick overview
- Most of the work involved in creating the agenda consists in defining the sessions and inserting presentations into the sessions.
- The search and bookmark functions are created automatically by the software.
- The abstracts and their presentations (uploaded files or videos) are also handled by the software. Admins simply need to check that all the required files or videos have been uploaded by the presenters.
- The optional cover page and the footer are created as free text. An editor is provided for the formatting of the content. Pictures, videos, maps and links can be inserted.
Defining the sessions: quick overview
- At a minimum, sessions are defined by their date, time, room and title.
- Other data can be added: the session chair/s, moderator/s, speakers (and other roles); free text; a short code identifying the session; a Zoom meeting; the recording of a Zoom meeting.
- The data used to characterize the sessions are included in a session header that is show on the pages listing the sessions of a day, as well as the page dedicated to the details and presentations of that session.
- Fig. 8 shows an example of a session header. It consists of the following elements:
- The start and end times of the session.
- A code uniquely identifying the session, "Wed-Oral1".
- The room.
- The chairs and organizers.
- The speakers and the titles of their presentations.
- The data included in the session header can be changed, rearranged and restyled.
- Parallel sessions are supported.
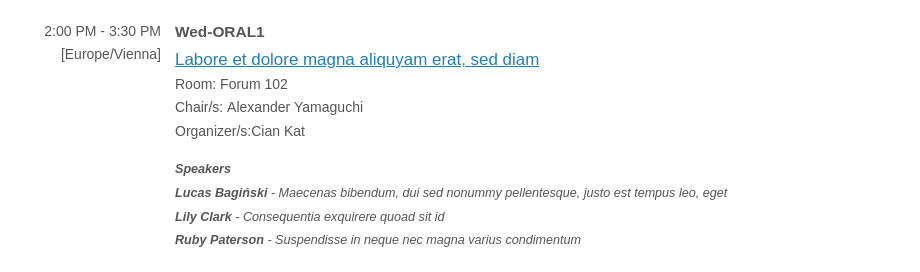
Inserting presentations: quick overview
- Abstracts submitted for the event need to be marked as accepted in order to be inserted as presentations in the agenda.
- Presentations can be inserted in more than one way:
- When selecting the abstracts for acceptance. A list of sessions defined by their titles must be first created. This provides a dropdown of sessions that can be used for the insertion of the submission.
- Once all the submissions have been selected, you can insert them in the agenda by first selecting a session, then selecting the presentations from a list.
- It is possible to work offline with spreadsheets and input the lists of contributions as a list of submission-ids for each session.
- It is also possible to create entries, as free text, for presentations that do not have an abstract on the site.
- By default, contributions can only be inserted in one session. Once inserted, they are removed from the list of candidates that can be inserted into other sessions. An option exists, however, to allow insertions in multiple sessions.
7.2. Defining the sessions
Initial setup
- Input the predefined dataThese data are grouped under Agenda & proceedings / Sessions (fig. 1).
- Conference dates & time zone
- Rooms (can be ignored if the event is virtual)
- Sessions and presentation IDs - On this page, you can define a template that will be used to generate short, unique identifiers for the sessions, for instance "Wed-KEY", "Friday-Posters". These identifiers are needed to identify the sessions in the Q&A of the virtual platform. Otherwise, they are optional. If they are used, the presentations in the sessions will be identified sequentially, as such: "Friday-Posters-01", "Friday-Posters-02", "Friday-Posters-03".
- Presentations time slots - On this page, you can define the duration of various types of presentations (key notes, oral, posters etc). These values are needed to calculate the start and end times of the presentations. They are not needed for the definition of the sessions and can be left for later.
- Select the fields to display and edit
- The list of sessions is displayed and edited at Agenda & proceedings / Sessions / Define the sessions.
- On that page, under the list Agenda & proceedings / Sessions / Define the sessions / 2. Change the display and editing options for the list of sessions, you can adapt the display to fit your needs, as shown in fig. 2.
- The form, on the left hand side (fig. 2), allows you to toggle between display mode and edit mode. In edit mode, you can input data directly in the list. In display mode, you need to edit each session separately, by clicking on the "Edit..." link, on the left of the session row.
- The form on the right hand side (fig. 2), allows you to select the fields to include into the list of sessions. These could correspond to the fields you need to edit at a certain time and can be changed without affecting their availability for inclusion in the agenda. Their order can also be rearranged on that form.
- The form, on the left hand side (fig. 2), allows you to toggle between display mode and edit mode. In edit mode, you can input data directly in the list. In display mode, you need to edit each session separately, by clicking on the "Edit" button, on the left of the session row.
- Fig. 3 shows the list of sessions corresponding to the settings of fig. 2.
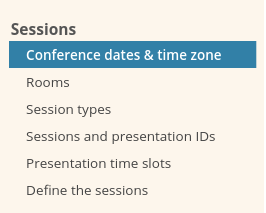
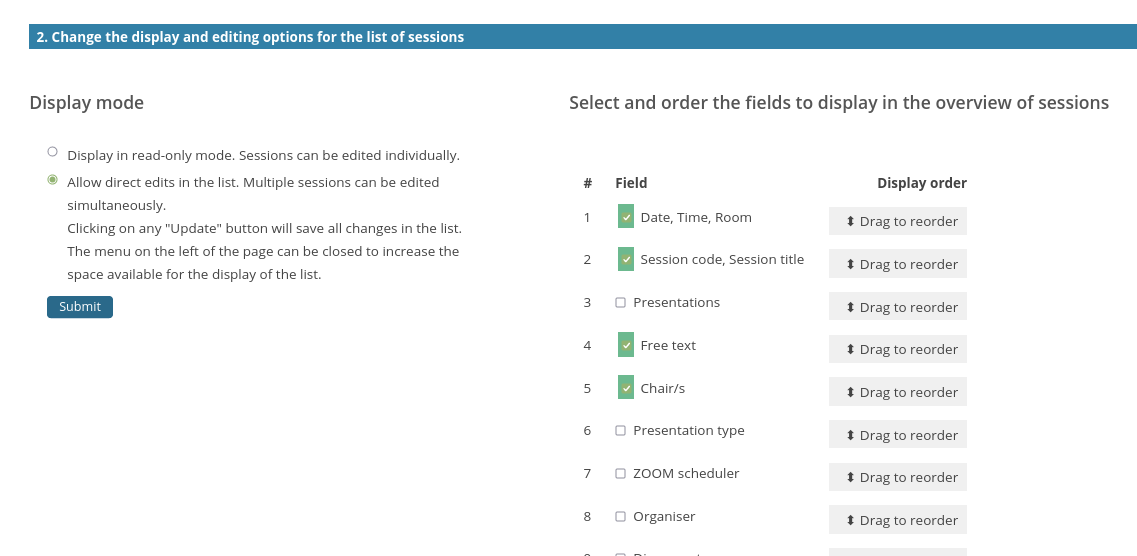
Create a session
- To create a session, go to 1. Create / edit the list of sessions, at the top of the page.
- select the type of session you wish to create by clicking on the relevant button (Fig. 4). It will be created and displayed under the buttons.
- Note: the first button, labelled
Add a session with contributionsis suitable for sessions that will list contributions entered on the site by the presenters. The second button is suitable for sessions that do not feature any existing contributions (abstracts). The content of such sessions can be created by inputting free texts in an editor. - Once the session has been created and the right fields have been selected for editing, simply fill in the relevant fields and save the session. This can be done by clicking on the
Updatebutton on the left. A second update button, labelledUpdate all changesand situated in the bottom right corner of the screen, can be used to update multiple sessions at once (Fig. 5).

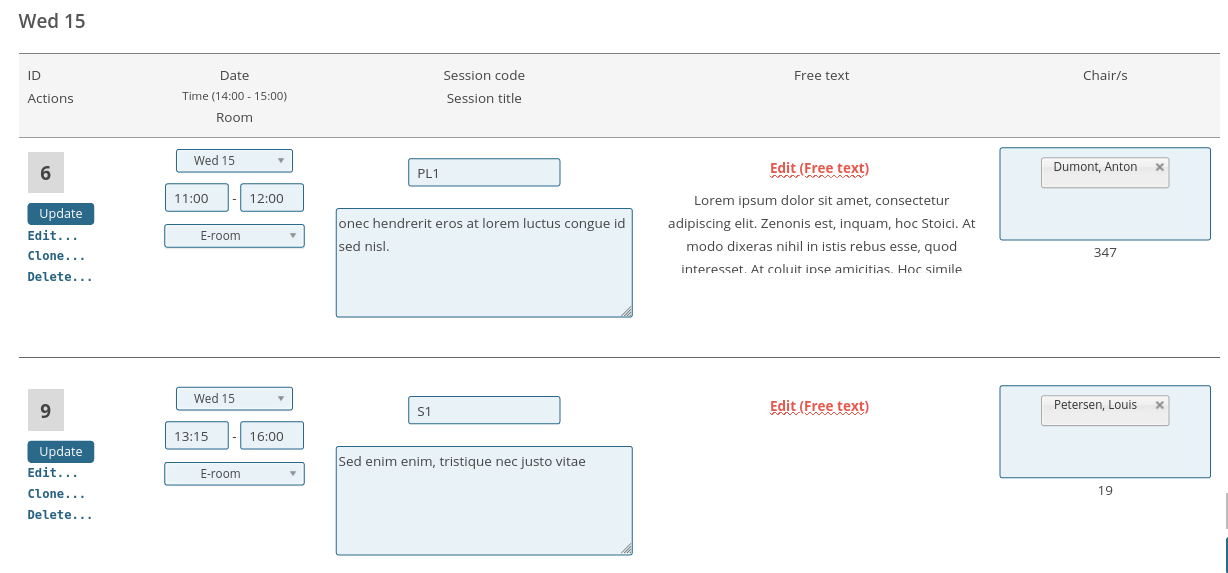

Create / update the agenda
- Use the button labelled
Save or update the agendato create or recreate the agenda. - The sessions, as defined on this page, will be listed as an overview of sessions for each conference day.
- The next page details the insertion of the speakers and their presentations into the sessions.
7.4. Using Zoom for conferences: what to know
meetings, webinars and breakout rooms. Meetings
- Meetings allow all participants to switch on their camera and microphone and as such are mainly suitable for interactive sessions in which all participate as equals.
- They can, however, be used for conference presentations too. In this case, hosts typically mute attendees on entry, reserving the right to use the microphone, camera and screen sharing function for the speakers.
- The host might allow participants to be unmuted, so that they can ask questions, for instance after a presentation.
- All participants are listed by name, or seen, if their cameras are switched on.
- Breakout rooms, Q&As, a chat and polls can be used in a meeting.
- The creation and handling of meetings in COMS is detailed here.
Webinars
- Webinars are specifically designed for presentations to a silent audience.
- They allow the host and any designated panelists (speakers) to share their video, audio and screen.
- Attendees do not see other attendees, but they have the ability to ask questions in writing, use a chat, and answer polling questions.
- It is not possible to create breakout rooms in a webinar.
Meetings and webinars
Breakout rooms
- Breakout rooms allow participants of a meeting to be distributed in separate rooms.
- They are often used for poster sessions, providing private booths in which the posters can be presented and discussed.
- They are also used to allow participants to meet the speakers of oral sessions after their presentations, or to allow free discussions among participants.
- Typically, breakout rooms are configured to allow participants to move freely from one room to the next.
- The setup of breakout sessions in COMS is detailed here.
Choosing between meetings and webinars
- Webinars are specifically designed for presentations and can accommodate very large audiences. However, they do not allow the creation of breakout rooms or live interactions between the presenters and the audience.
- Meetings can be used for presentations just as well as webinars, but have a limited capacity (<1000 participants). Since they allow attendees to be seen, to be heard (optionally) and to meet in breakout rooms, they present a friendlier, more interactive option that is potentially better suited for conferences.
7.5. Scheduling Zoom meetings in COMS
Schedule Zoom meetings in the agenda sessions
- Once sessions are defined, i.e. given at least a date, a start time and an end time, it is possible to schedule a Zoom meeting for each session. This can be done directly in the list of sessions at Agenda & proceedings / Sessions / Define the sessions, by using the Zoom scheduler, as shown in Fig. 1.
- The scheduler is prefilled with the times given for the session, but these times can be changed. They do not need to match the session times.
- You can choose a host in the dropdown of users displayed on the scheduler. This dropdown consists of all the users registered on the site. If the list is long, you can quickly retrieve a user by typing the fist few letters of their name.
- After filling the form, you can schedule the meeting by clicking on the "Schedule" button. This will create the meeting on the Zoom portal and return its Zoom link. This Zoom link is recorded in the COMS database for that session (Fig. 2).
- To modify a scheduled meeting, for instance, to change the host or the timing, simply delete the meeting and reschedule it, using the buttons provided on the scheduling form (Fig. 1).
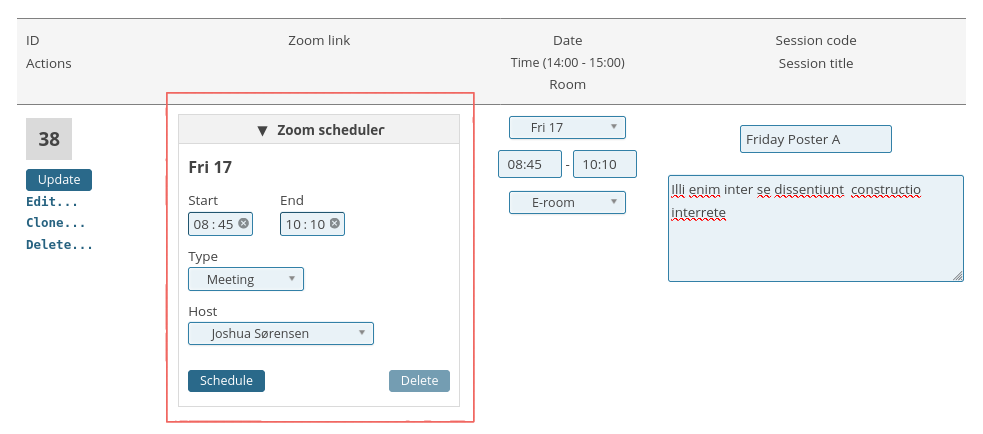
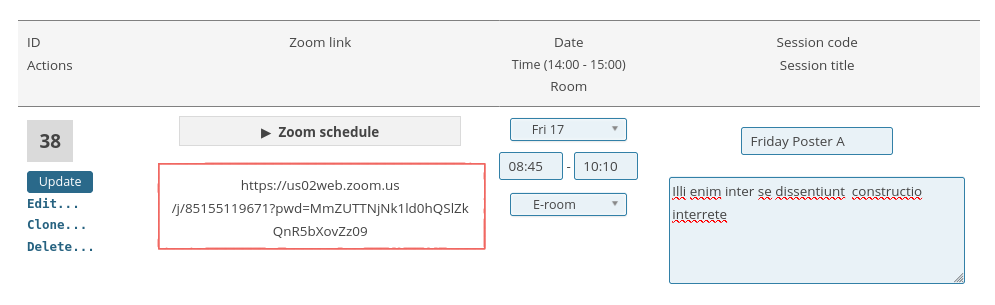
Insert Zoom meetings in the agenda
- Zoom meetings created in the sessions will be automatically inserted in the agenda when the agenda is recreated.
- By default, the meeting is embedded in the agenda and a link is added under the embed, to allow joining the meeting via the desktop app (Fig. 3). It is possible to insert just the link, without the web embed.
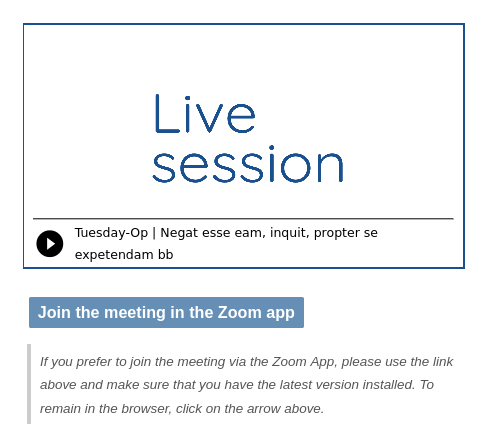
Remove Zoom meetings from the agenda
- Delete the meeting in the list of sessions (Fig. 1).
- Recreate the agenda.
Starting and hosting Zoom meetings
- For meetings created remotely using the Zoom scheduler, as described on this page, Zoom provides start links that can be used to start and access the meeting as host.
- The meetings' designated hosts can start the sessions using start links provided by Zoom and displayed on the landing page of their COMS account. The hosts need to click on a button to generate the link. Clicking on the link opens the meeting, either in the browser or in the desktop app, if installed on the host's account.
- Administrators need to activate the display of the links in the configuration, at Configuration / Access rights / Disclose personal data to participants.
- Note: it is possible to use the start links multiple times ahead of the live session, for instance for practice sessions.
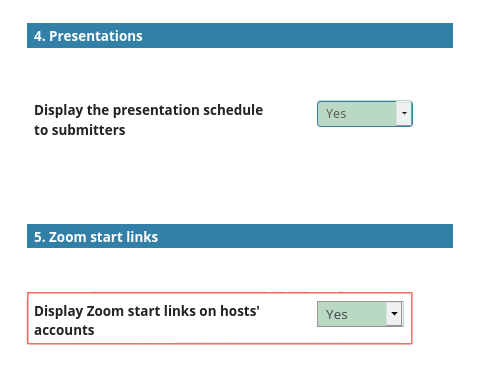

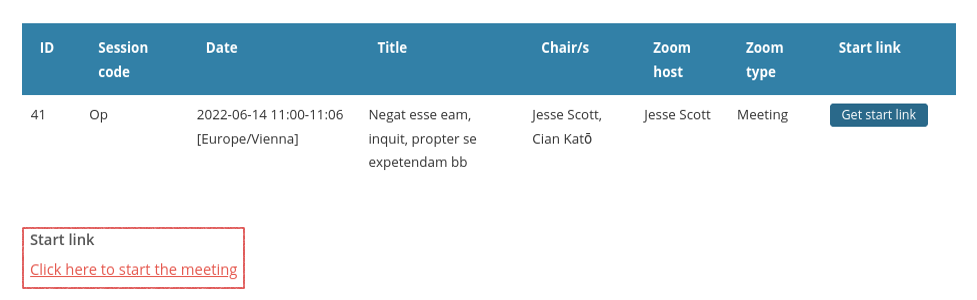
Start links for admins
- Whereas hosts get the start links for the meetings they are scheduled to host, admins get a list of the start links for all meetings. This list is accessible at Agenda & proceedings / Zoom / Start links .
- This list can be useful if a host is unable to attend. In this case, admins can start the meeting themselves, or, alternatively, send the start link to an alternative host.
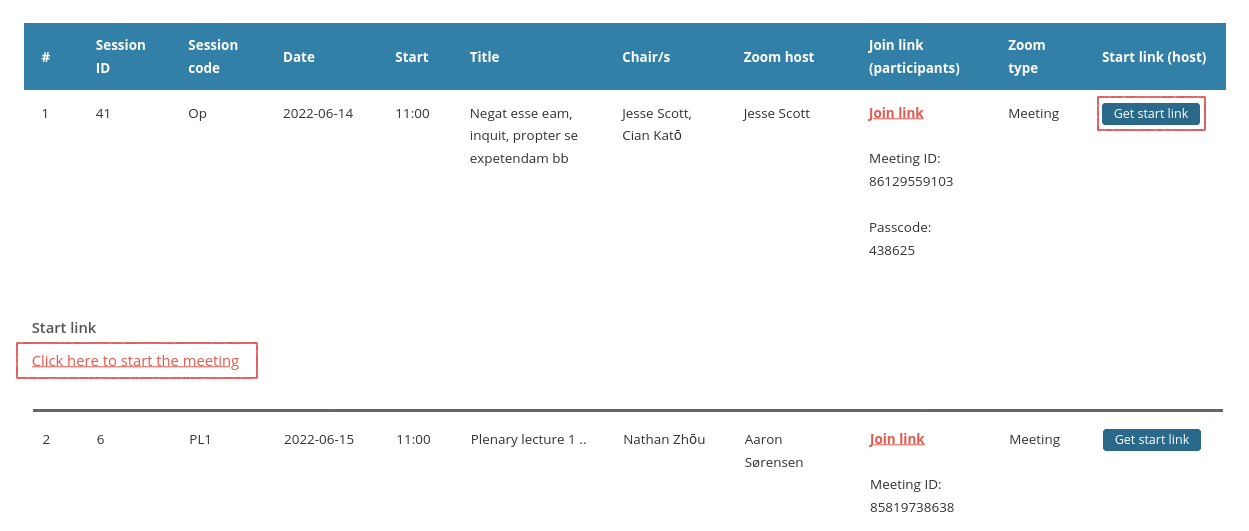
Recap
- If you use the Zoom scheduler to schedule the Zoom meetings and webinars, you will be provided with a special Zoom function, that allows starting and hosting the meetings without having to log in to the portal.
- This is implemented through the use of start links that are made accessible to users who have been selected as hosts on the Zoom scheduler.
- Admins who schedule the meetings have access to all the start links, for all the sessions. This is primarily meant to serve as a backup option, in case the designated host is unable to attend.
- Attendees can only join through the join link or the web embed provided in the agenda.
- The join link is permanent: it is created as soon as a Zoom meeting is created and remains valid until the meeting is over.
- The start link is not permanent. It needs to be generated before the event. It is possible to start and conclude a Zoom session multiple times using the start link. However, the start link needs to be generated for each occasion and will be different each time.
Planning the use of the start links
- Option 1: select the designated host (typically the session chair) in the scheduler.
These users will see a start button on their landing page as soon as you activate their display. They will be in charge of starting the meeting they are meant to host. If these users are scheduled to host multiple meetings, a start button will be displayed for each and will duly identify its session. - Option 2: select an admin in charge of supervising the virtual platform.
The start button will be displayed on the landing page of the admin who will be in charge of starting the meeting. Once the meeting is started and the intended host has joined it with the join link, the admin can make that person host or co-host.Note: an admin can be assigned to multiple Zoom meetings. If this happens, start buttons will be displayed for each.
7.6. Setting up breakout rooms in Zoom
Steps required to create breakout rooms
- Step 1: organisers need to access a sub-account of the COMS Zoom account in order to create the rooms.
- Step 2: organisers need to create the meeting that hosts the room on the COMS site, as described here.
- Step 3: once the meeting is created, organisers need to log in to the sub-account that owns the meeting and locate the meeting.
- Step 4: once located, the meeting can be edited by clicking on the "Edit" button next to the listing of the meeting (Fig. 1). Scroll to the bottom of the page, where the relevant function can be found.
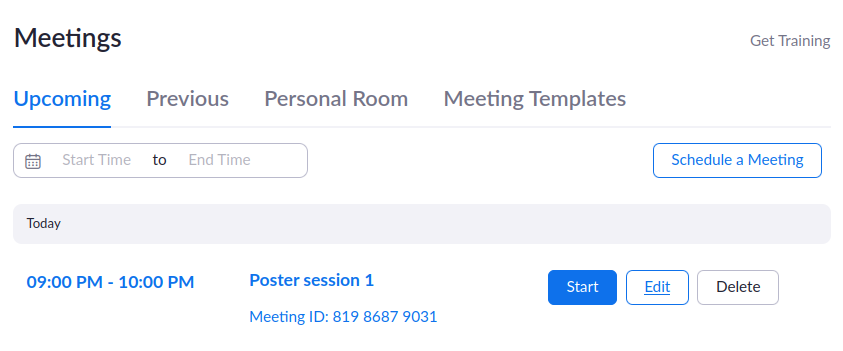
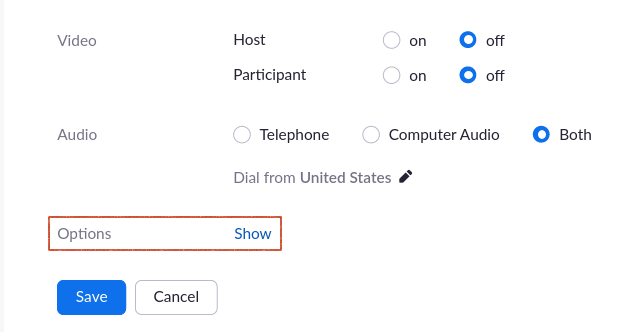
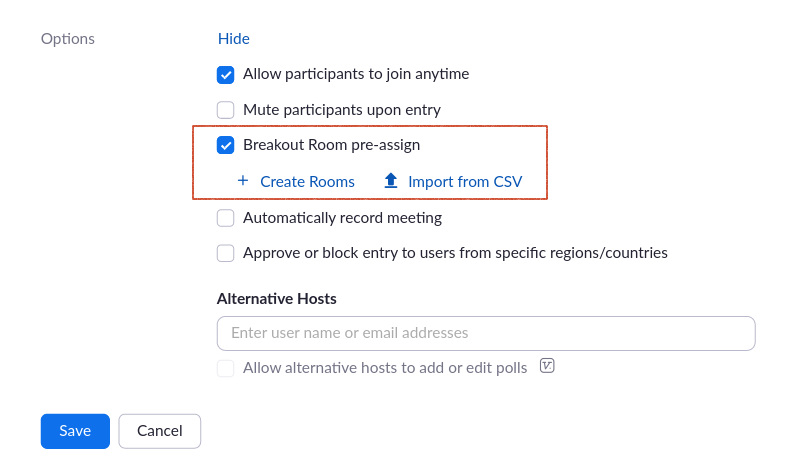
7.7. Handling Zoom recordings in COMS
Planning the recordings
- Technically, recording a meeting to the cloud is simply a matter of clicking on a button during the meeting. However, permission might be required from the speakers to record their presentations.
- If a speaker does not agree to be recorded, the host can pause the recording during the speaker's presentation and resume it later.
- The resulting recording will be available on the Zoom cloud and organizers will be able to easily insert it into the agenda.
- Important note: if a recording needs to be downloaded to edit out some parts, it is not possible to reupload the edited file to Zoom. As a result, inserting the recording into the agenda will require a more complex workflow: uploading of the file to an alternative platform (e.g. Dropbox or COMS) and then manually inserting the link of the recording into the agenda.
Retrieving and listing the recordings
- The page at Agenda & proceedings / Zoom / Recordings lists all the sessions for which a Zoom meeting has been scheduled using the Zoom scheduler
- Each session on that page can have several cloud recordings, since a meeting with a given meeting ID can be run several times. When several recordings exist, the latest is displayed. It can be viewed directly but it can also be inserted for viewing in the agenda.
- In order to insert a recording
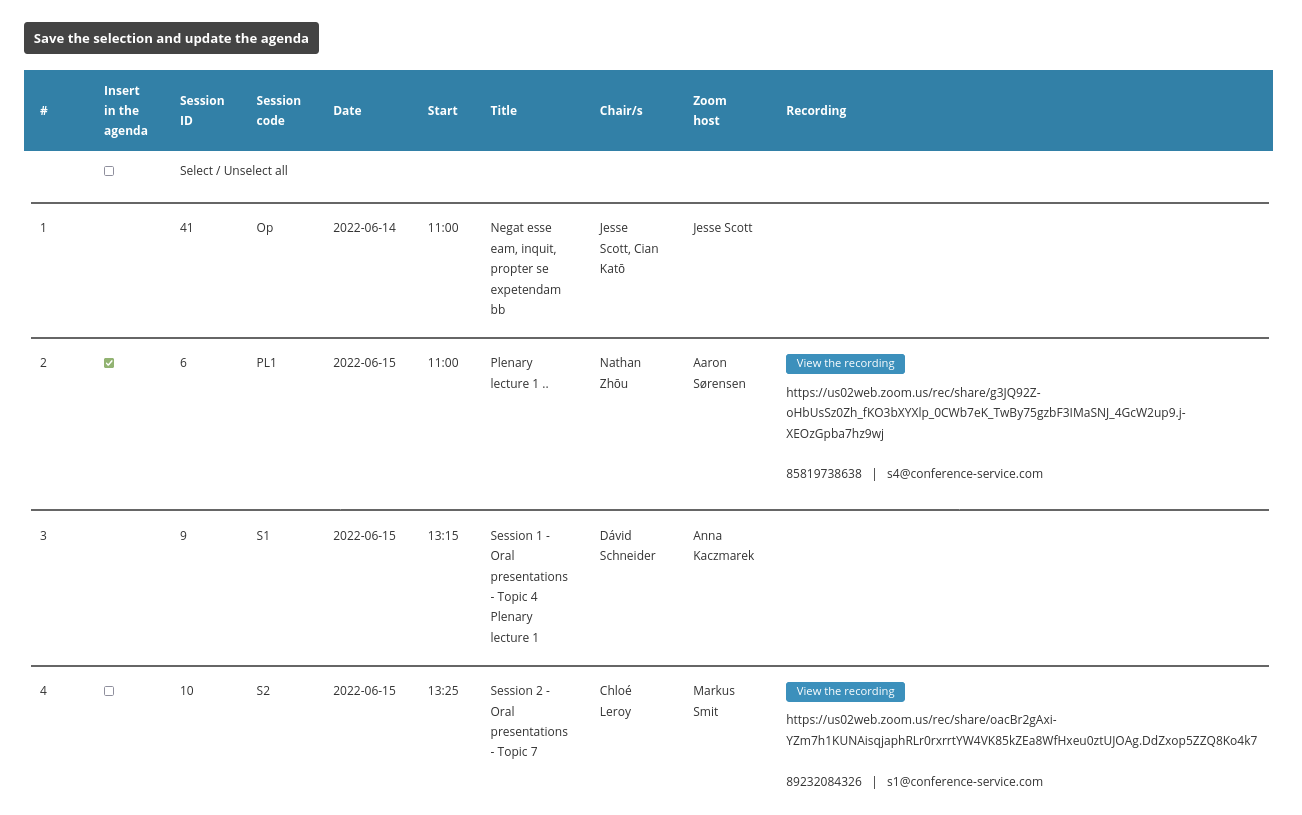
Inserting recordings in the agenda
- In order to insert a recording, simply click on the check box displayed for this recording and recreate the agenda.
- When a recording is inserted into the agenda, the link for the corresponding Zoom session is removed, as it is no longer needed.
- You can select all or some of the existing recordings for inclusion in the agenda.
- Note: new recordings take some time to be made available (e.g. half an hour). The longer the meeting, the longer the processing time.
- Zoom deletes cloud recordings after a month. If you decide to keep the recordings for a longer period of time, you will need to download them and store them on another platform or site.
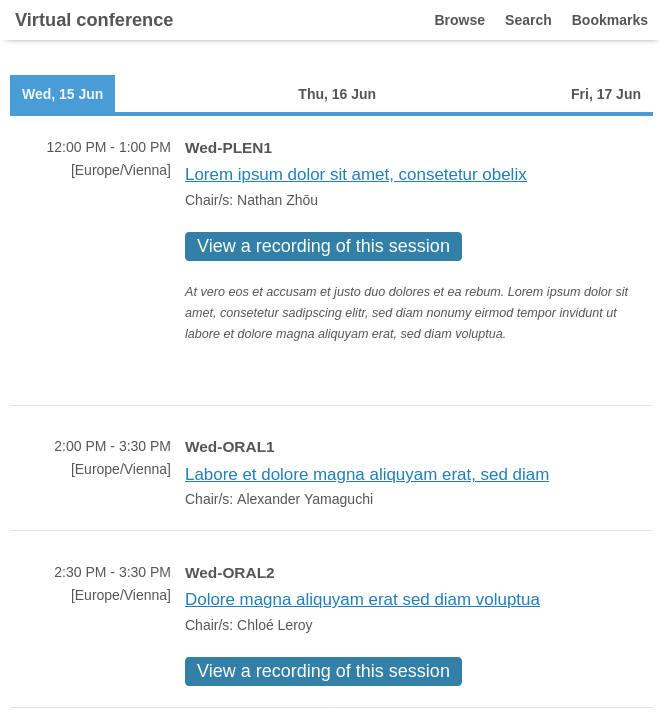
Removing recordings from the agenda
- In order to remove a recording from the agenda, simply remove the check mark from its check box and recreate the agenda.
- You can unselect all or some of the existing recordings.
7.8. Handling local Zoom recordings in COMS
Saving a recording locally
- Option 1: save the recording to the Zoom cloud. COMS provide an easy procedure for inserting the cloud recordings into the agenda and then removing them, if needed. When feasible, this option should be the preferred option.
- Option 2: if cloud recordings are not an option, a manual procedure can be used to insert the recordings. This could be the case, for instance, if the recording was saved locally by mistake. Another use case might occur if a cloud recording needs to be downloaded and edited, for instance, if a speaker asks to be removed from an existing recording. Once downloaded, a recording cannot be reuploaded to the cloud and therefore needs to be handled manually-
Manually inserting recordings (first step: create a URL for the recording)
- Recordings saved to a host's computer are stored as a folder containing several files (a video + sound tracks, a separate sound track, the chat and possibly other files).
- The file to use as the recording is the file with the mp4 extension, which contains the video and its soundtrack.
- The mp4 file needs to be uploaded to a platform or website, so that it can be made available as a public URL. This URL can then be inserted in the agenda as a link.
- Websites suitable for hosting the mp4 files are, for instance:
- Vimeo: a good solution. COMS' Vimeo account can be used.
- Youtube: a good solution, but requires a Youtube account.
- Dropbox or your own cloud hosting solution. You will need to ensure that the URL is made public, which is often not the default.
- Your own website. You will need to ensure that the URL is made public.
Manually inserting recordings (second step: add a link to the agenda)
- Log in to your COMS account and navigate to Agenda & proceedings / Sessions / Define the sessions / 2. Change the display and editing options for the list of sessions (Fig. 1).
- Set the view as shown on the screenshot below. You need to activate the edit mode and select the fields to edit as shown. They will be displayed as columns in a list of sessions and will be directly editable, similarly to a spreadsheet.
- Navigate to Agenda & proceedings / Sessions / Define the sessions / 1. Create , edit the list of sessions (above the previous section). There you will find the list of sessions, ready to be edited. (Fig. 2)
- Locate the session you need to work on. You can use its title. Edit the corresponding free text by clicking on the wavy blue link.
- The free text field opens as a modal box (Fig. 3).
- Click on the
>Sourceicon to switch to HTML (important). The HTML snippet used to create the link is highlighted. You will need to paste a modified version in the free text of every session for which you want to add a recording. Only the URL will change (Fig. 4). - The HTML snippet to use is: You'll need to replace the
<a href="{URL}" style="background-color:#3280a7 !important; color: #fff !important; text-decoration:none !important; padding: 5px 12px;" target="_blank">View a recording of this session</a>{URL}bit (the href attribute), by the actual URL (e.g.https://example.com/video1.mp4), then paste it under the speakers in the free text boxin HTML modeand save. 8. When you save, the data are saved to the database, but the agenda is not automatically recreated. In order to do so, you'll need to click on the green button in the bottom left corner of the screen (Fig. 5).
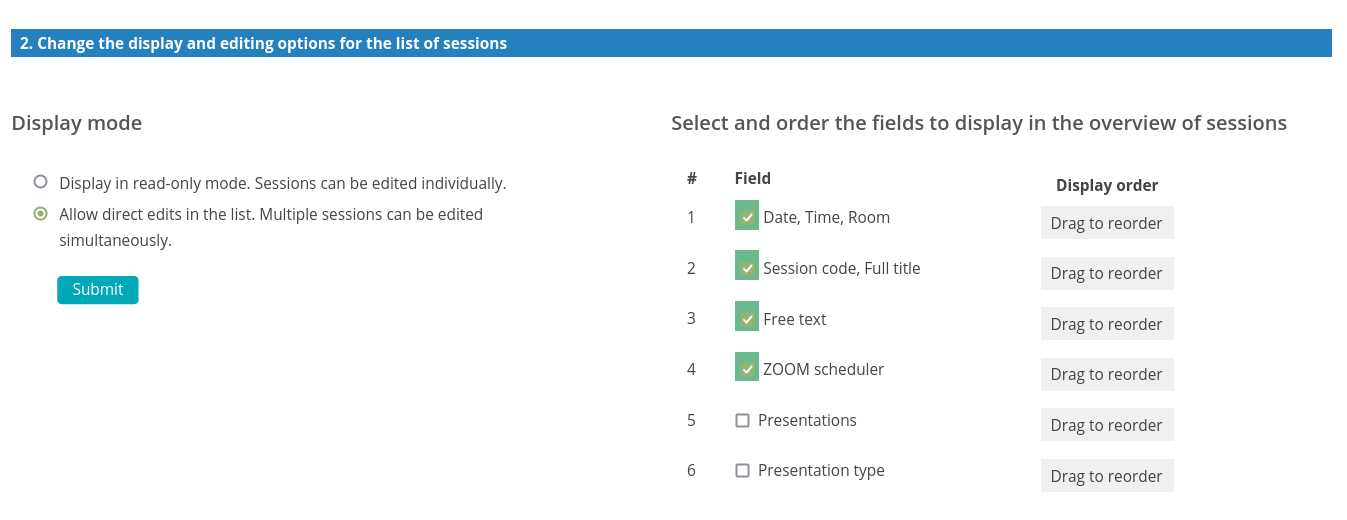
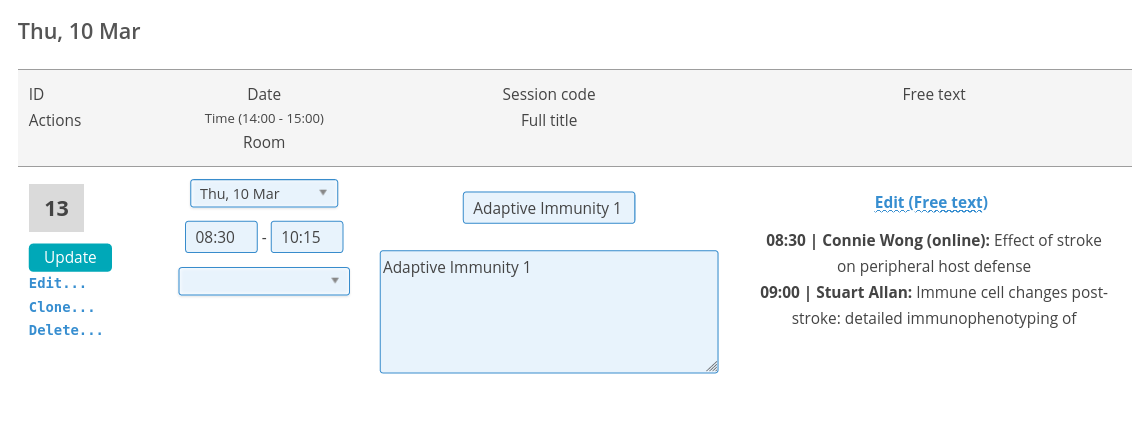
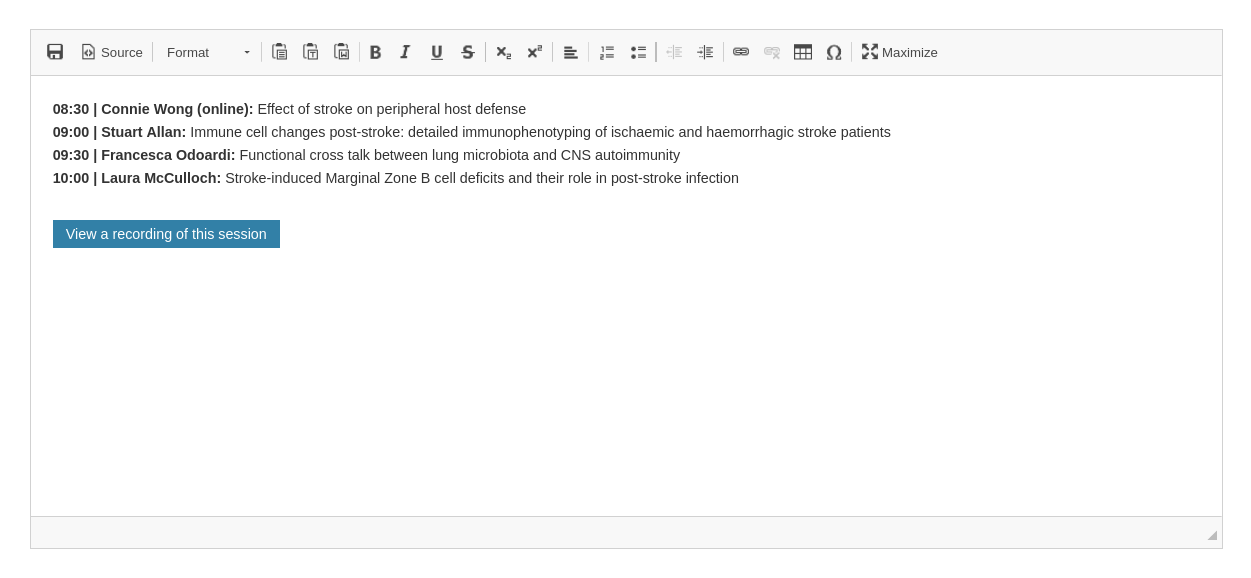
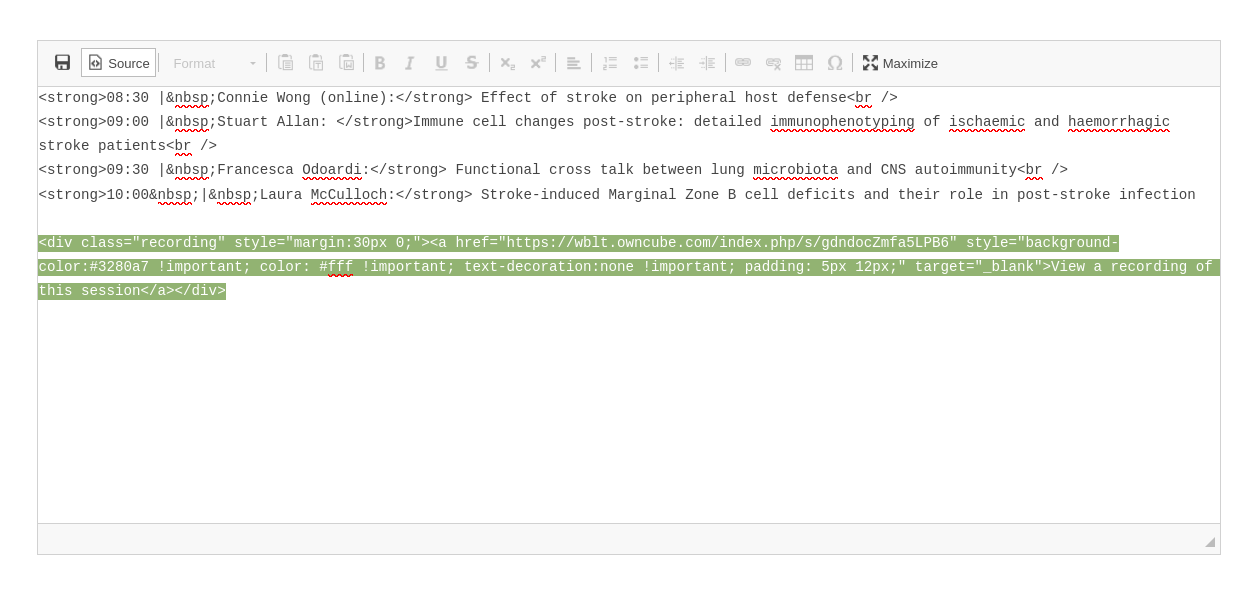

8. Registration & payments
About the COMS payment module
The COMS payment module allows you to collect and track registration and payments performed by the participants. Both credit card payments and payments made by bank transfer can be handled, either exclusively or simultaneously. This page gives an overview of the module. Implementation details are described in the pages that follow.
https://conference-service.com/{event_acronym}, in order to set up and manage the payments.What you can do with the payment module
- Create custom registration forms.
- The forms can include multiple bookable items, variable fees, registration periods (early bird, standard, late), more than one currency, quotas and discounts.
- Collect online payments from the delegates.
- Collect offline payments from the delegates.
- Automatically generate invoices and receipts for the delegates.
- Collect scans of student cards. These can be viewed and annotated by administrators of the site.
- View, edit, export registration and payment records.
Setting up the module for online payments
- If you are planning to use online payments, you will need to connect your bank account to the COMS system, in order to collect payments from the delegates.
- For this, you will need to select a payment solution (payment gateway) that can be integrated with COMS. The payment solution will also connect to your account, thus allowing registrations performed on the COMS site to be paid directly into your bank account.
- Available options are listed here.
- Small to medium sized events
For events with less than about 500 participants, we recommend the use of either Stripe or PayPal, which can be set up quickly and work with standard accounts (checking accounts). Other platforms, which require a merchant account, might offer better (lower) commissions. However, they require more time to set up and may incur fees for the maintenance of the account. These additional costs might not be offset by the lower commissions, if the number of delegates is low. - Detailed guidelines are given in this doc for the setup of a Stripe or PayPal account and the creation of an interface to your COMS site.
- Once the interface between COMS and your bank account is ready, you can activate or deactivate it at will in the configuration of your COMS site. When online payments are activated, users are given access to the payment gateway through a
"Pay now"button. - Online payments are reported in COMS in real time. The status of a payment immediately up to date and a receipt is automatically emailed to the user.
Setting up the module for offline payments
- Offline payments (mostly bank transfers) can be used to collect payments, independently or in combination with online payments.
- They can be activated by administrators in the configuration of the COMS site. When they are activated, users can specify their intention to pay offline and are presented with your bank details. These can also be printed on the generated invoice.
- Note: offline payments are not reported to the COMS server and need to be manually input on the COMS site in order to update the status of a payment.
8.1. Integration with Stripe
A Stripe account is free and easy to obtain. You need, however, to be a registered business or non-profit in order to be able to accept credit card payments with Stripe. Payments collected through Stripe are automatically transferred to the bank account of your university or organization. Stripe takes a commission on all payments. The fees are listed at https://stripe.com/at/pricing.
In order to integrate the COMS system with Stripe, you need to own a validated Stripe account. The steps necessary to obtain it are described below. If you already have an approved Stripe account, there is no need to register a new one.
Register an account with Stripe
- The first step is to check whether it is possible to open a Stripe account in the country where the payments will be received. You can check this at .
- If your country is supported, the next step is to open an account at . This step only requires that you provide a name and email address.
Validate your Stripe account
- On your newly created Stripe account, you will have to provide details about the business / non-profit that collects the funds (Fig. 1).
- Stripe will check the data and decide whether or not they approve it. It usually takes less than an hour.
- Once the account has been approved, it is ready to be integrated with COMS.
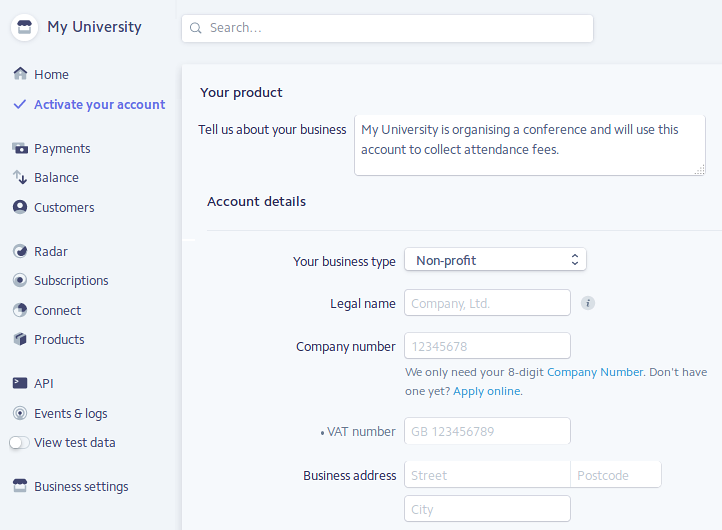
Integrate your Stripe account with COMS
- Log in to your Stripe account and retrieve your API keys (Fig. 2). These exist in two modes: test or live. The test keys should be used in the configuration phase, as it allows testing payments with dummy cards. When the setup is ready, switch to the live keys.
- Log in to your COMS account, go to Configuration / Bookings & Payments / Connect your bank account and input the keys (Fig. 3). The easiest is to copy and paste the values from your Stripe account. Both the test keys and live keys are input on this page.
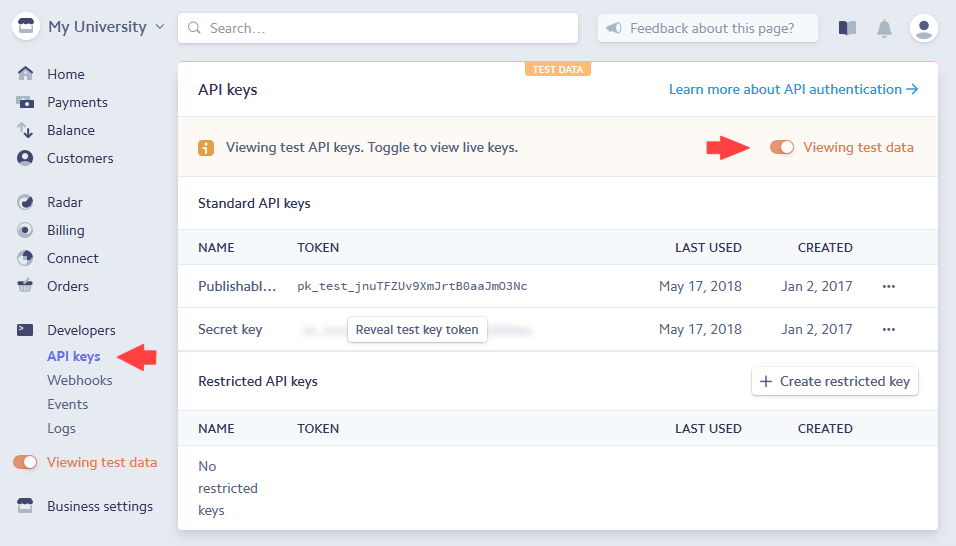
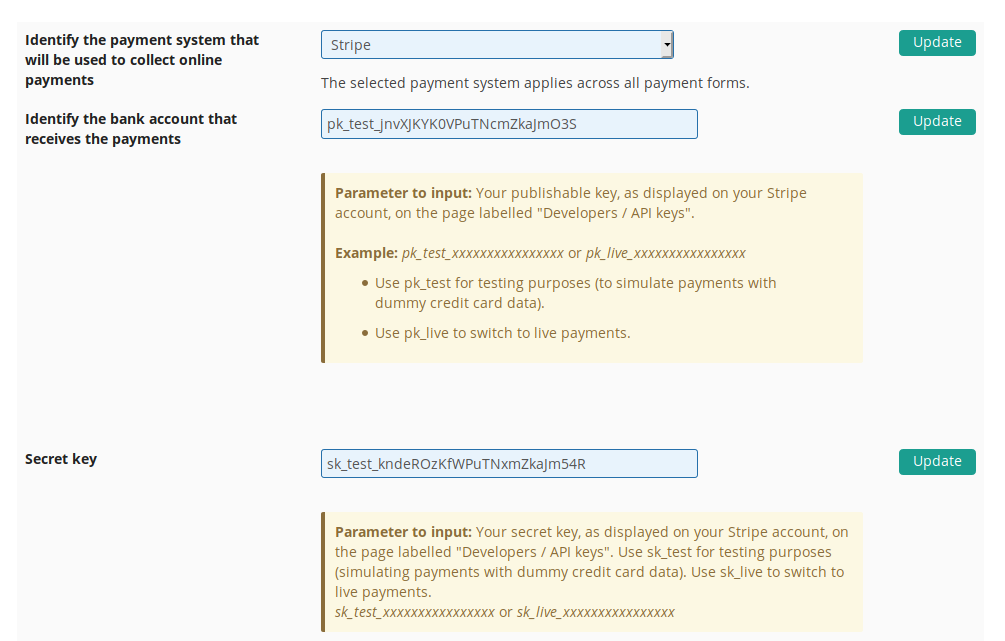
Test the Stripe integration
Stripe conveniently provides an option to simulate payments without actually using real money. The procedure is described below:
- Use the test API keys (pk_test... and sk_test...) to interface between COMS and Stripe, as described in the section above.
- Set up a payment form in COMS, as described on the page labelled Setup of the payment form/s (Fig. 4, 5).
- Fill in the form you just created on your COMS account (Fig. 4), then check your order and confirm it. This will generate an invoice. A Pay button will be displayed. Clicking on it will take you to a payment page hosted by Stripe (Fig. 5). Note that this can only happen if the keys have been input correctly (no typo), so this test will validate your interface. Note that the Stripe page clearly shows whether you are using a test form or a live form.
- Once on the Stripe page, choose a dummy credit card flagged for success at . The other bits of information can be invented. Submit the form.
- If you selected a credit card flagged for success, the transaction will succeed and you will be redirected to your COMS account.
- Your payment status should be up to date on your account and a receipt should be available for download. Note that both the invoice and the receipt are also emailed to the users.
- Occasionally, though rarely, there could be a delay between the completion of the transaction on Stripe and the update on the COMS site. This delay should not last more than a few seconds, unless there is a disruption on the Internet.
- After this, the integration can be considered successful and you can switch to the live keys.
- When switching to the live keys (pk_live... and sk_live...), be sure to test the interface to Stripe again, since there is still scope for mistakes in the input. If you are able to reach the live Stripe form, the interface is correct. There is no need to test the report of a successful payment again, as this works identically for both modes.
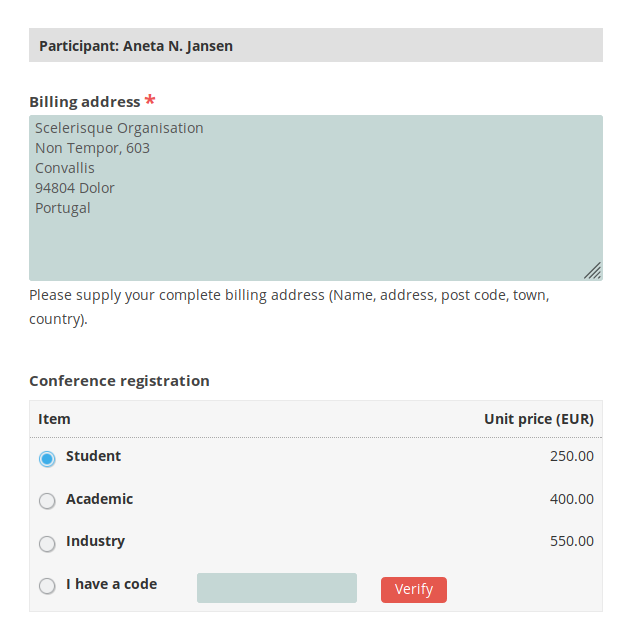
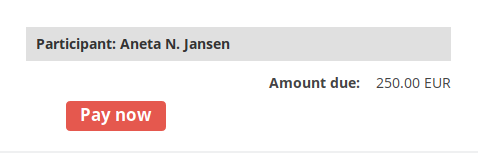
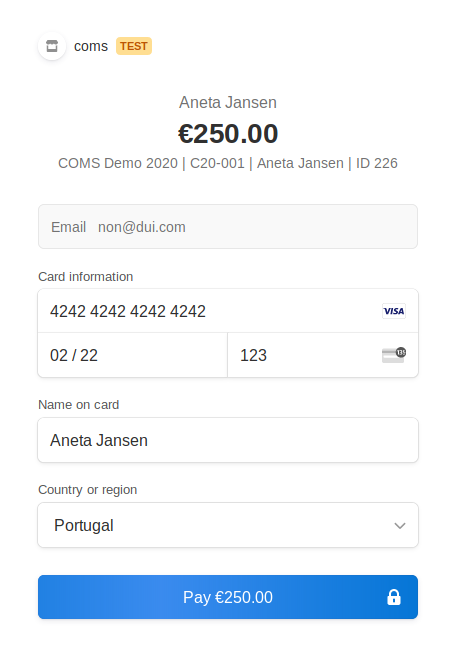
Test cards to simulate payments in test mode
- Test card numbers can be found at (Fig. 7).
- The listed card numbers can be copied and pasted into the Stripe payment form for testing. All other fields can be made up.
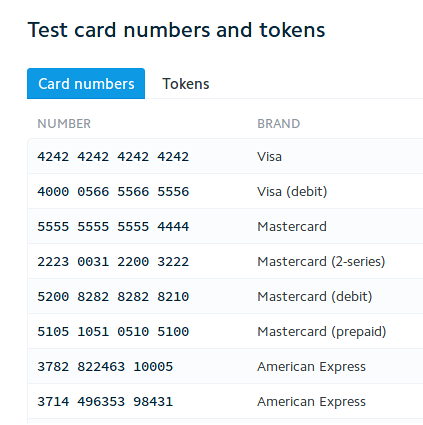
Finding payments and payouts on your Stripe account
- After logging onto your Stripe account, you can find the received payments as shown on Fig. 8.
- Payouts from your Stripe account to your bank account can also be viewed, as shown on Fig. 9.
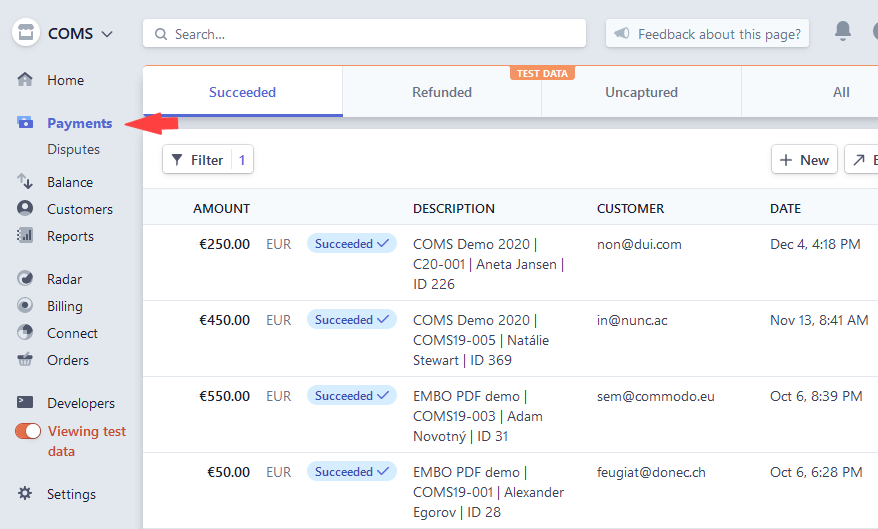
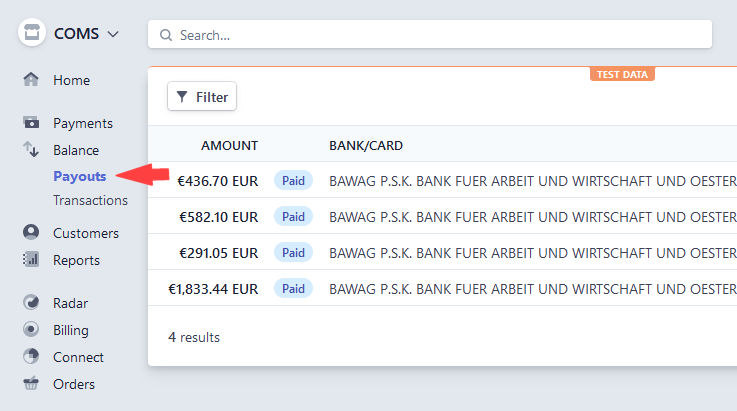
8.2. Integration with PayPal
March 2023
This section describes the steps required to obtain and configure a Business PayPal account to interface with COMS.
- A PayPal account is free and easy to obtain.
- You need, however, to own or obtain a
PayPal Business accountin order to be able to accept credit card payments with PayPal. This is different from the two other types of accounts (Personal accountandPremier account). - Payments collected through PayPal can be manually transferred at any time to your bank account.
- PayPal takes a commission on all payments. The fees are listed on the PayPal website. They depend on the volume of transactions and the country where your business is based.
- For example, US fees can be found at https://www.paypal.com/us/webapps/mpp/paypal-fees, while for Germany, the fees are listed at https://www.paypal.com/de/webapps/mpp/paypal-fees.
Create a PayPal business account
- If your organisation already owns a Business account, there is no need to open a new one and you can skip this section.
- On the PayPal website of your country, find the page dedicated to opening a business account. Fill in the form, making sure you select the
Payments Standardplan, which is free of monthly fees. - For example, in the US, this page can be found at https://www.paypal.com/webapps/mpp/merchant.
- In Germany, this page can be found at https://www.paypal.com/de/webapps/mpp/accept-payments-online.
- PayPal will review your application and decide whether or not to grant you the account.
Check that your PayPal account is a business account
- Log in to your PayPal account and navigate to Profile settings / Login and security (Fig. 1).
- Find the setting labelled
Account type. It should be set to Business.
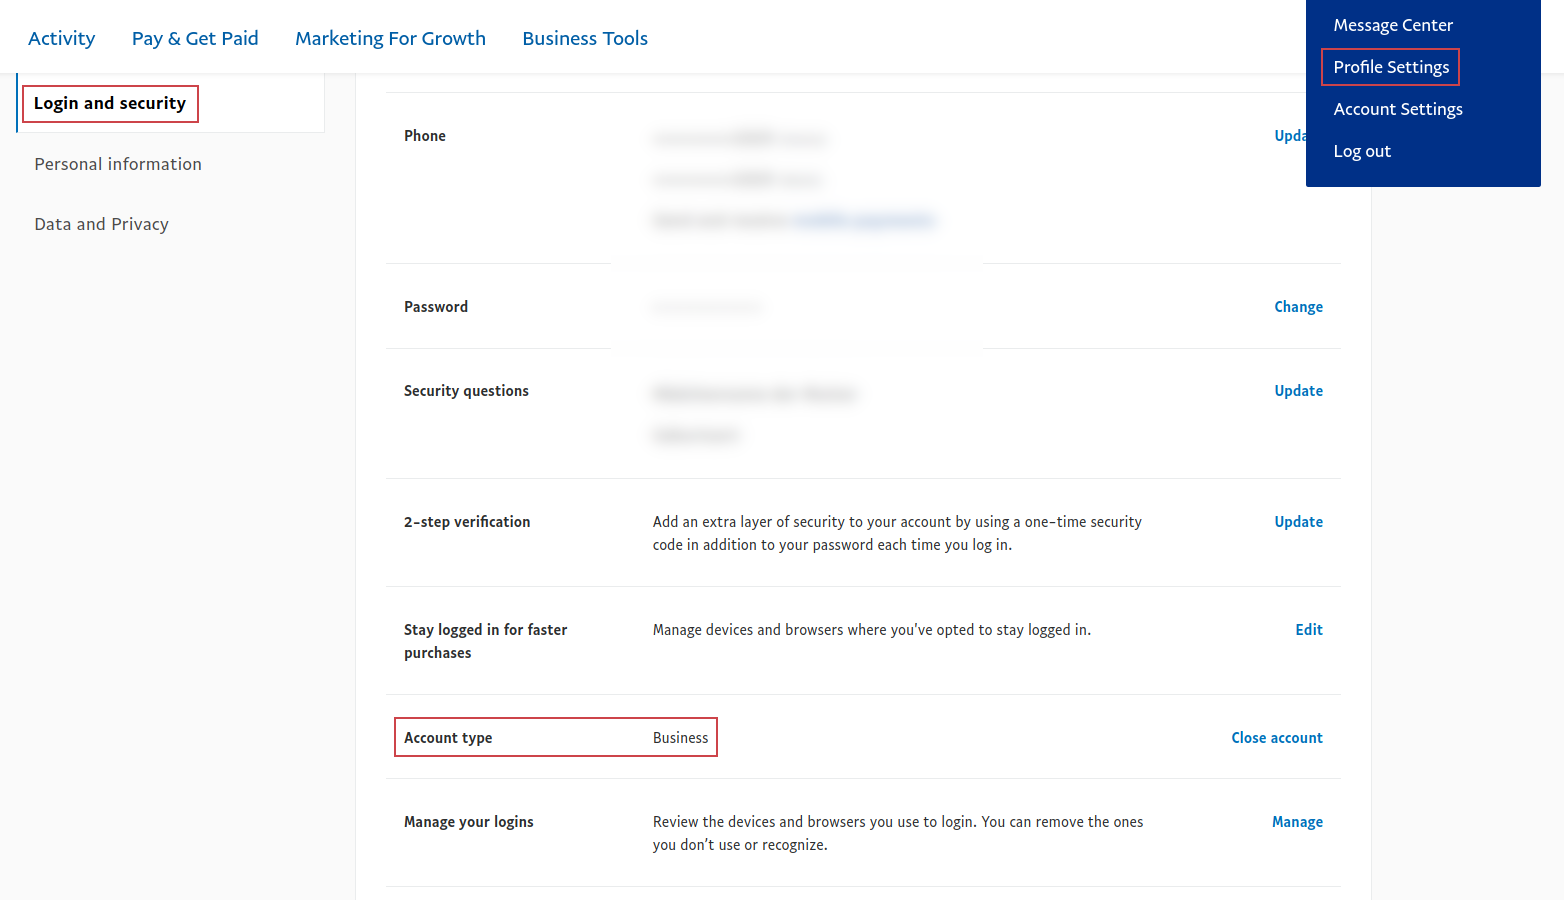
Find the account settings page on your PayPal account
- The instructions given in this section are valid for an account set to English. You can set the language of your account to English, at least temporarily, to follow these instructions. This can be done at Account settings / Account preferences/ Preferred language (Fig. 2), or the equivalent path in another language (e.g., in German, Profil und Einstellungen / Voreinstellungen / Bevorzugte Sprache).
- Log in to your PayPal account and go to Account settings / Website payments (Fig. 3).
- All the settings need for the COMS integration can be found on this page.
- The following sections detail the configuration of these settings.
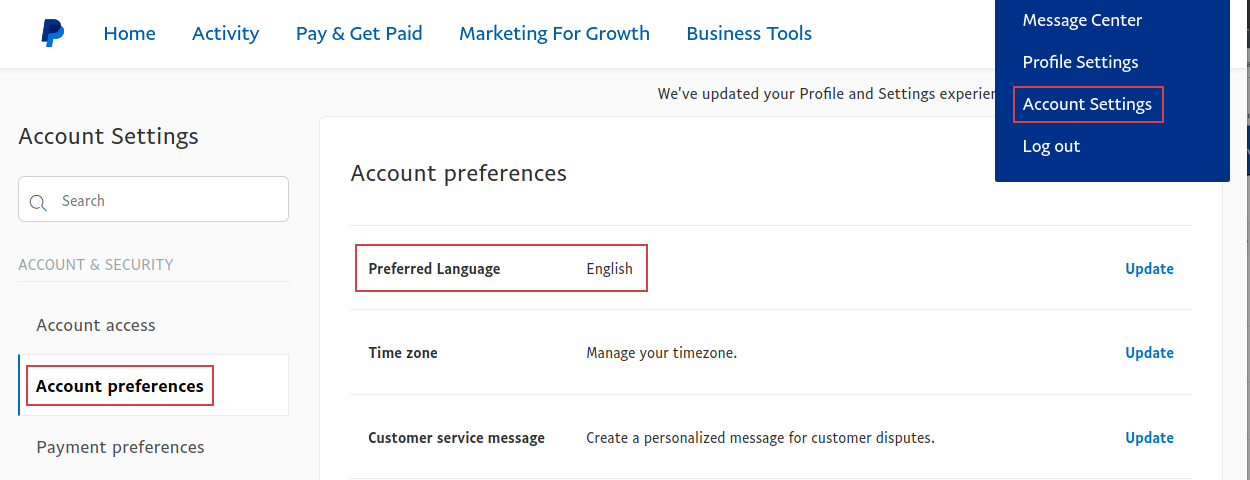
First group of settings: Website preferences
- Go to Account settings / Website payments / Website preferences (Fig. 3).
- Click on the
Updatelink. - Set the following parameters:
Auto Return:On.Payment Data Transfer:Off (important).
If it is set to On, COMS will not be notified of the payments.Block non-encrypted website payment:Off.
This option ensures that credit card payments can be made without logging into a PayPal account.PayPal Account Optional:On (Important).
This option ensures that credit card payments can be made without logging into a PayPal account.- Other parameters can be set on that page, but they are not relevant to the COMS integration per se.
- Save your settings.
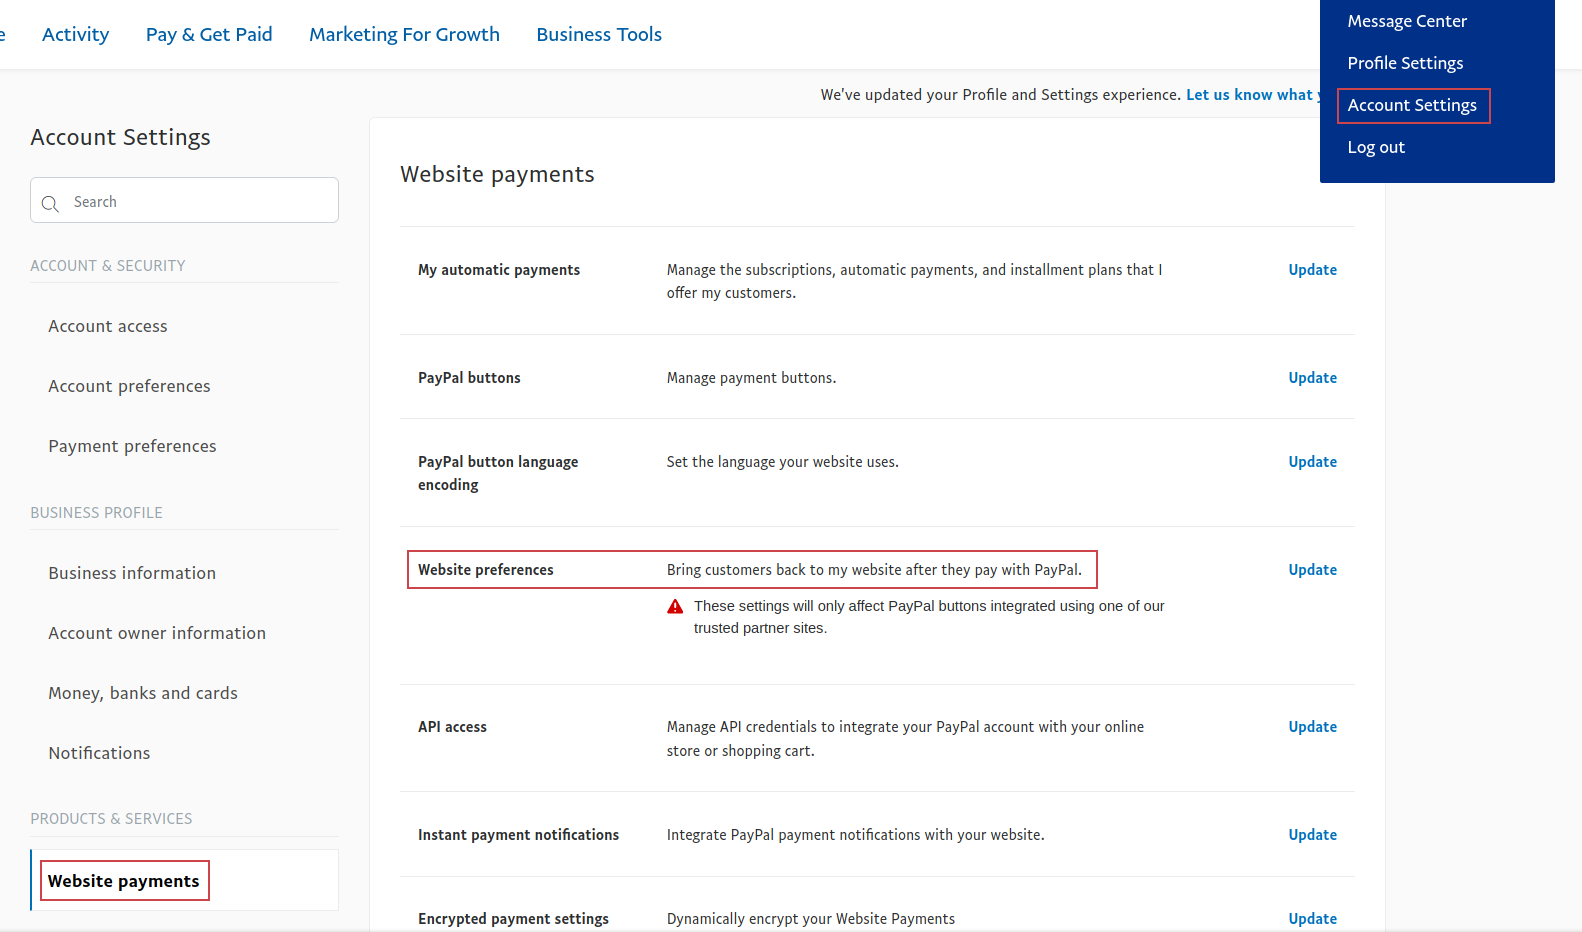
Second group of settings: Instant payment notifications
- Go to Account settings / Website payments / Instant payment notifications (Fig. 4).
- Click on the
Updatelink. - Set the following parameters (Fig. 5):
Notification URL:https://conference-service.com/myconf/paypal_ipn.html (important).myconfshould be replaced by the value relevant to your site. Notifications of all transactions will be sent to this address by PayPal. Please double check the URL. If it is mistyped, notifications will not be received.
Message delivery:Enabled (important).
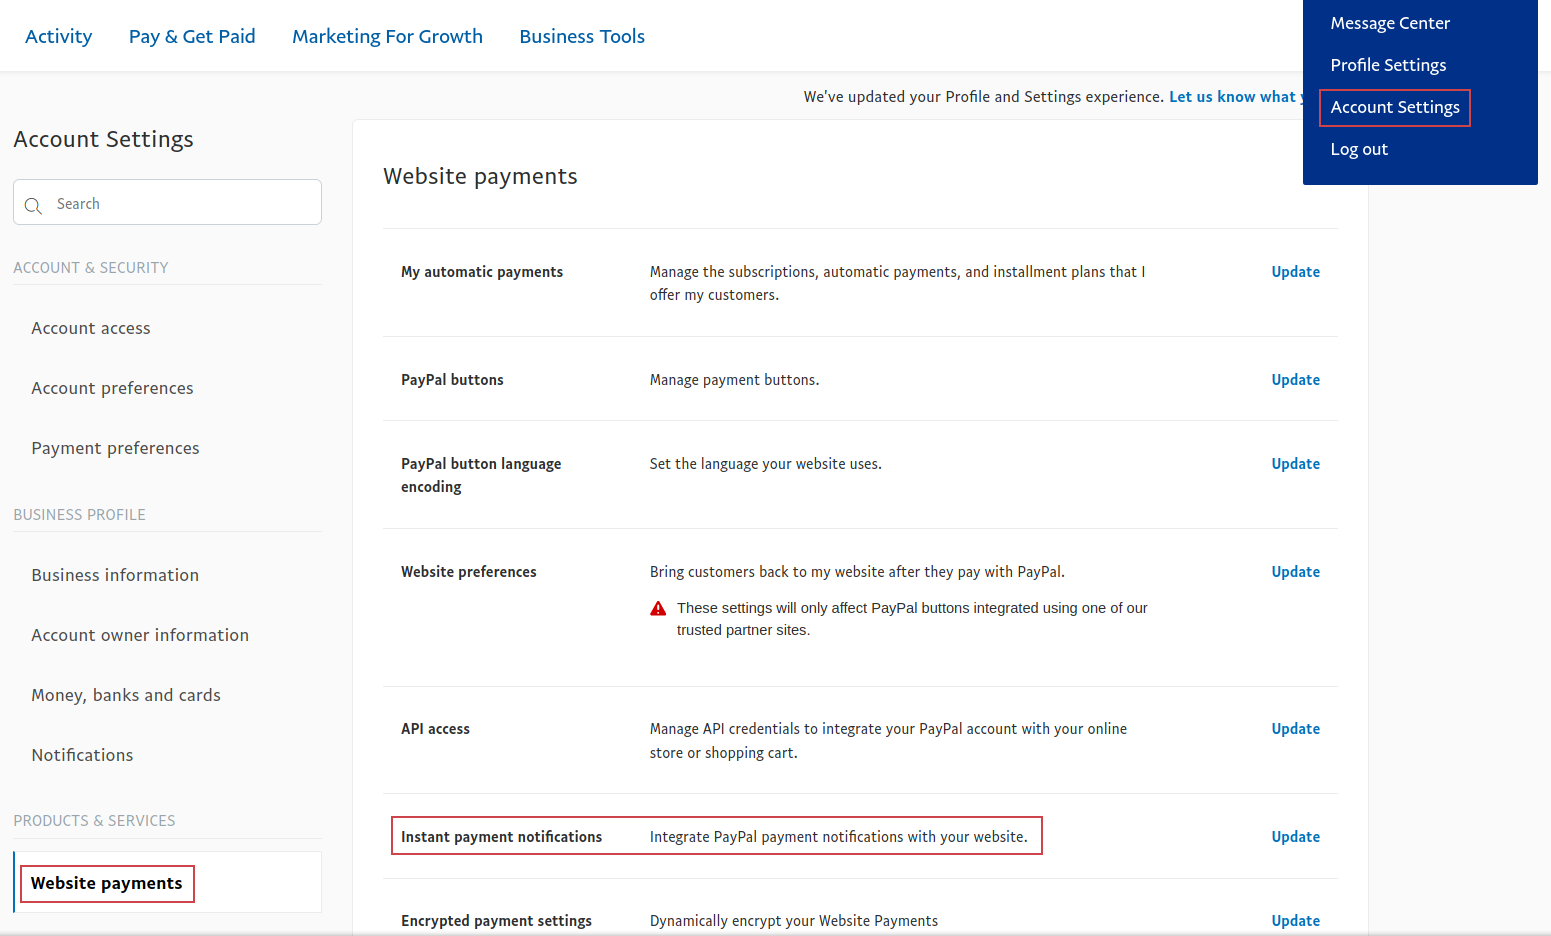
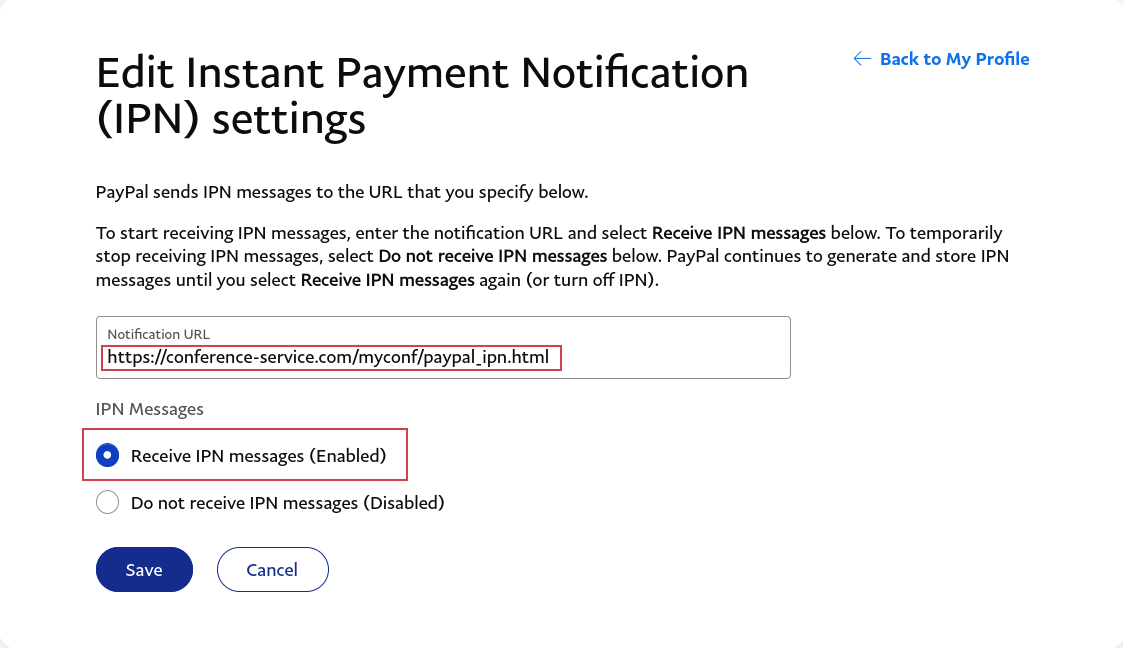
Third group of settings: Block payments
- Go to Account settings / Payment preferences / Block payments.
- Click on the
Updatelink. - You will be led to a page headed
Preferences for receiving payments. - Set the following parameters:
Allow payments sent to me in a currency I do not hold:Yes (Important).Block accidental payments:Yes,
- Save your settings.
Integrate your PayPal account with COMS
- Still on your PayPal account, go to Account settings / Account access / API access (Fig. 6). Click on the
Updatelink. On the next page, go to the section labelledNVP/SOAP API integration (Classic)and click on theManage API credentialslink (Fig. 6). You will find your API credentials on the next page (Fig. 7). You might have to generate them if they do not exist yet. - Log in to your COMS account and navigate to Configuration / Bookings & Payments / Connect your bank account (Fig. 8), select the PayPal soution, at the top, enter the email associated with your PayPal account and input the three API credentials to finalise the integration. Save your input.
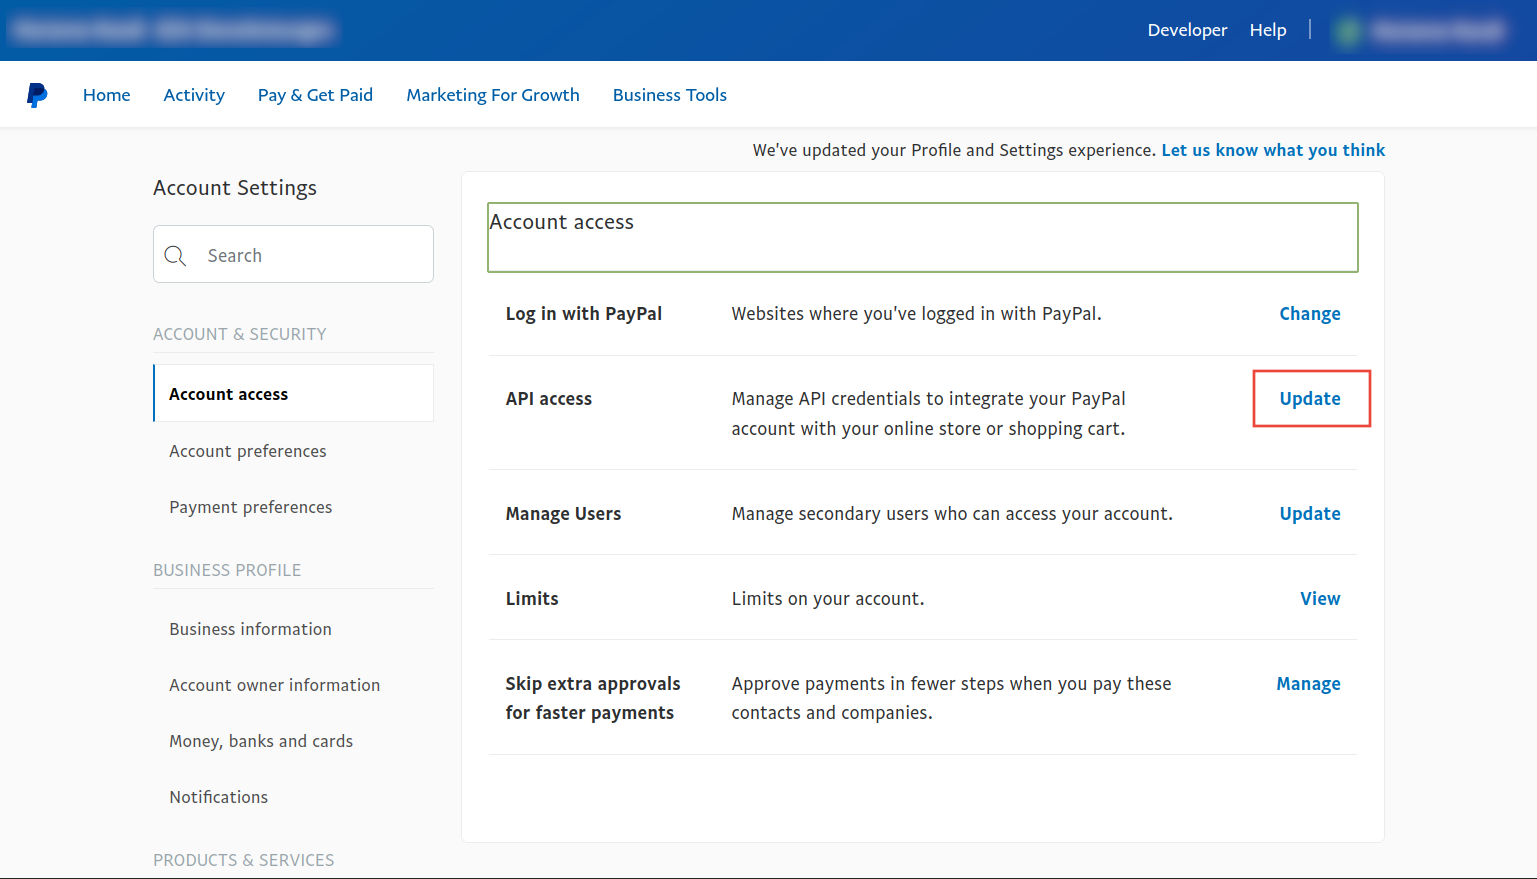
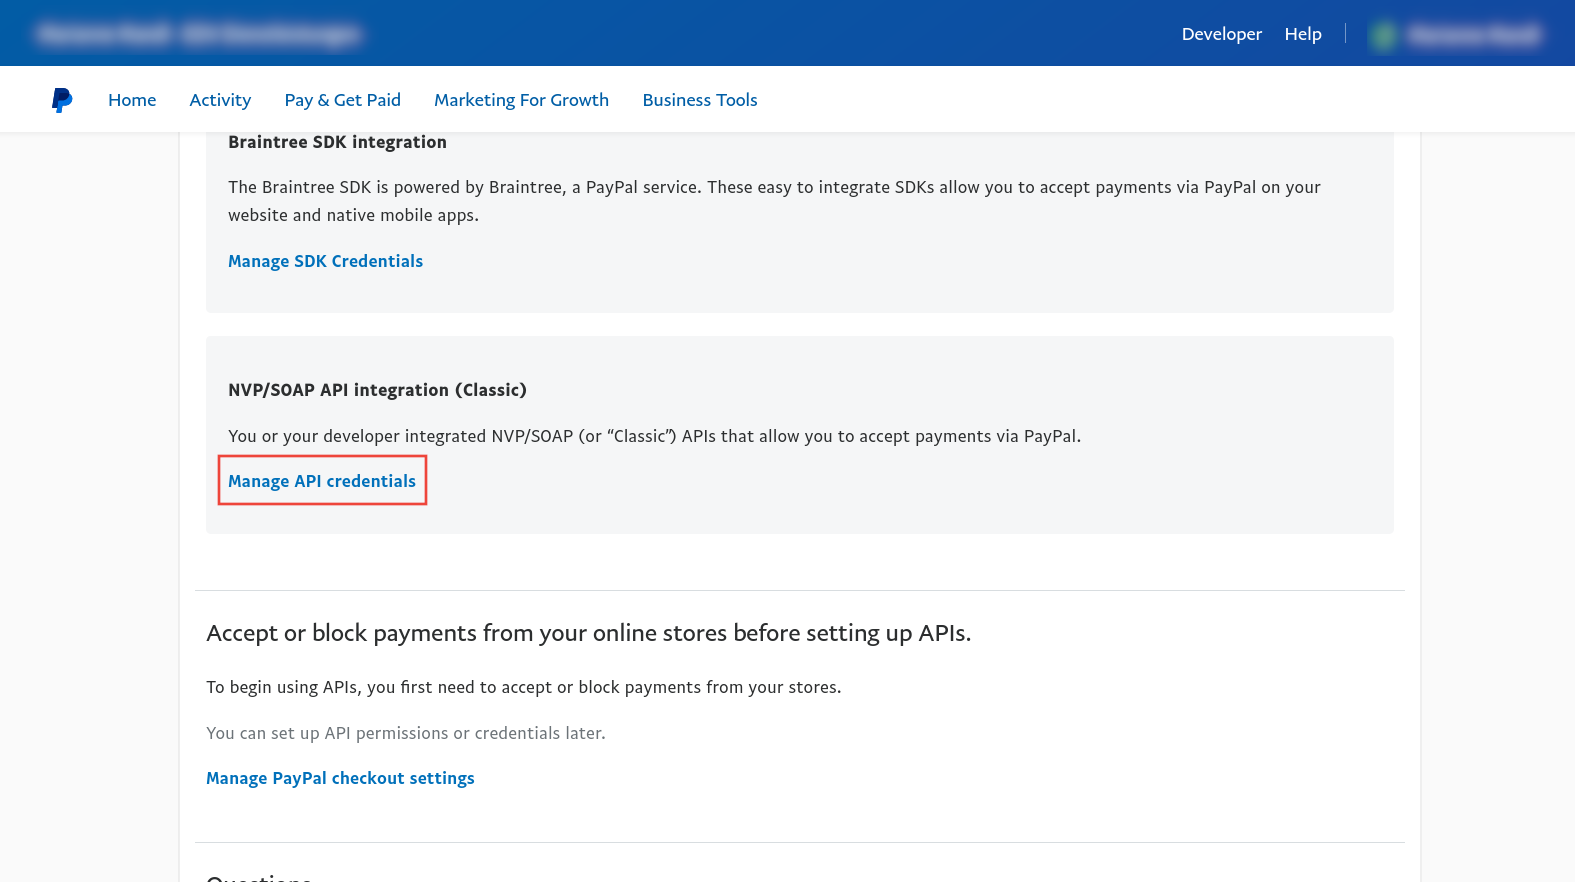
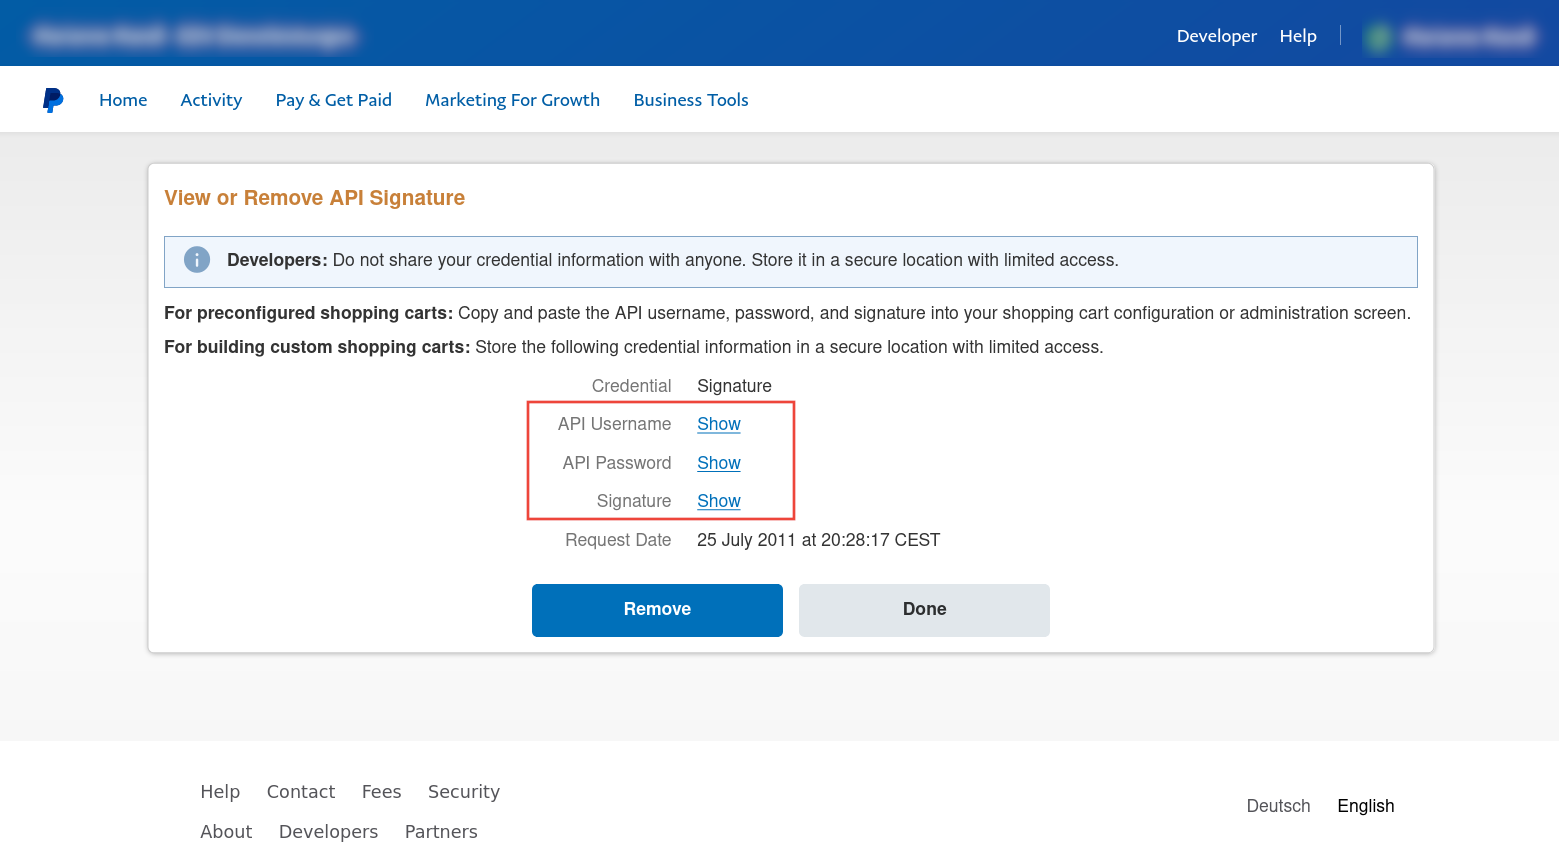
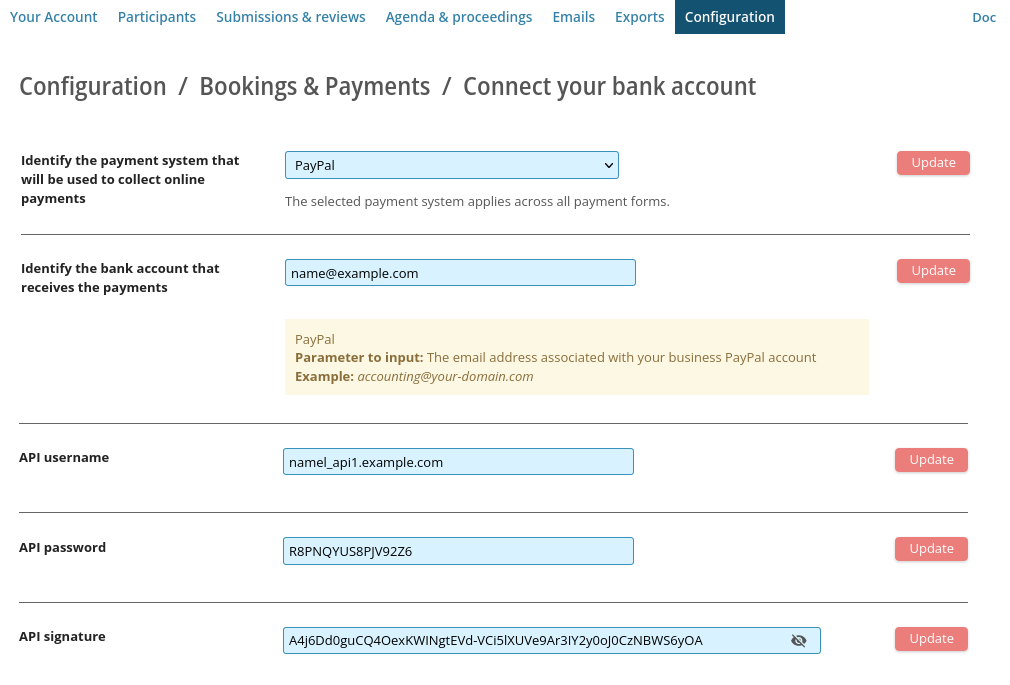
The interface should be ready!
8.3. Setup of the payment form/s
- You can activate and use up to five independent payment forms. You might use separate forms for different currencies or for separate types of participants (e.g. one form for the delegates and another for exhibitors).
- Once the form/s are set up, you will need to configure related emails and access permissions.
- This page describes the setup of a single form.
Locate the relevant functions
- Go to Configuration / bookings & payments / Form 1 [Conference registration]<, which is the setup page for the first payment form.
- This page contains most of the settings needed to configure the form.
- It is divided in a number of sections corresponding to various tasks involved in the setup.
- The configuration can be done by accessing these sections sequentially.
- What follows gives an overview of the tasks involved.
Activate the form
- The form needs to be activated in order to gain access to all the functions necessary to collect and manage the payments. These functions are removed when the form is inactive, to avoid clutter.
- An active form is recognisable by the green check mark prepended to its menu entry, on the left hand side of the page.
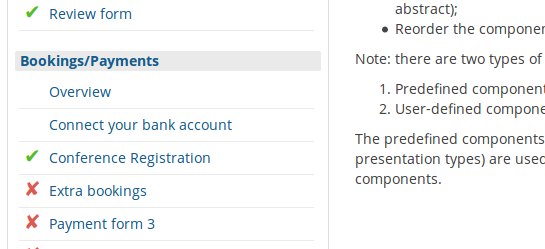
Set permissions to access the form
- You can decide which users can access the form.
- You can also set a time period of accessibility for the selected users. A time zone can be selected at Configuration / Access rights / Access to functions & deadlines
- Details are given at Permissions to access a payment form
Payment options
- Decide whether to allow payments online (needs a payment gateway to be set up to collect the payments).
- Decide whether to allow payments by bank transfers (bank details will have to be provided).
- Choose a currency and VAT options.
Input texts
- Edit the header and instructions seen above the form; edit the label of the tab used to access the form.
- Edit the cancellation policy. This will appear on the form.
- Supply your bank details and instructions for payments made by bank transfer, if applicable. These will appear on the form.
Set up the invoice
- First, decide whether you want to create an invoice.
- If you use an invoice, you need to decide whether it should be generated automatically of manually, by an administrator. An automatic invoice is generated after a participant fills in the form and confirms the order. This happens before a payment is made, even if the payment is performed by credit card. A manual invoice is also generated once an order is confirmed, but needs the intervention of an administrator.
- If the invoice is created automatically, you can supply a template for the automatic creation of an invoice number. If the invoice is created manually, you can either generate the invoice number automatically or manually.
- Configure the header and footer of the invoice and receipt. An editor is provided to help format the texts that appear above and below the orders. These can include pictures (logos) and placeholders to personalise the content (e.g. the participant's name or a reference to a participant's order, as specified by their university. Typically, the bottom part of the invoice contains your organisation's details, as well as your bank's details, if payments by bank transfer are allowed. The items relating to the order are generated automatically by the software and inserted between the top and bottom parts.
- Once a payment is completed, a receipt is emailed to the participant, provided this option is set up by administrators. The receipt looks similar to the invoice, but contains additional information about the status of the payment.
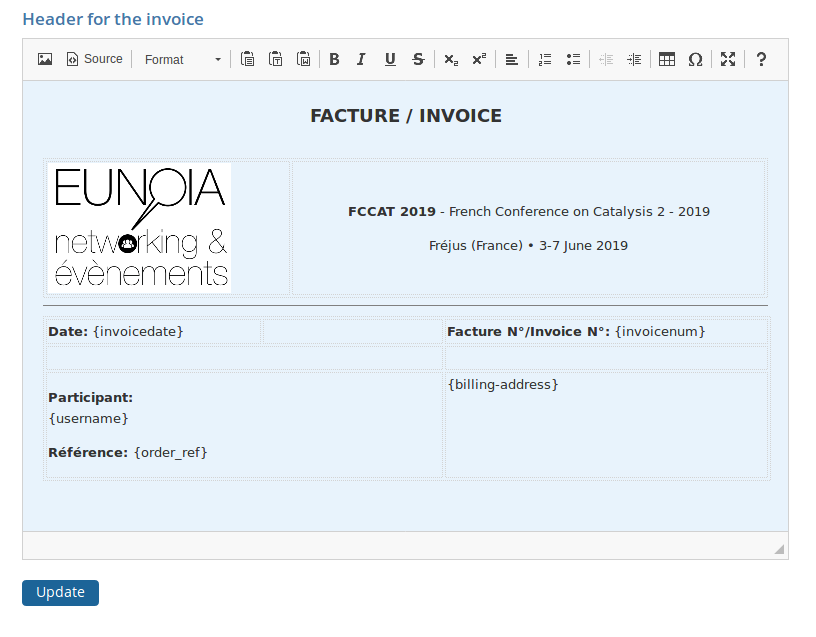
Configure the form
- The section devoted to the configuration of the form contains an overview of the fields already included on the form. A few fields are included by default, for example, the billing address of the delegate. Any field added to the form is added to the overview. The overview list details about the field (its type, its label, its position on the form, whether it is mandatory and an optional time period during which it is shown on the form. These data can be edited.
- Items that can be booked by users can be added to the form by inserting and configuring ready-made components. There are several types of components, described in the next section and shown in the picture below. These consist of: a single option among several (radio buttons); several options among a given list of options (check boxes); an input box to specify a number of tickets (e.g. tickets for the conference dinner). These components can be used with or without prices, allowing in some cases, to register for free events (e.g. free workshops, free social event). In addition, you can also add helper components to the form (separators, texts, images).
- Once a component has been added to the form, it appears in the overview and is accessible for configuration. You can define dates of availability that coincide with your deadlines; you can edit the texts around the component (its label, instructions); you can reposition it on the form; you can specify options to choose from (e.g. registration for students, registration for academics); you can add prices, individual VAT rates, if applicable and add a discount code.
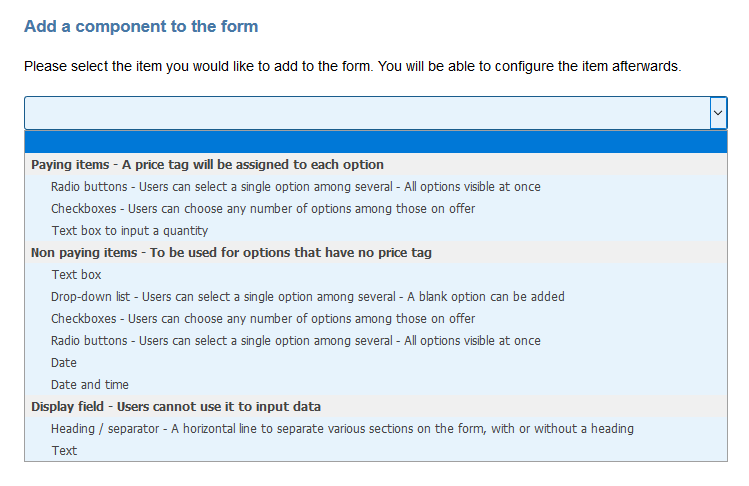
Choosing the right component to add to the payment form
The items that can be ordered on the form (conference registration fee, conference dinner, workshops) can be created by adding ready-made components to the form, and them editing their properties (label, price, options, instructions). These can be selected from a list shown in the figure shown above. What follows, describes the component and their suitability for various items.
- Paying items - radio buttons
Example showing radio buttons with price tags 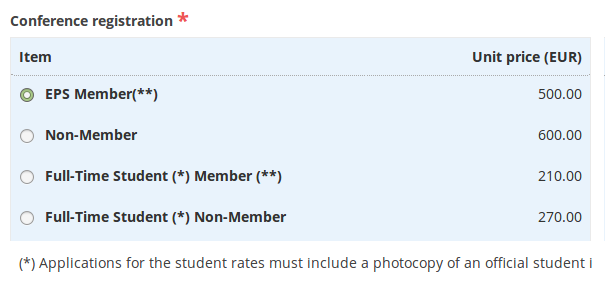
- Radio buttons are suitable if users must choose a single option among several.
- This is typically used for the conference fee.
- The first option is selected by default.
- It is possible to mix paying and free options, by setting the free options to 0.00.
- A discount code can be defined for each option.
- A quota can be defined for each option, or for a group of options.
- Paying items - check boxes
Example showing check boxes with price tags 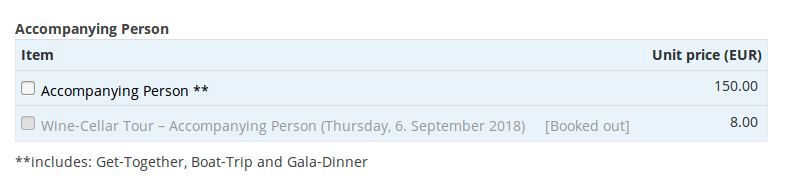
- Check boxes are suitable if users are allowed to select several options in a list.
- This is typically used for social events and workshops. Care must be taken to ensure that the various options do not overlap in time.
- If the choice is set to optional, users can choose not to select any option.
- If the field is set to mandatory, users are forced to choose at least one option.
- It is possible to mix paying and free options, by setting the free options to 0.00.
- A discount code can be defined for each option.
- A quota can be defined for each option, or for a group of options.
Setting quotas
- It is possible to set quotas on all the items found on a form (any form, in fact).
- To set a quota, go to Configuration / Quotas.
- The creation of a quota involves three steps:
- Name the quota (e.g. "Conference dinner"),
- Set the quota (e.g. "300"),
- Select all the items that contribute to the quota (e.g. "Dinner for the participant" + "Dinner for an accompanying person" + "Extra tickets for other accompanying persons".
- Once quotas have been defined, a menu labelled "Quotas" is activated on the "Participants" page. It allows administrators to track the number of orders for each item.
- When a quota is exceeded, it becomes inactive (gray) on the form. Further orders cannot be made.

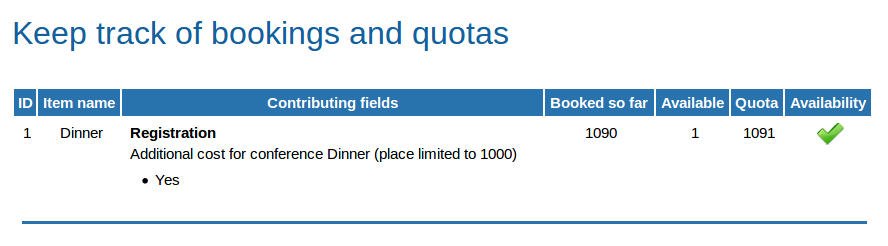
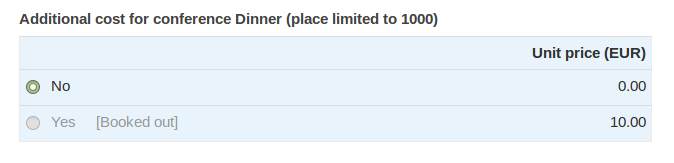
8.4. Permissions to access a payment form
Locate the functions
- Go to Configuration / bookings & payments / Form 1 [Conference registration] / 2. Form access.
- Make sure that the payment form is
active, in section 1. Otherwise, the form will not be accessible, no matter what permissions you set. - Section 2 contains several functions, which allow you to:
- define the users allowed access,
- to set deadlines on this access,
- to prevent editing of the form, if relevant. In this case, allowed users can view their order and download an invoice or a receipt, but they cannot edit the form.
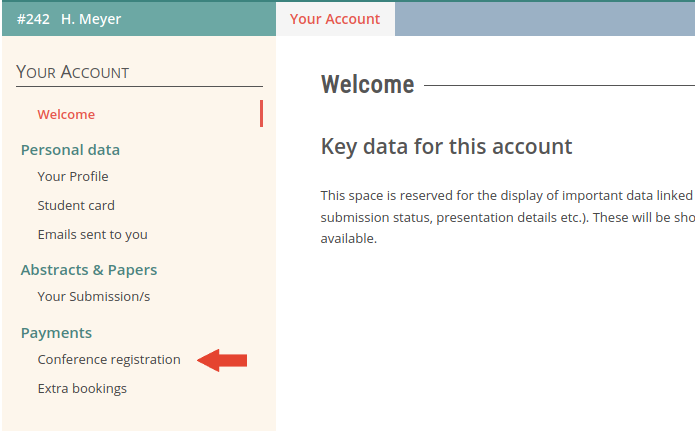
Allow access to all users
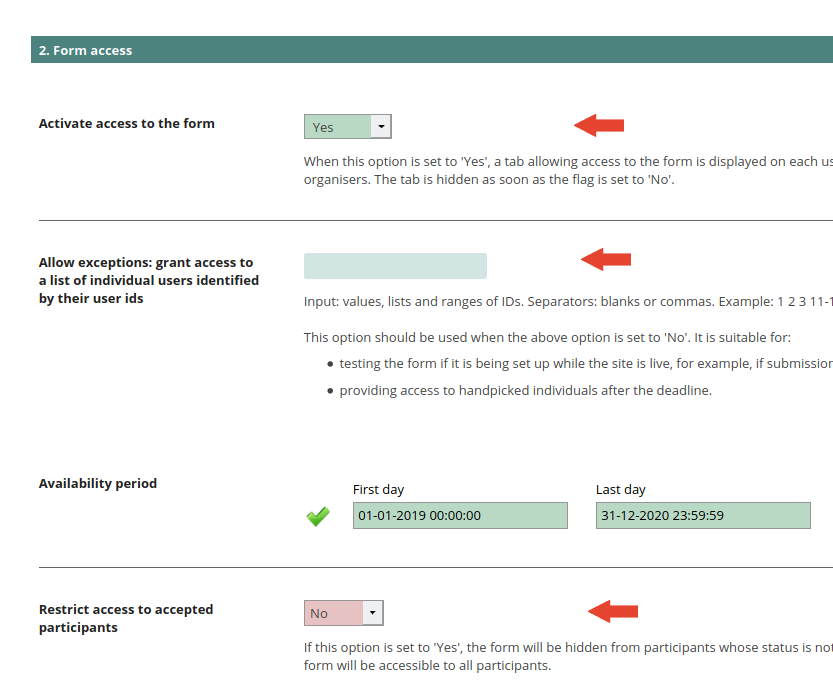
Allow access to accepted users only
"Accepted" or "Will participate" status to the users, you can ensure that only users selected with this function can access the form. 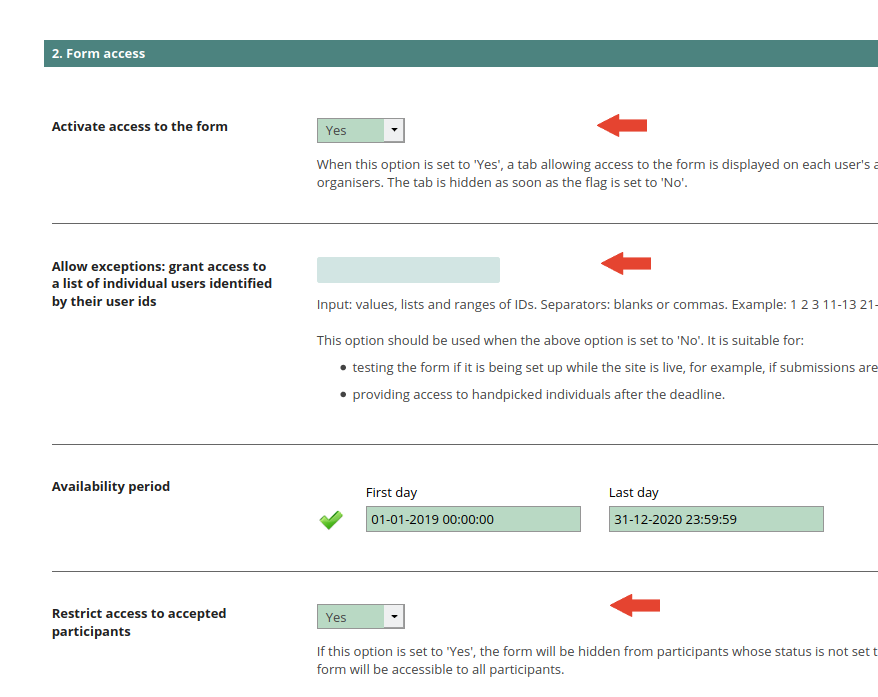
Allow access to a small list of users, for testing
- Payment forms are often set up at a later stage than the submissions. When this happens, the configuration of the payment module occurs on a live site that is already accessed by the participants. You can restrict access to administrators or other users involved in the setup, so that they can access the forms on their accounts to view it and simulate payments in test mode. Once the tests are completed and you decide to go live, you can lift this restriction and allow all, or accepted users, as described above, to access the form.
- The restriction to a select number of users is shown in the figure below. General access to the form must be disabled, while the list of authorised users, identified by their user-ids, must be provided. This list can be modified at will, but should be erased when going live. In this example, only users 1,2, 7, 8 an 9 will be able to have access.

Set time limits on the availability of the form
- Access to the form can be further restricted by setting time limits, as shown in the figure below.
- These can be made to correspond with your deadlines and can take your time zone into account.
- If you prefer not to impose deadlines, make sure that the time limits are set to start in the past and end after the event.

8.5. View and edit users' orders
- Locate the function
- Go to Participants / Bookings & Payments and access the menu associated with the relevant registration form.
- This page contains an overview list of the users and their registration details. A filter, at the top of the page, allows you to locate specific records in the list.
- The most useful components of that filter are the
Order status [Missing / Recorded]and thePayment status [Completed / Waived / Pending / Refunded / Partially refunded].and theInvoice number.
- Edit a user's registration record
- Each record features an overview of the user's payment record, as well as an edit button
- Clicking on the edit button leads to a page containing functions that can be used to modify a user's record and input an offline payment into the COMS database.
- Input a payment record
- If a user has paid offline, by bank transfer or by check, the transaction needs to be manually input into the COMS database.
- To do this, edit a user's record, as described above, go to Order form and make sure an invoice exists.
- If an invoice exists, a download link should be visible.
- If there is no invoice, it means that the user has created an order, but has not confirmed (registered) it on the second tab of the payment form. In this case, you need to confirm the order on that second tab, before inputting the payment. Once an invoice has been created, you should see the download link for that invoice.<
- Go to Input an offline payment or a refund, input the paid amount, select the payment method and save your input. The payment status will be automatically updated.
- Create or modify an order on behalf of a user
- Once users have confirmed an order and created an invoice, they cannot modify their order.
- However, administrators can do it on their behalf, by editing their payment form at Participants / Bookings & Payments / [Payment form].
- To do so, simply locate the user in the list, edit their record and access their payment form.
8.6. Export payment records & download invoices
Export payment records
- Go to Participants / Bookings/Payments / [Registration form] / Select the records to work on and select the records you want to include in the export.
- Typically, you would set the filter to
Order status: Recorded, to select all orders, whether pending or completed. you can, however, limit the records toPayment status: completed,Payment status: missingor select a single user by name, email or by their user-ID. Other filtering criteria care available. Resetting the filter will select all the records. - Once suitable records have been selected, go to Participants / Bookings/Payments / [Registration form] /Work on the selected records.
- This section contains a list of the selected records. At the top of the list, you will find an export link to Excel. All the data collected on the payment form will be included in this export, as well as the status of the payments.
Download invoices
- Go to Participants / Bookings/Payments / [Registration form] / Select the records to work on and select the records you want to include in the export.
- Typically, you would set the filter to
Order status: Recorded, to select all orders, whether pending or completed. you can, however, limit the records toPayment status: completed,Payment status: missingor select a single user by name, email or by their user-ID. Other filtering criteria care available. Resetting the filter will select all the records. - Once suitable records have been selected, go to Participants / Bookings/Payments / [Registration form] /Work on the selected records.
- This section contains a list of the selected records. At the top of the list, you will find a download link for the invoices. when you click on the download link, the selected invoices are contained in a zip file that can be saved to your computer and unzipped.
9. On-site registration & tracking
- A Plug & Play module to scan QR codes issued to participants and record their arrival in the database.
- A manual function to record arrivals, by setting a flag in a list.

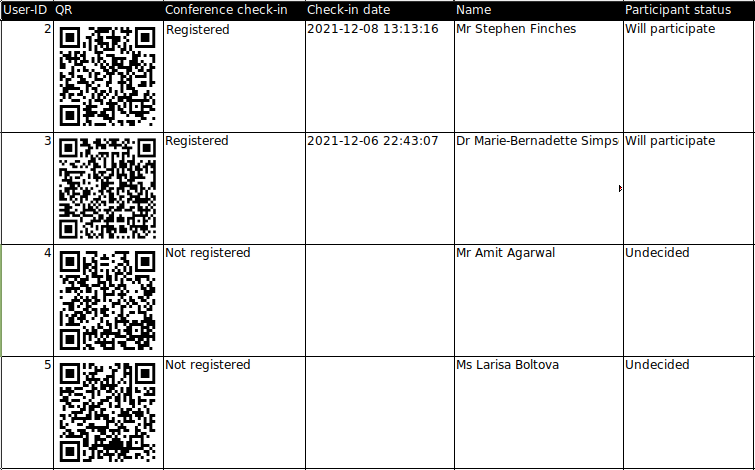
Scanning QR codes
If you are planning to scan QR codes (fig. 1), you will need to:
- Construct a list of participants who are authorized to receive a QR code and use it to check in.
- Activate the display of the QR codes to authorized participants and notify them by email.
- Set up one or more devices (laptops, PCs, tablets) with webcams that can be used to scan the QR codes.
- Note: alternatively to a webcam, you can use a smartphone to scan the codes.
- Use the scanning function provided by COMS to register the participants.
Recording arrivals manually
If you are not planning to scan QR codes, you will simply need to:
- Activate and display the list of participants on a suitable device in the reception area.
- Identify the participants and record their arrival by setting the relevant option in a drop down list.
9.1. On-site check-in
Registered.Set up a scanner (option 1: use a portable webcam)
This is our recommended option, as it is very easy to set up and portable webcams are inexpensive.
- What you need
- A laptop (recommended), a tablet or a desktop computer with a USB port.
- An external webcam for laptops or desktop computers, with a USB cable. The webcam will be hand-held.
- An Internet connection and a browser to access the COMS site and its scanning function.
- Choosing a webcam
- Plug and Play devices that work without the need to install any software, are recommended. Make sure that they are compatible with your operating system.
- Since the device will be used as a hand-scanner, choose one that is comfortable to hold.
- A webcam with auto-focus is a little bit easier to use, though the scanning works well without.
- Set up the device
- Plug the webcam in a USB port and follow the manufacturer's instructions, if any.
- Log in, as an administrator, to the COMS site, on the computer you just set up, and go to to the scanning function at Participants / On site registration / Conference check-in.
- Find the list of users, below the filter. On the left hand-side, you will find the scanning function, which consists of a display area and two buttons used to start and stop the scanning (Fig. 1).
Set up a scanner (option 2: use a smartphone)
- What you need
- A laptop (recommended), a tablet or a desktop computer with a Wifi connection or a USB port.
- A smarthphone with access to an app store and a Wifi connection.
- If using a Wifi connection, ensure that both devices are on the same network.
- Software to connect the two and allow the use of the phone as a scanner.
- Choosing the software
- There are many options to choose from. These can be found by running an Internet search for "use smartphone as a webcam".
- This will require installing software on both devices: downloading an app on the phone and installing software on the computer that registers the users.
- We have tested the software at
https://iriun.com/, which works on the main operating systems and phones.
- Set up the device
- Install the software on the devices and make sure they are connected, either by Wifi (on the same network) or by a USB cable.
- Log in, as an administrator, to the COMS site, on the computer you just set up, and go to to the scanning function at Participants / On site registration / Conference check-in.
- Find the list of users, below the filter. On the left hand-side, you will find the scanning function, which consists of a display area and two buttons used to start and stop the scanning (Fig. 1). If you have more than one camera connected to your computer (e.g. the computer's camera and your connected smartphone), you will be able to choose the camera via a drop down list before starting the scanning.

Test the scanner
- Activate the scanner
- Click on
Start scanningto activate the webcam.
- Click on
- Give permission to the camera
- You will need to grant
conference-service.compermission to use the camera. This works differently on every browser and might require that you edit your browser settings. If this is necessary, search for permission to enable thecamera. - Fig. 1, above, shows the permissions settings for Firefox. As soon as you click on the start button, a popup appears, asking you to select a camera and grant permission to record.
- If the setup is correct and the permission to record has been granted, the webcam will start recording your surroundings, which will be shown in the display area, below the start button (Fig. 2).
- You will need to grant
- Find sample QR codes to scan
- You can test the scanning on random QR codes, presented on screen or paper. These can be any codes, not just codes generated by COMS. The decoded information, which in most cases consists of a URL, will be printed as text above the display area.
- When a code is decoded, the scanning function emits a beep. Switch your computer sound on if you want this feedback.
- It takes a few minutes of practice to be comfortable with the scanning.
- You can also test COMS QR codes by logging onto user / test accounts on a phone and scanning the codes found on the dedicated QR code page.
Set up the check-in function in COMS
- Step 1: Find the setup page for the configuration of the check-in module
- Go to Configuration / On site registration / Conference check-in.
- Step 2: Activate the check-in module
- This will activate all the functions needed to manage the module.
- The activation function is located at the top of the page, at 1. Activate the module.
- Step 3: Construct a drop down list of registration statuses
- This can be done at 3. Edit the drop down list of registration options. The resulting drop down will be displayed for each user on the page used to register the participants (Fig. 2). It will be used to record changes in the registration status of each person.
- Before the registration, all users are assigned the default status
Not registered. - When registered with the scanner, this status will automatically change to
Registered. - At a minimum, the drop down list should consist of these two statuses.
- It is possible, however, to add any number of options to the list, for instance
CancelledandWaiting list. These statuses will have to be set manually.
Define a list of participants who will receive a QR code on their COMS account
- Purpose of the QR code
- The QR code stores data that uniquely identify a user and the COMS site of your event. No other data are stored.
- When the QR code is scanned at the event registration desk, it automatically registers the participant. It is therefore necessary to limit the attribution of QR codes to participants who are expected to attend the event (attendees).
- Defining the list of attendees
- Go to Configuration / On site registration / Conference check-in / Define the list of attendees.
- This section contains a filter that can be used to select the users who will get a code.
- The filter consists of two components that can be combined: one, an
additive filter, is used to include users; the other, asubtractive filter, is used to exclude users. In most cases, the additive filter will be sufficient. - Several criteria can be used to include users. For example, you can include all users; instead, you can include participants who have completed their payment for participation in the event; you can also include participants who have been accepted based on other criteria than payments (e.g. following an application process); you can also include individual users. These criteria can be combined. For example, you might include participants who have have completed their payment and add a few organisers who have not, but need to be registered as participants.
- To exclude users from the list, simply add their user-id/s to the subtractive part of the filter.
- After saving the filter, a list of all the users, identified by their user-ids, will be displayed below the filter. You can copy and paste the list in the filters of the
Participantspage, for checking. You can also use it to filter the recipients of the handpicked template in theEmailsmodule. - If you are testing the module, you can set the filter to include just a few administrators, identified by their user-ids.
Display the QR codes on the participants' accounts
- Activate the display
- Before the event, you can activate the display of the QR codes on the participants' accounts and notify them by email.
- To activate the display, go to Configuration / On site registration / Conference check-in / 2. Display a QR code that identifies the participant.
- The QR codes will be displayed on a dedicated page, accessible after login.
- You can verify that the display is working correctly by accessing a few accounts at Participants / Accounts / View, edit user data, making sure that you check both users who are included and excluded from the list of attendees.
- Participants who are included in the list will be able to show the code on their phone or print it on paper.
- Email the attendees to inform them of the availability of the QR code
- In order to target the right users, you will need to use a bulk email with an appropriate filter.
- The handpicked template can be used. To set the filter, either use filter components corresponding to the filter set for the QR code (e.g. filter for users who have paid their conference registration, if appropriate). Alternatively, you can copy the list of user-ids displayed under the filter set at Configuration / On site registration / Conference check-in / 2. Display a QR code that identifies the participant and paste it in the filter component that applies to a list of user-ids.
Register the attendees at the event
- Set up and test one or several scanners for the registration
- This should follow the setup procedure described above. If you want to set up several scanners, you will need to provide an admin account for each scanner operator.
- Navigate to the registration function at Participants / On site registration / Conference check-in.
- Two options are available to set the registration status of a participant:
- Automatic registration, by scanning a QR code This will retrieve the user's record in the list, display it at the top of the list and set the registration status to
Registered. - Manual registration If a user does not present a QR code at the reception desk, you can retrieve his or her record by means of the quick filter displayed above the list. Either input the
nameoruser-idof the participant. Once the record has been retrieved, you can manually set the status in the list to any of the available options shown in the drop down list. The manual option can also be useful if you need to change an existing registration, for instance set it toCancelled.
- Automatic registration, by scanning a QR code This will retrieve the user's record in the list, display it at the top of the list and set the registration status to
- Update of the users' accounts
- As soon as the registration status changes on the check-in page, it is automatically updated on the user's account, as shown in Fig. 3.
- Export the list of registered participants
- You can export the list of users and their participation status to Excel by clicking on the link above the list.
- The filter, above the list, can be used to select the users to include in the export.
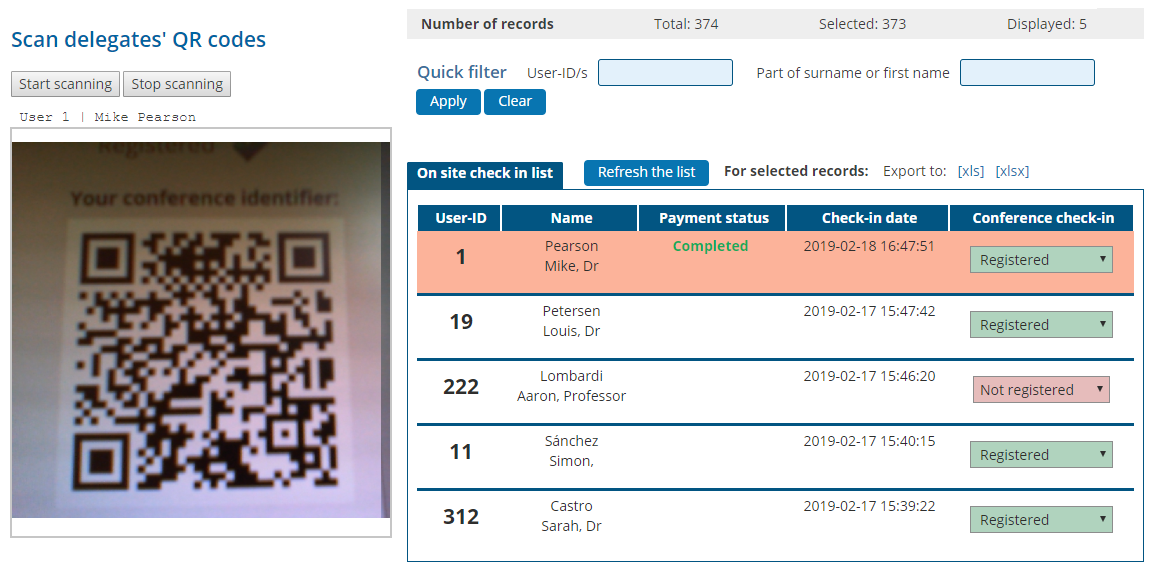
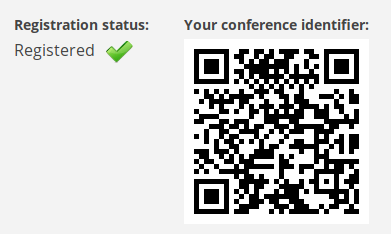
Appendix 1: Testing the scanner setup: results of our tests
- Operating systems
- We have successfully tested the scanning on three operating systems:
[Windows, Linux and Mac]. - All performed equally well.
- We have successfully tested the scanning on three operating systems:
- Browsers
- We have successfully tested the scanning on the following browsers:
[Firefox, Chrome, Safari, Edge]. - Edge did not perform as well as the others, but it worked. Firefox, Chrome, Safari all performed very well.
- Older browsers might not work. For example, if you use Safari, make sure you use at least version 11.
- As of 2019, the latest versions of the browsers listed above, all worked.
- We have successfully tested the scanning on the following browsers:
- Camera activation in the browser
- Firefox had the best interface, presenting a popup window with all the required settings, as soon as the camera was activated. If more than one webcam were plugged in, it was easy to swap them.
- Chrome and Safari were easy to use if a single webcam was connected. To select another device than the default webcam (for instance the one embedded in the monitor) required editing the browser settings.
- Edge did not have an intuitive interface. It was difficult to change the webcam.
- Computers
- We tested the scanning on desktop computers and laptops of various sizes.
- All worked, but smaller laptops (12 inches or less) were less comfortable to use.
- Lighting
- Poor lighting or light reflections from windows can hinder the decoding and might require adjustments
- Webcams
- We tested three webcams
[Logitech, Microsoft, Canyon]. - All worked well.
- We tested three webcams
- Our recommendation for the choice of hardware and browser
- Webcams: We would recommend a webcam with auto-focus, though all seem to work well.
- Computers: Both desktop computers and laptops can be used, bearing in mind that the scanning process is CPU intensive. Very lean, energy saving devices like Chromebooks, might be slow. Laptops, being easy to set up and move around are very well suited.
- Browsers: All modern browsers can use a camera. Make sure you are familiar with the camera settings of the browser you choose.
- Operating system: Windows, Mac OS and Linux worked equally well in our tests.
10. Emails
The configuration and management of emails sent to the users is performed on the Emails page, accessible through the Emails tab, on the horizontal navigation bar. The various functions of the emails module are as follows:
- General settings that need to be configured in the initial setup.
- Email alerts, used to notify administrators of specific events.
- Automatic emails, sent in response to users' actions.
- Bulk emails, sent to targeted groups of users by the administrators.
- Notification emails, sent to notify users of their participation status or the status of their submission/s.
- A mail log that records all emails sent out by the system.
10.1. Initial setup & general functions
Initial setup
These are settings that should be configured before you go live.
- Set the sender of the emails
- Go to Emails / Overview and settings / Set the sender (From:).
- Input the
conference email, for instance myconf@example.com and adisplay text, for instance "Myconf 2019". - The given email address will receive the recipients' replies.
- Define a signature for all (or some) emails
- Go to Emails / Overview and settings / Set the signature.
- Your input will be used to substitute the placeholder
<signature>, wherever it is found. - By default, this placeholder is used in all emails. It can, however be removed, if needed.
- Set the default language of the emails
- Go to Emails / Overview and settings / Default language and make sure that the selected language corresponds with the language selected for the site.
- If two or more languages are used, the emails language should be the main / default language.
General functions
- Placeholders
- The emails can be personalised by means of
placeholders. These are inserted in the texts of the emails and replaced by the values associated with each user (e.g. names, submission titles, presentation details etc.). - Go to Emails / Overview and settings / Placeholders to find a list of the placeholders.
- Two types of placeholders can be used:
predefined placeholders, corresponding to standard, predefined variables (e.g. surname, abstract title) andcustom placeholdersthat correspond to custom variables, created by administrators (e.g. "Food preference" or "Selected workshop"). - Both types are listed on the page. They can be copied and pasted into the texts of the emails.
- The emails can be personalised by means of
- Audit emails
- You can get copies of automatic emails sent to the users, allowing you to monitor activity on the site.
- Go to Emails / Overview and settings / Get copies of emails and enter a list of emails that will receive copies of all automatically generated emails.
10.2. Automatic emails
You can set up emails to be sent out automatically in response to specific actions taken by the users: when they register an account, they submit or withdraw an abstract, upload a document, fill in a form, complete a payment etc.
- Locate the automatic emails
- Go to Emails / Automatic emails / Activate and edit the emails. All the automatic emails are listed on that page.
- Activate suitable emails
- Go through the listed emails and activate those you would like to use; deactivate those you do not need. For example, if you do not wish to send an email to a user who withdraws an abstract, make sure that the template labelled
Send email on submission withdrawalis switched off. The list of emails available depends on the modules that are active. If payments are not in use, emails related to the payment functions will not be listed. - Edit the emails
- Most of the email templates are prefilled, in English, German and French. You can modify these texts to suit your needs. Placeholders can be used to personalise the emails.
- Monitor activity
- Once the emails have been activated and edited, they will be triggered automatically in response to users' actions. If you have set up audit emails, you will receive copies at the designated email addresses. If not, you can still check the emails at Emails / Mail log / Automatic emails.
- List of emails on users' accounts
- Users can view all the emails sent to them on their account, on a page accessible through the Emails tab.
10.3. Emails sent in bulk
The COMS system allows you to send emails to any group of users, at a time of your choosing. Templates useful for specific tasks are provided, often prefilled with a standard text corresponding to the task at hand. For example, there is a template to target authors of accepted (or rejected) submissions; another to contact all users, etc. All the templates can be edited and personalised by means of placeholders.
- Locate the bulk emails
- Go to Emails / Bulk emails. All the templates are located in this section.
- Select a suitable email template
- The bulk emails section lists a number of templates that target predefined sets of users. For example, you can find templates that target all users, all submitters, all speakers, all submitters of accepted papers or posters, all reviewers, all presenters, all users whose registration payment is still due etc.
- Edit the texts and subject lines of the templates
- The email templates are provided with predefined texts and subject lines that suit the task at hand, for instance inform submitters of accepted papers of the status of their submission. These texts and the subject lines can be edited or replaced entirely with your own texts.
- Preview the emails
- After editing and saving the text of an email template, you can use the preview function to check the list of recipients, as well as the content of all the emails.
- Send the emails and track the result
- When you commit to sending the emails, these are stored in the email database where they queue to be sent out. The mail log, accessible at Emails / Mail log / Bulk emails, records the status of the task.
- Send an email to hand-picked users
- The last of the bulk email templates, found at Emails / Bulk emails / Hand-picked users is designed to allow flexible targetting of the recipients. While the other bulk emails reach predefined sets of recipients, the hand-picked template comes with a filter that can be used to select any subset of the users. The selection of the recipients proceeds in two steps:
- First, use the filter to make a broad selection of the users, for instance all presenters whose registration fee is still due.
- Review the list of users generated by the filter and manually refine the selection.
10.4. Notification emails
Organisers can define a list of statuses to use in both cases. Each status is associated with an email template that can be used to communicate with users or submissions assigned the corresponding status.
10.5. Spam-prevention measures
Avoiding spam filters
- To prevent emails sent from your COMS site from ending in spam filters, we have to ensure that the sender comes from an email with the domain name of our email server (conference-service.com). Receiving email servers check this.
- Each site has a unique acronym, which we use to construct the URL of the site. For instance, a site could use
coms-sitefor its URL:https://conference-service.com/coms-site - The email sender for this site is therefore
coms-site@conference-service.com. It contains our domain and as such should be accepted by the receiving servers. - When participants receive an email sent out from your COMS site (e.g. coms-site), their answers are received by
coms-site@conference-service.com(the sender) on our server. - As soon as our server receives the reply, it redirects it to the email alias you provide in the COMS email module (email sender, e.g.
office@example.comif you use this email in COMS). - If you change the email alias, our server will redirect to the newly input email.
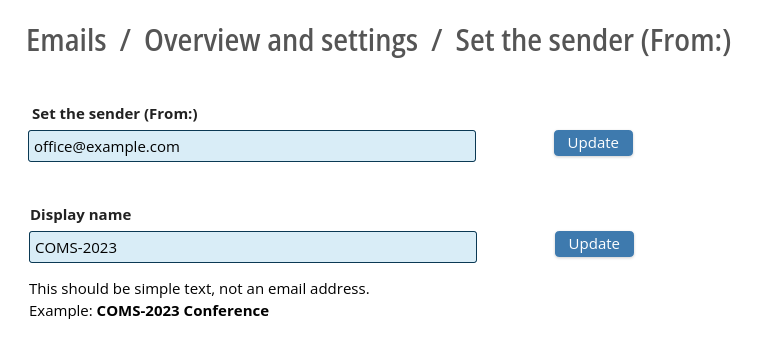
11. Website content
- A COMS site can be used to publish content, that is either public or private. Private content is only shown to users who log in to their account. Public content is visible to all.
- Administrators can create the pages and their contents on their accounts, in the configuration module.
- An editor is provided to format the content.
- Placeholders can be used to insert content that is generated by the software, like the conference agenda.
11.1. Public pages
Locate the function used to create public pages
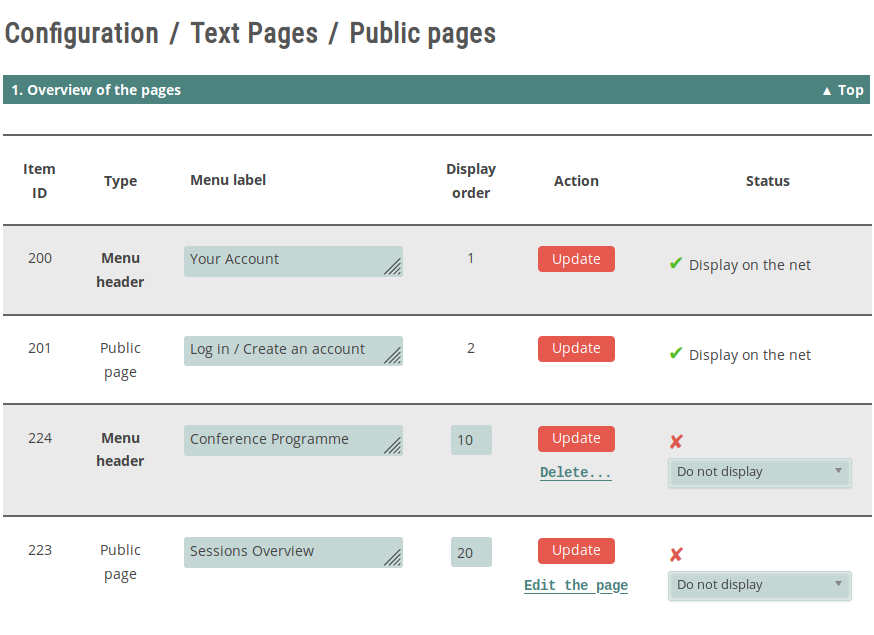
Create a page
Add a page button. This will add an item to the list and give you access to the newly created page. The menu item and the page will not be published on the net until you make them available with the dropdown on the right. Edit the content of the page
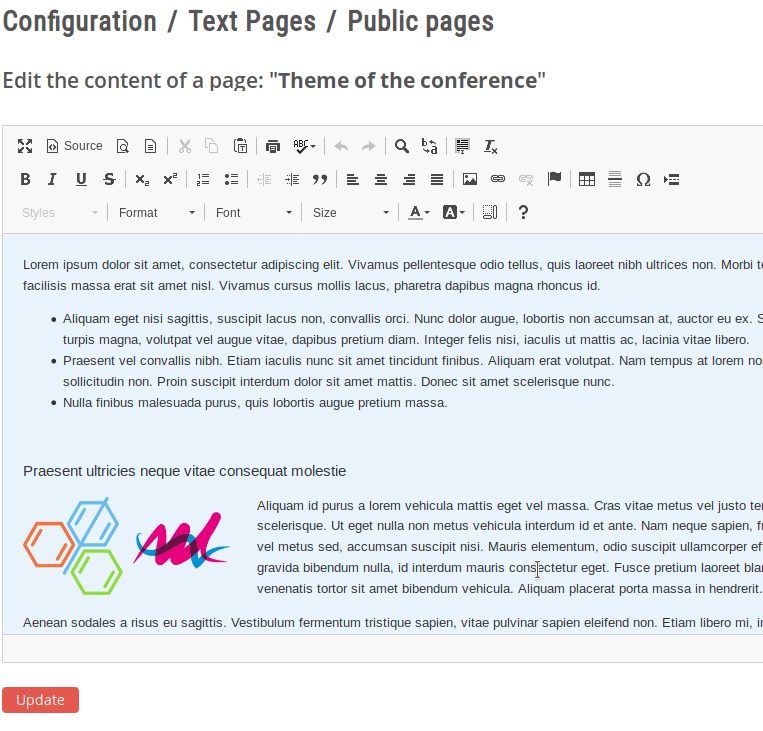
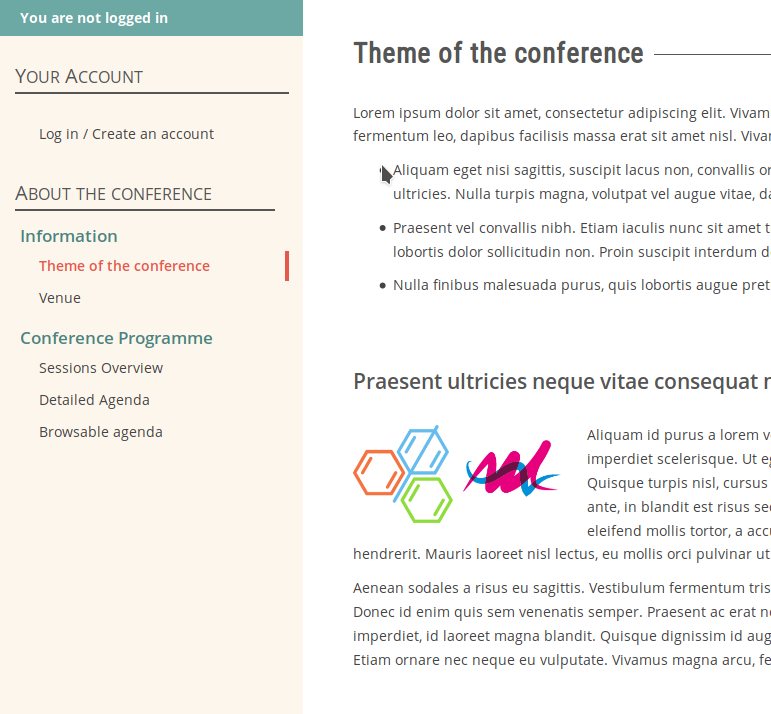
Position the page in the side menu
Group pages into sections
Add a header to the menu. This will create a new entry at the bottom of the list. Input the text of the heading, set its order value and save. 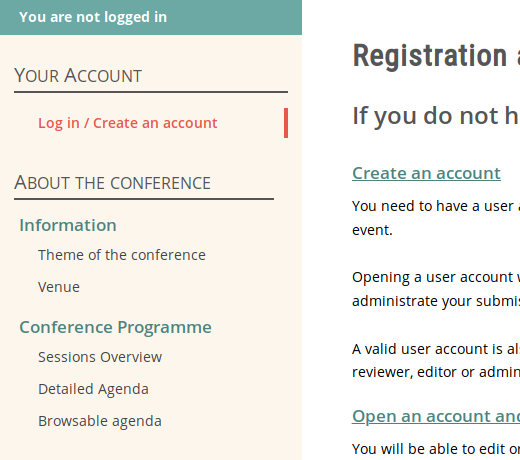
Publish / unpublish a page or a heading
Publish on the net / Do not publish.Images and links
Publishing content generated by the software
{detailed_agenda} will be replaced by a detailed view of the conference prrograme. Text can be added above and below the placeholder. A list of available placeholders is provided under the overview list of pages. 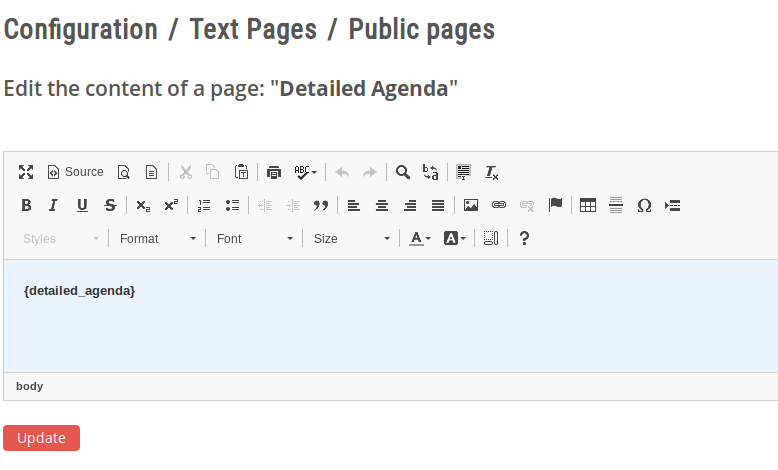
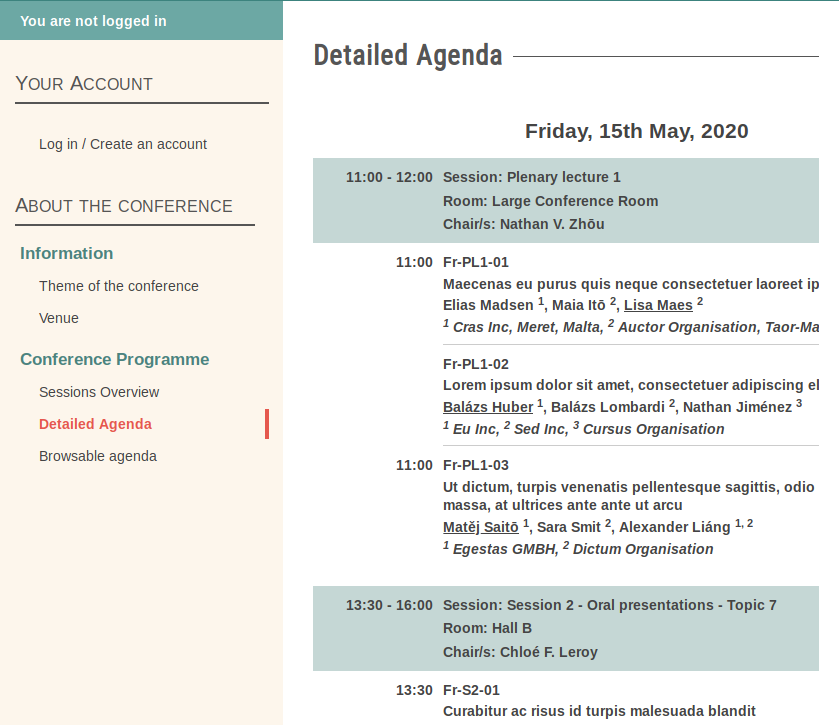
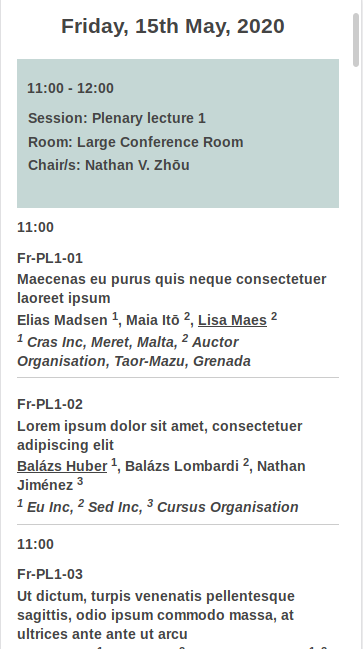
12. Exports
Three types of exports are described in this section:Exports of data collected on forms
- These refer to the profiles, submissions, reviews, registration and payment records and custom forms set up by admins.
- Filters are provided to select subsets of the records.
- The data can be exported to various formats (Excel, CSV, HTML, PDF and MS-Word).
Downloads of files uploaded by the users
- These refer to uploads related to the users and uploads related to the submissions.
- Currently, there are three available uploads for collecting user documents. They can be customised by administrators.
- For each submission, organisers can collect up to three files (extended abstracts, full papers and presentations). All of these files can be included in the interactive agenda and downloaded by its users.
- Uploaded files can be downloaded as a zipped file containing all the files.
- Filters are provided to select subsets of the uploaded files.
Exports and downloads of data generated by the software
- Invoices and receipts.
- The conference proceedings.
- The conference programme (agenda), in various forms.
- Personalised documents (certificates of participation).
12.1. Data exports
Exporting the abstracts
- Excel and CSV
- First option: export all abstracts
Go to Exports / Submissions / Export to CSV or Excel / All submitted abstracts and click on one of the links to export all the abstracts found on the site, either to Excel or CSV. - Second option: export a subset of the abstracts
Go to Submissions & reviews / Abstract selection / Accept or reject submission / 2. Accept, reject submissions one by one. This page displays a list of submissions which is used to select and classify abstracts and papers. At the top of the list, you will find several export links, including links to export the abstracts to Excel. The records selected for exports are defined by the filter at the top of the page. If the filter is cleared, all abstracts are exported. After setting the filter, you should be able to export any subset of the records, for instance, all accepted abstracts, or all accepted posters, etc.
- First option: export all abstracts
- HTML and MS-Word
- First option: export the abstracts in various sorting orders
With the option, you can export either all abstracts, or all accepted abstracts, to either HTML or MS-Word. You will be able to choose the order of the abstracts. Go to Agenda & proceedings / Book of abstracts (independent of the agenda) / Export the book of abstracts / 3. Export the abstracts in the desired order. You will be presented with a series of download links corresponding to the available formats (HTML or MS-Word), the selection of abstracts (all or accepted) and the desired order (e.g. presenters' name, submission ID, preferred type of presentation and by presenter name etc). - Second option: export a subset of the abstracts
Go to Submissions & reviews / Abstract selection / Accept or reject submission / 2. Accept, reject submissions one by one and find the export link to HTML:For selected records: Export submissions: [xlsx] [HTML] [MS-Word]. Clicking on the link will export filtered abstracts to a single HTML document. Before the export, you can set the filter to select the needed abstracts at 1. Select the submissions .
- First option: export the abstracts in various sorting orders
To be continued...
13. Managing the site
13.1. Log in to a user's account
Access this account (Fig. 1). The filter at the top of the page can help select the users 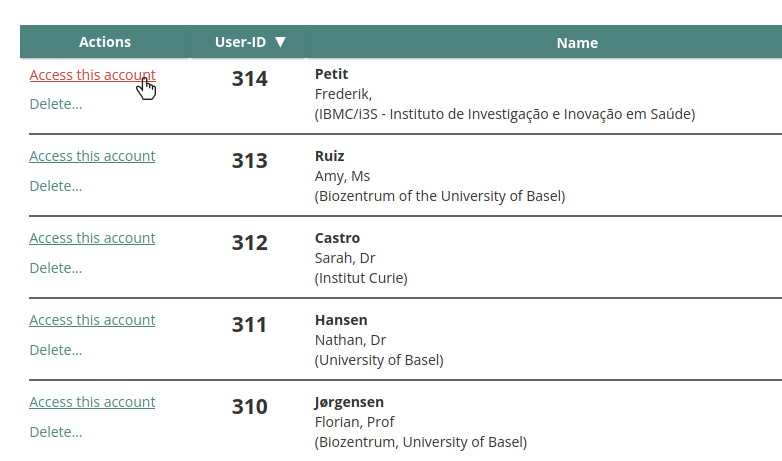
14. EMBO hybrid platform
14.1. About the EMBO platform
Presentation
- The hybrid / virtual platform consists of a single page app accessible from the conference management site allocated to the event.
- The agenda, on the left hand-side of the screen features a cover page, the program with embedded Zoom sessions or their recordings. Sponsors' logos can be added.
- The chat on the right hand-side lists all the participants, who can message each other and participate in discussions and Q&As.
- Once participants access the platform, they can freely move about, interact with other participants, view the agenda, access Zoom sessions and recording, without having to use passwords.
- The platform integrates tightly with the conference data (participants, agenda) and can be created on short notice.
- Participants are automatically registered to the platform.
- The agenda is based on the agenda created by the organisers.
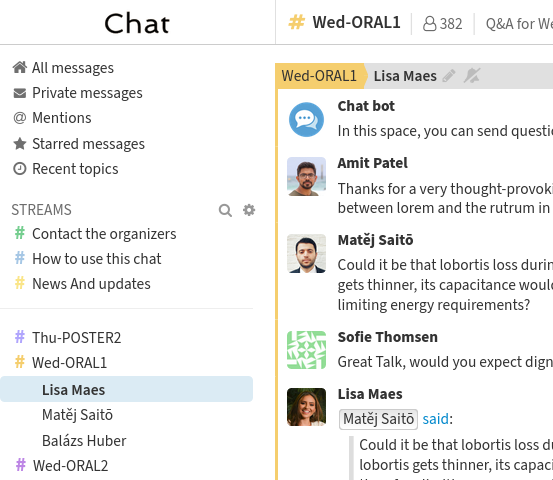
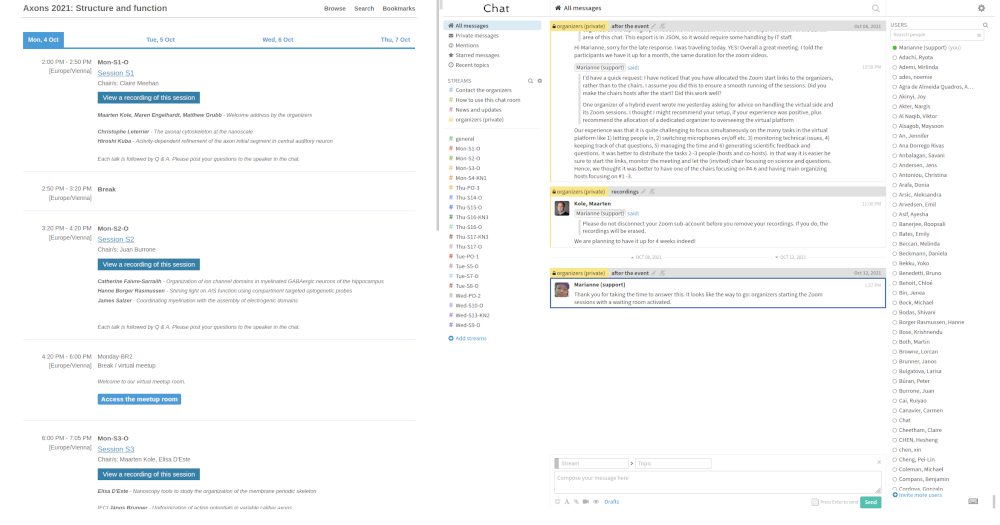
14.2. Before the event: creation of the platform
Initial setup
- As a first step, the platform will be created and made accessible to organisers (fig. 1).
- To access the platform, users will need to log in to their COMS account, at
https://conference-service.com/{conference-acronym}and find the access link, on the left side of the page (fig. 2).
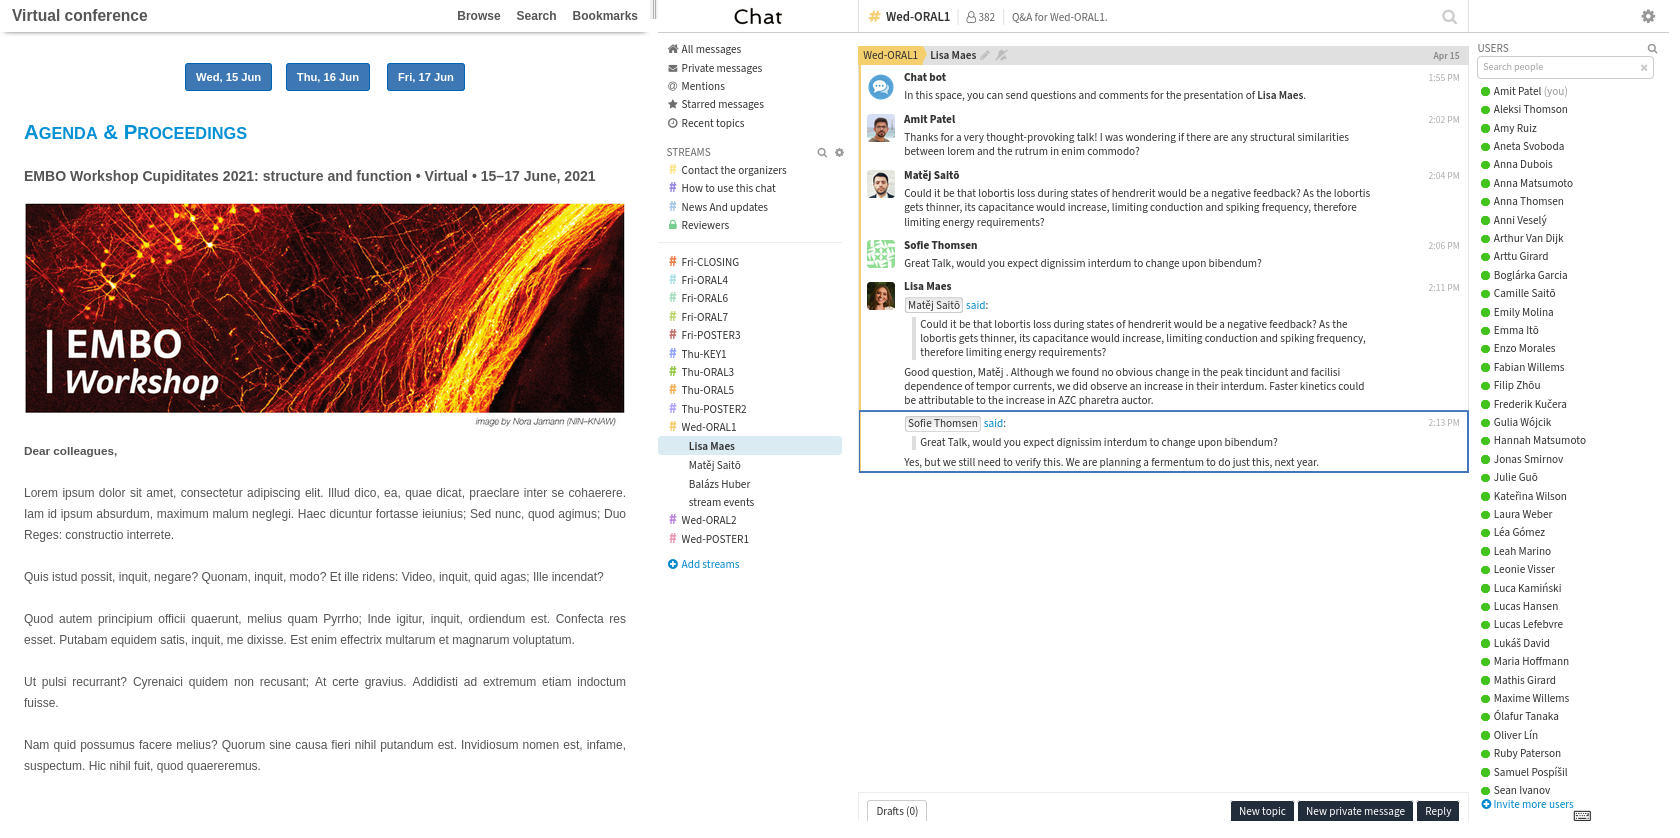
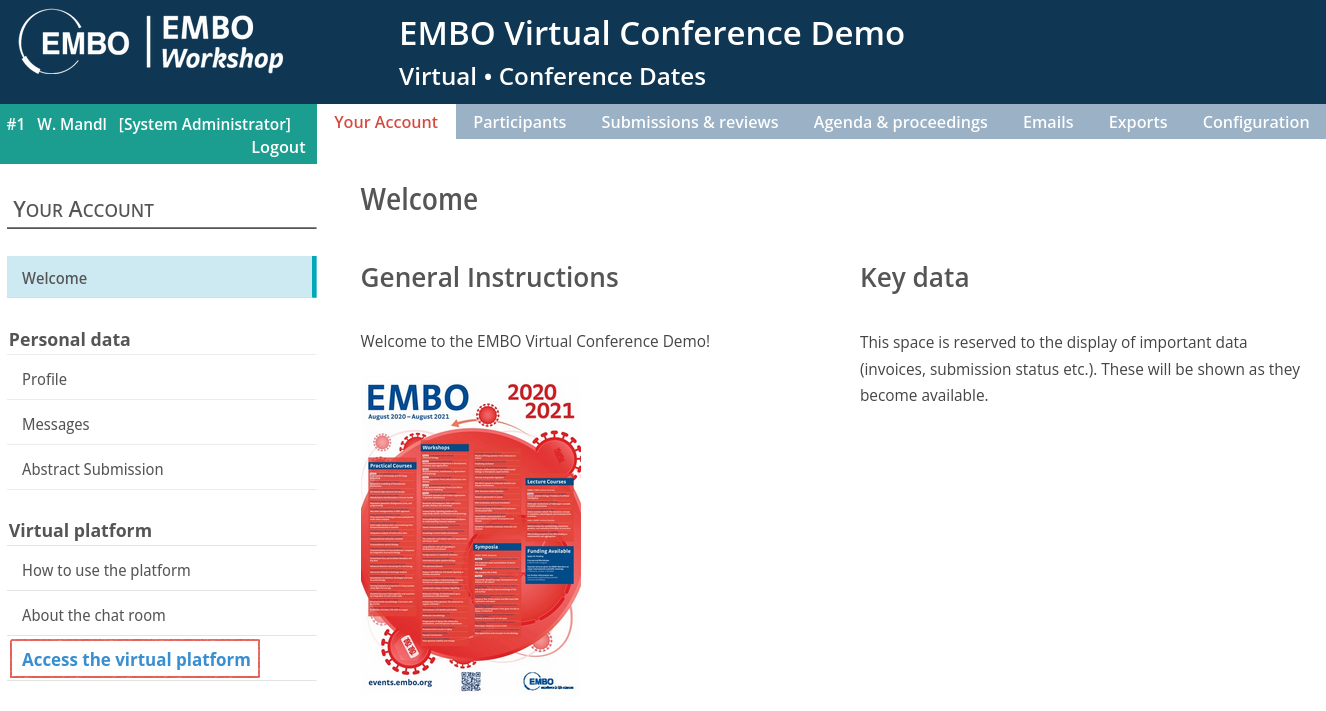
Registration of the participants to the chat
- Support staff will register all the participants to the chat and make sure that new users are also added to the chat as soon as they create an account.
- Users registered on the platform will be able to access it by clicking on the access link displayed on their account (fig. 2). Once on the platform, they will be able to freely access the agenda, the Zoom sessions and the chat. They will be able to see the list of participants (fig. 3) and send them messages.
- A support stream (channel), only accessible to organisers and admins, will be created in the chat. This will allow organisers to follow the development of the platform and provide input when needed.
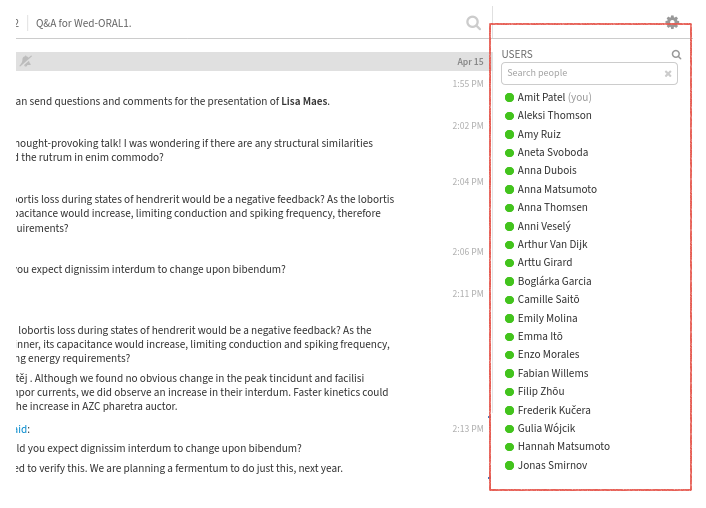
Creation of the agenda
- Organisers will be asked to provide a link to the Google sheet used to create and update the agenda published on the EMBO site. Support staff will use the data to create the agenda on the platform. Note that the provided Google sheet will only be accessible in read-mode.
14.3. During the event: managing the platform
Managing breakout rooms
- Step 1 - Presenters' access
Ahead of the session, contact the presenters and let them know that they should be ready to upload / share their presentation before the meeting. This means that they should be able to access the breakout rooms before the scheduled time and understand the upload procedure. To access the Zoom meeting, they will need to log in to their COMS account, access the platform and find the Zoom link in the agenda. An admin needs to start the session to allow them access. Steps 3 and 4, below, will also need to be ready before they access the meeting. - Step 2 - Start the meeting
Start the meeting, well before its scheduled time, by means of astart link ⧉, then perform steps 3 and 4, before letting the presenters in. Since Zoom meetings can last up to 30 hours once started, feel free to start a couple of hours in advance, so that speakers have enough time to prepare their room. If you want to prevent access by attendees during the preparation phase, you can enable the waiting room function (fig. 1). Once the meeting is set to start, you can disable the waiting room and let all visitors in. - Step 3 - Allow speakers to share their presentations
After starting the meeting and entering the session, find the"Share screen"button in the toolbar, at the bottom of the screen and access the settings linked to that function (fig. 2), by clicking on the arrow next to the button. Allow all participants to share, so that the presenters can upload their posters, slides or videos inside their allocated rooms. - Step 4 - Allow free movement during the session
For this, find the"Breakout rooms"button in the bottom toolbar (fig. 3), click on it and look for the settings button, which looks like a cogwheel, in the bottom left corner of the popup screen. Select"Allow participants to choose room", then click on"Open all rooms". - Step 5 - Invite the presenters to access their rooms and upload their presentations
The presenters should be present on the platform ahead of the session. After accessing the meeting, they will simply need to use the"Share screen"function in their allocated room in order to upload their presentation. - Step 6 - Allow all participants to access the meeting
Although participants will see the scheduled time of the session in the agenda, it might be useful to post an announcement in one of the streams of the platform chat, for instance the one labelled News and Updates. Be sure to disable the waiting room setting for free access.
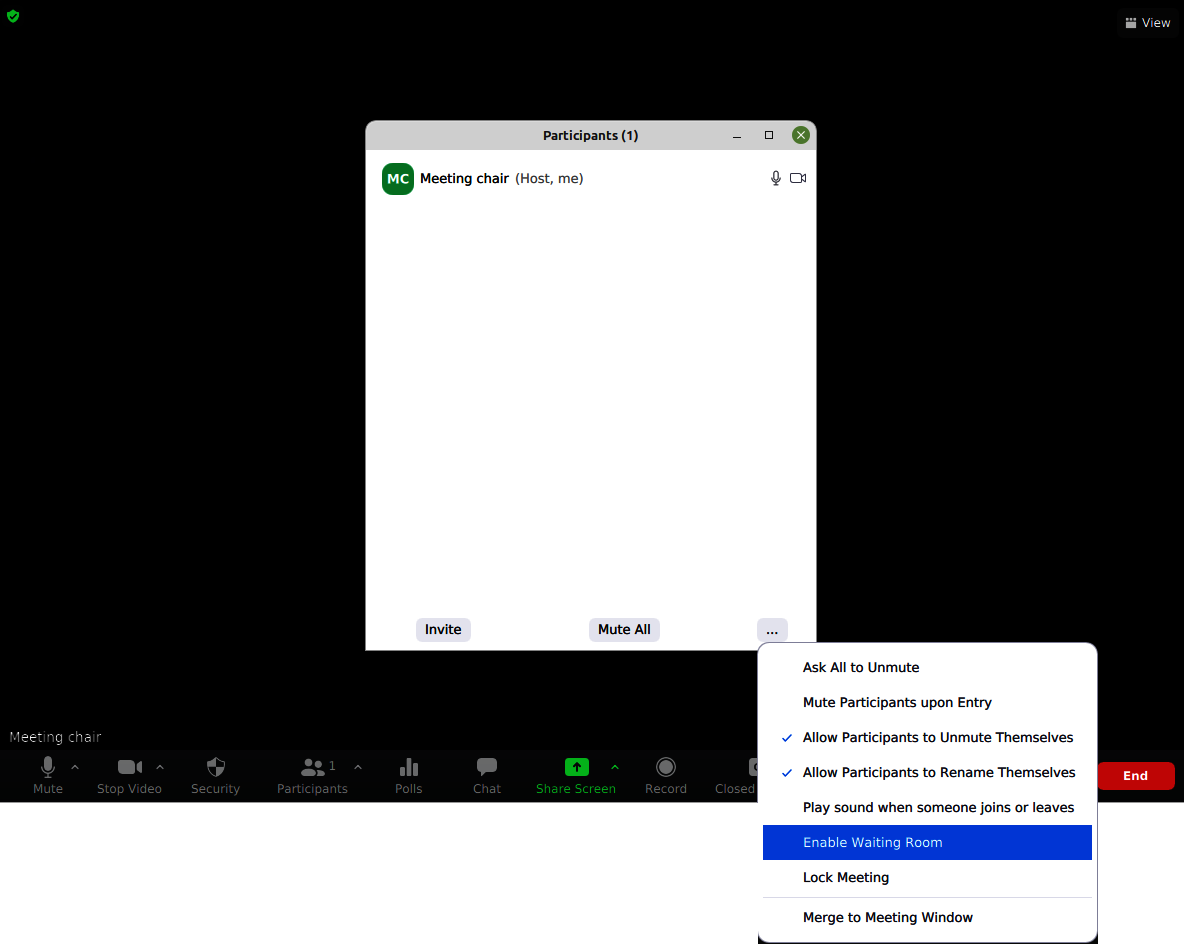
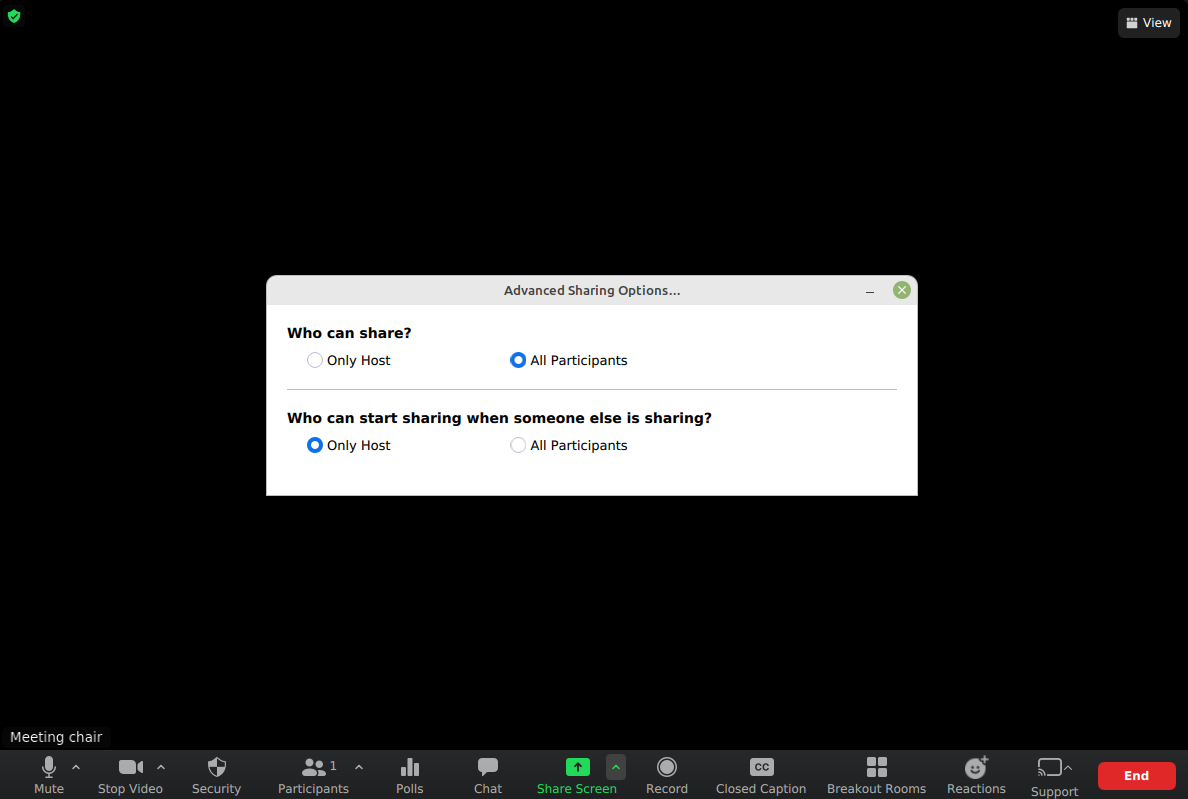
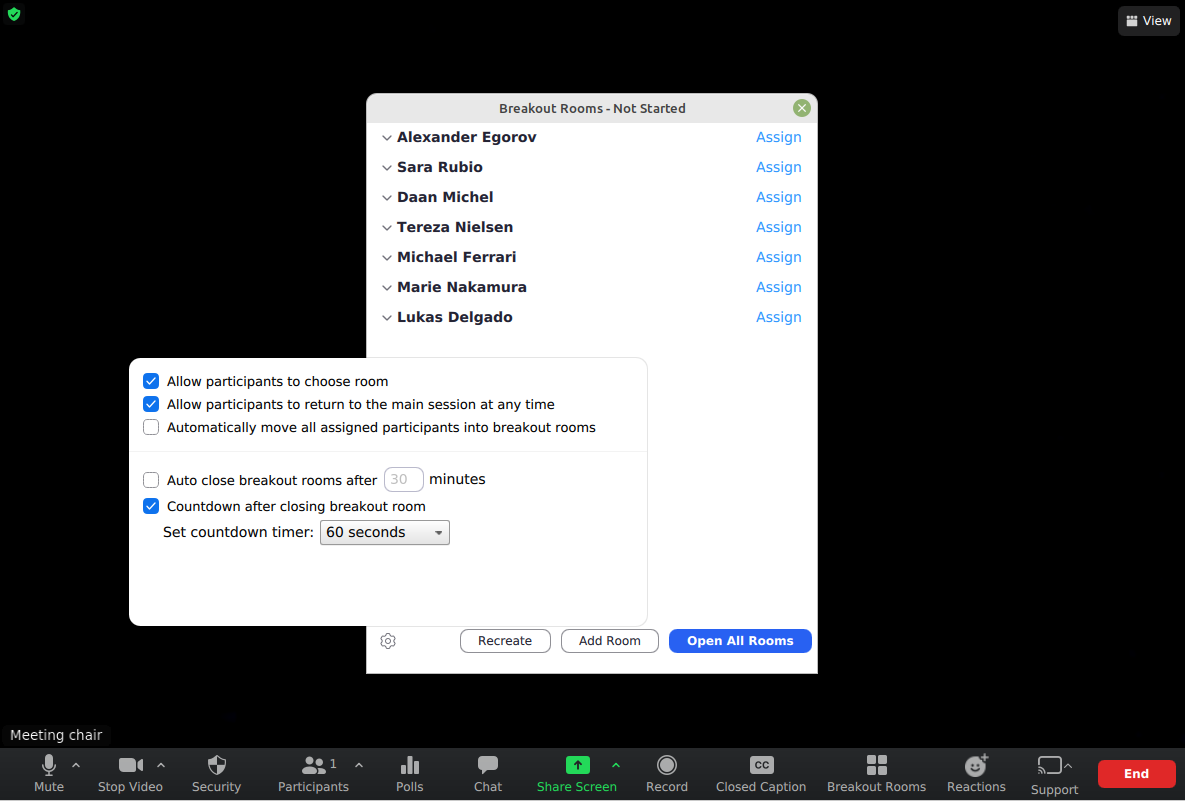
14.4. Breakout rooms: speakers' access
Virtual posters / Meet the speakers
- Step 1 - Access the virtual platform
- You will need to access your allocated Zoom room before the scheduled time of the session, in order to upload your presentation and get ready for visits from the participants. To access the virtual platform, first log in to your COMS account, which you used to submit your abstract (fig. 1). The login page for your COMS account is reached via a URL that looks like this:
https://conference-service.com/{conference-acronym}. - If you do not know the URL of your event, you can access it on the EMBO page used for your event. Simply find your event at https://www.embo.org/conferences-training/#/, then click on the registration button labelled
Online application(fig. 2). A password recovery function is accessible on the login box. - Once logged in to your account, you should find a link to the platform, on the left hand side of the page. Use it to access the platform (fig. 3).
- You will need to access your allocated Zoom room before the scheduled time of the session, in order to upload your presentation and get ready for visits from the participants. To access the virtual platform, first log in to your COMS account, which you used to submit your abstract (fig. 1). The login page for your COMS account is reached via a URL that looks like this:
- Step 2 - Locate your session in the agenda and access the Zoom meeting
- The virtual platform consists of a screen split in two parts, with the agenda displayed on the left hand side and a chat displayed on the right hand side (fig. 4).
- Navigate to your session in the agenda, on the left. A zoom meeting should be displayed. It will be accessible as soon as the organisers start the meeting. You can use either the web embed or the Zoom app to access it (fig. 5). If feasible, use the app, as it provides better functionality for speakers. With the web app, accessed through the web embed, sharing your screen might be more difficult, as suitable permissions must be given to your browser.
- If a problem occurs, for instance, if the Zoom session is not displayed or the session is not yet started, you can get in touch with the organisers in the chat, in the stream labelled Contact the organisers, or by email.
- Step 3 - Navigate to your allocated breakout room
- Once in the Zoom meeting, you should be able to access the breakout rooms by clicking on the
"Breakout rooms"button in the bottom toolbar (fig. 6). The breakout rooms are identified by the speakers' names. Find your own and access your room. - If you do not see a
"Breakout rooms"button, get in touch with the organisers. - Once in your breakout room, use the
"Share screen"button to upload your presentation. You should then be ready to present and discuss your poster with visitors. - Attendees will be able to freely navigate to all the rooms, as soon as the organisers let them in.
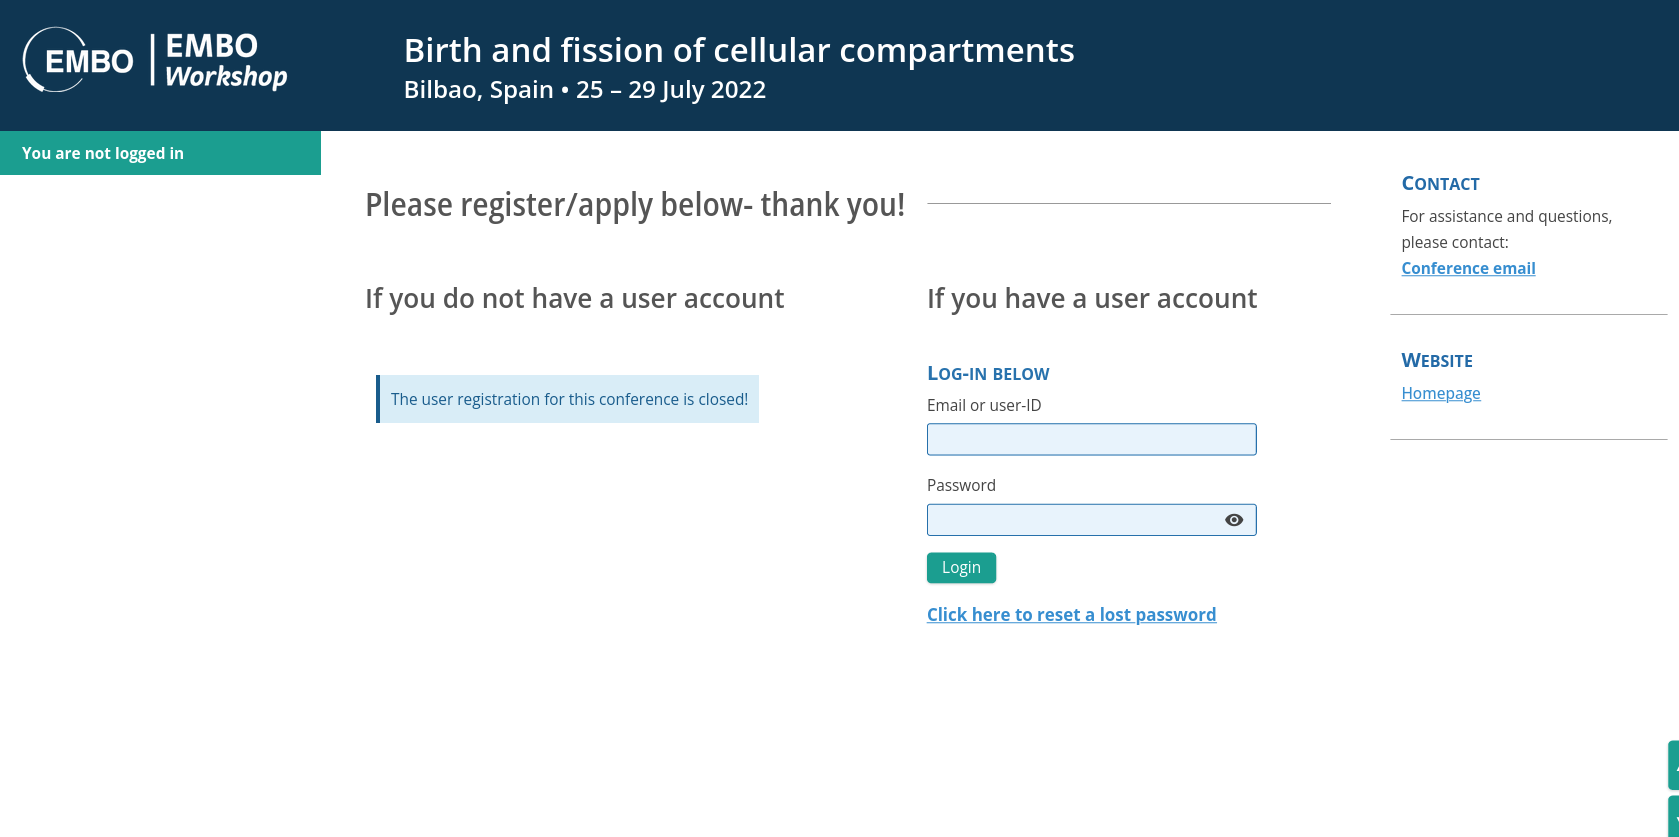
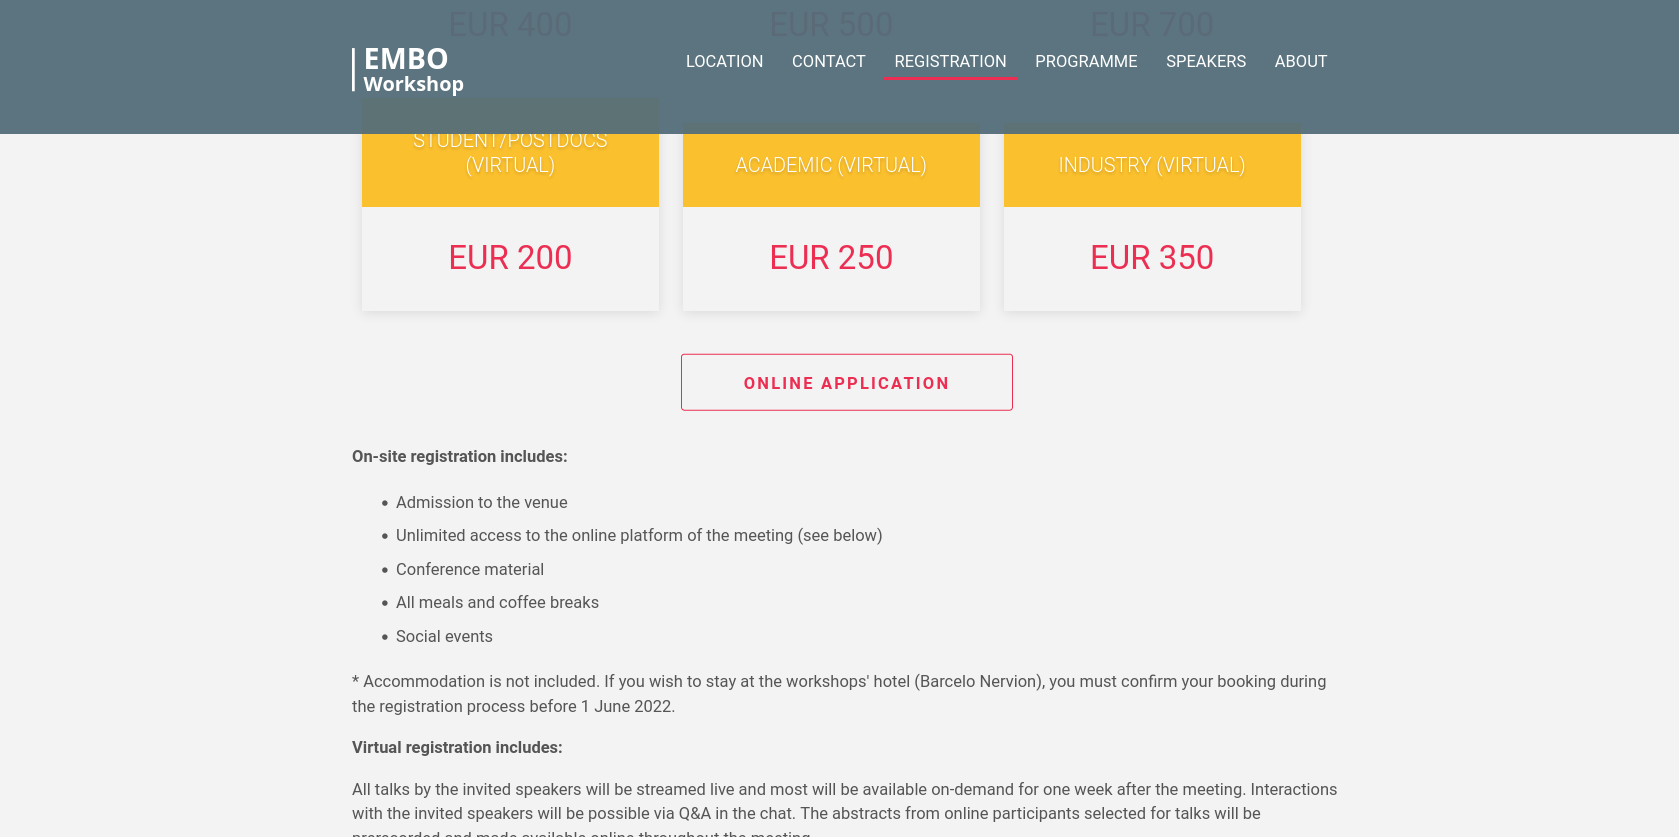
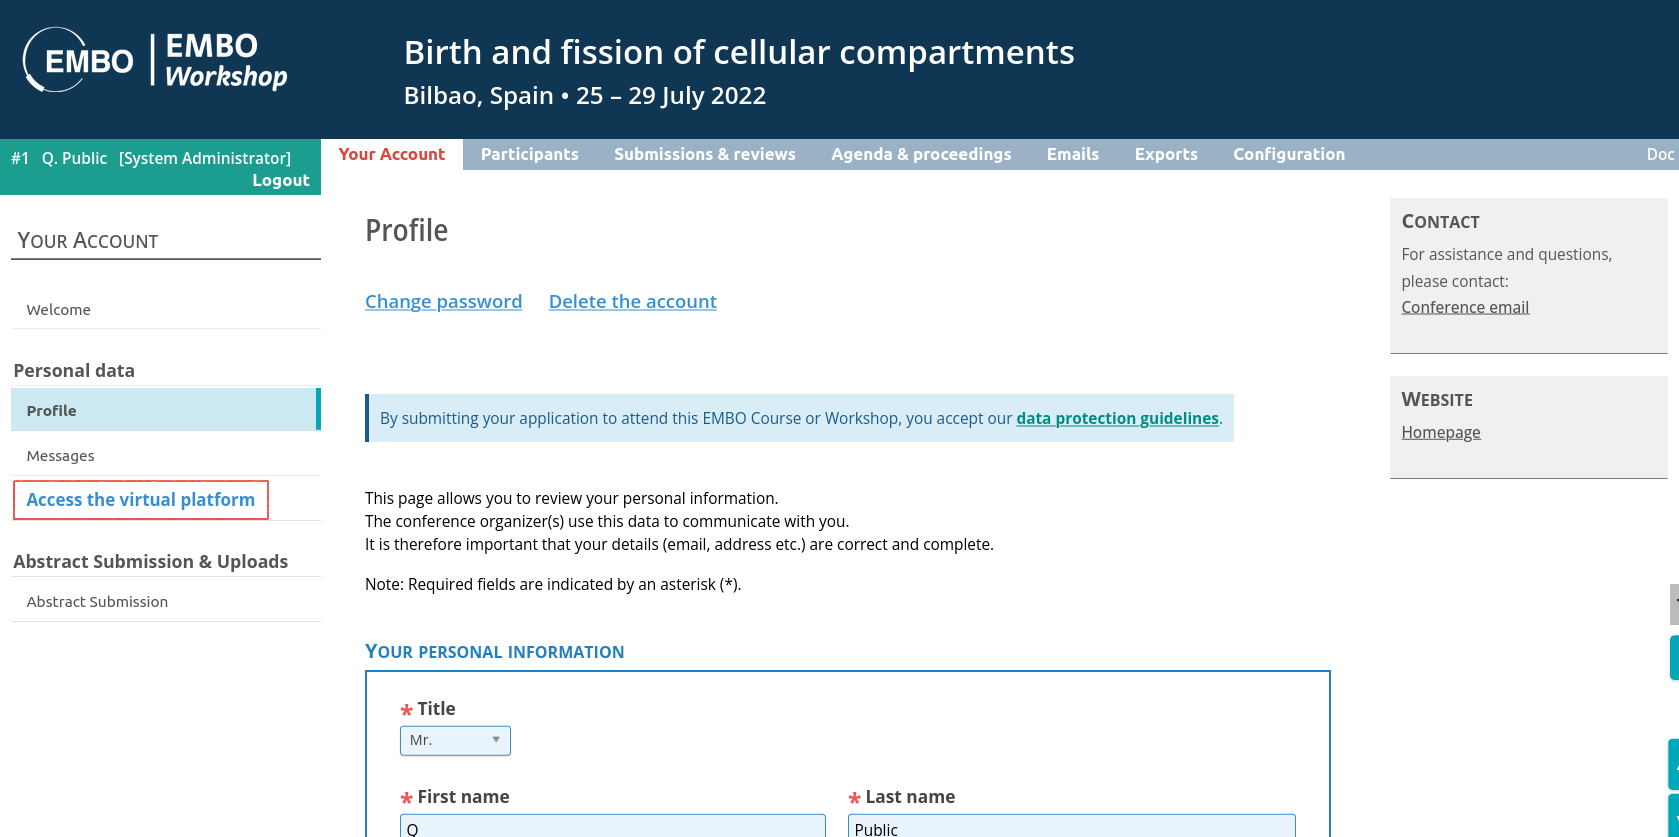


15. Mobile app
15.1. About the mobile app
Overview
- Available functions
- Detailed agenda
- Chat and video chat
- Discussion forum
- Custom content
- Push notifications
- Participants management
- Accounts are created for all participants by the conference management system.
- Admins can create / add users through an Excel upload.
- Filters are provided to control the creation of the accounts.
- All participants are listed on the app by name and affiliation. A search function is provided. Presence indicators show who is online.
- Agenda
- If the agenda is created on the COMS platform, it is automatically available in the app.
- Changes to the agenda are automatically ported to the app.
- Participants can build their personal schedule and send questions to the speakers
Visual guide
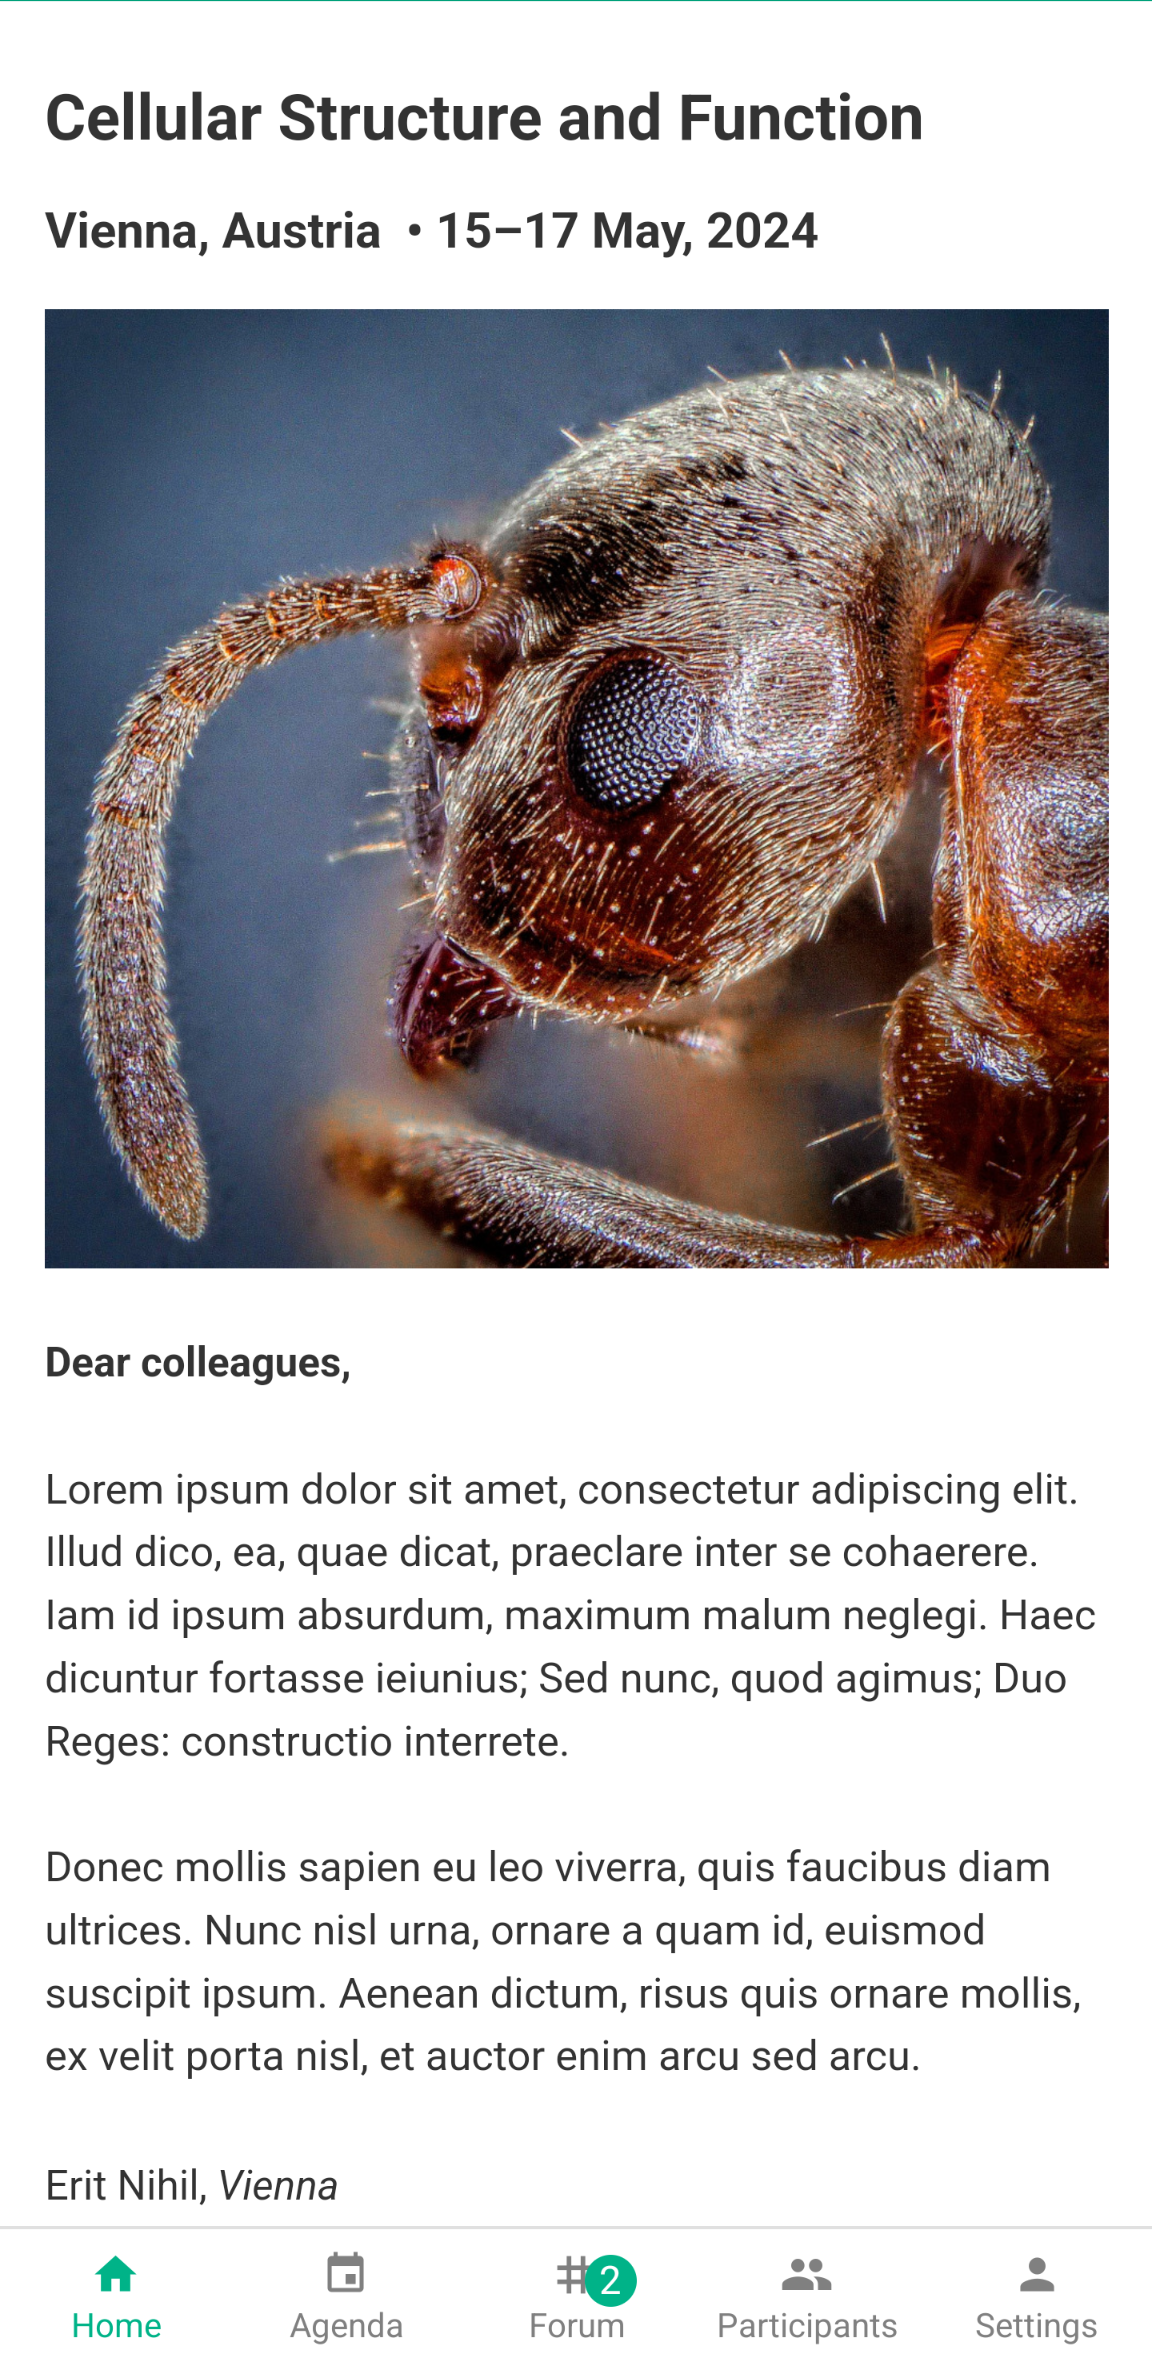
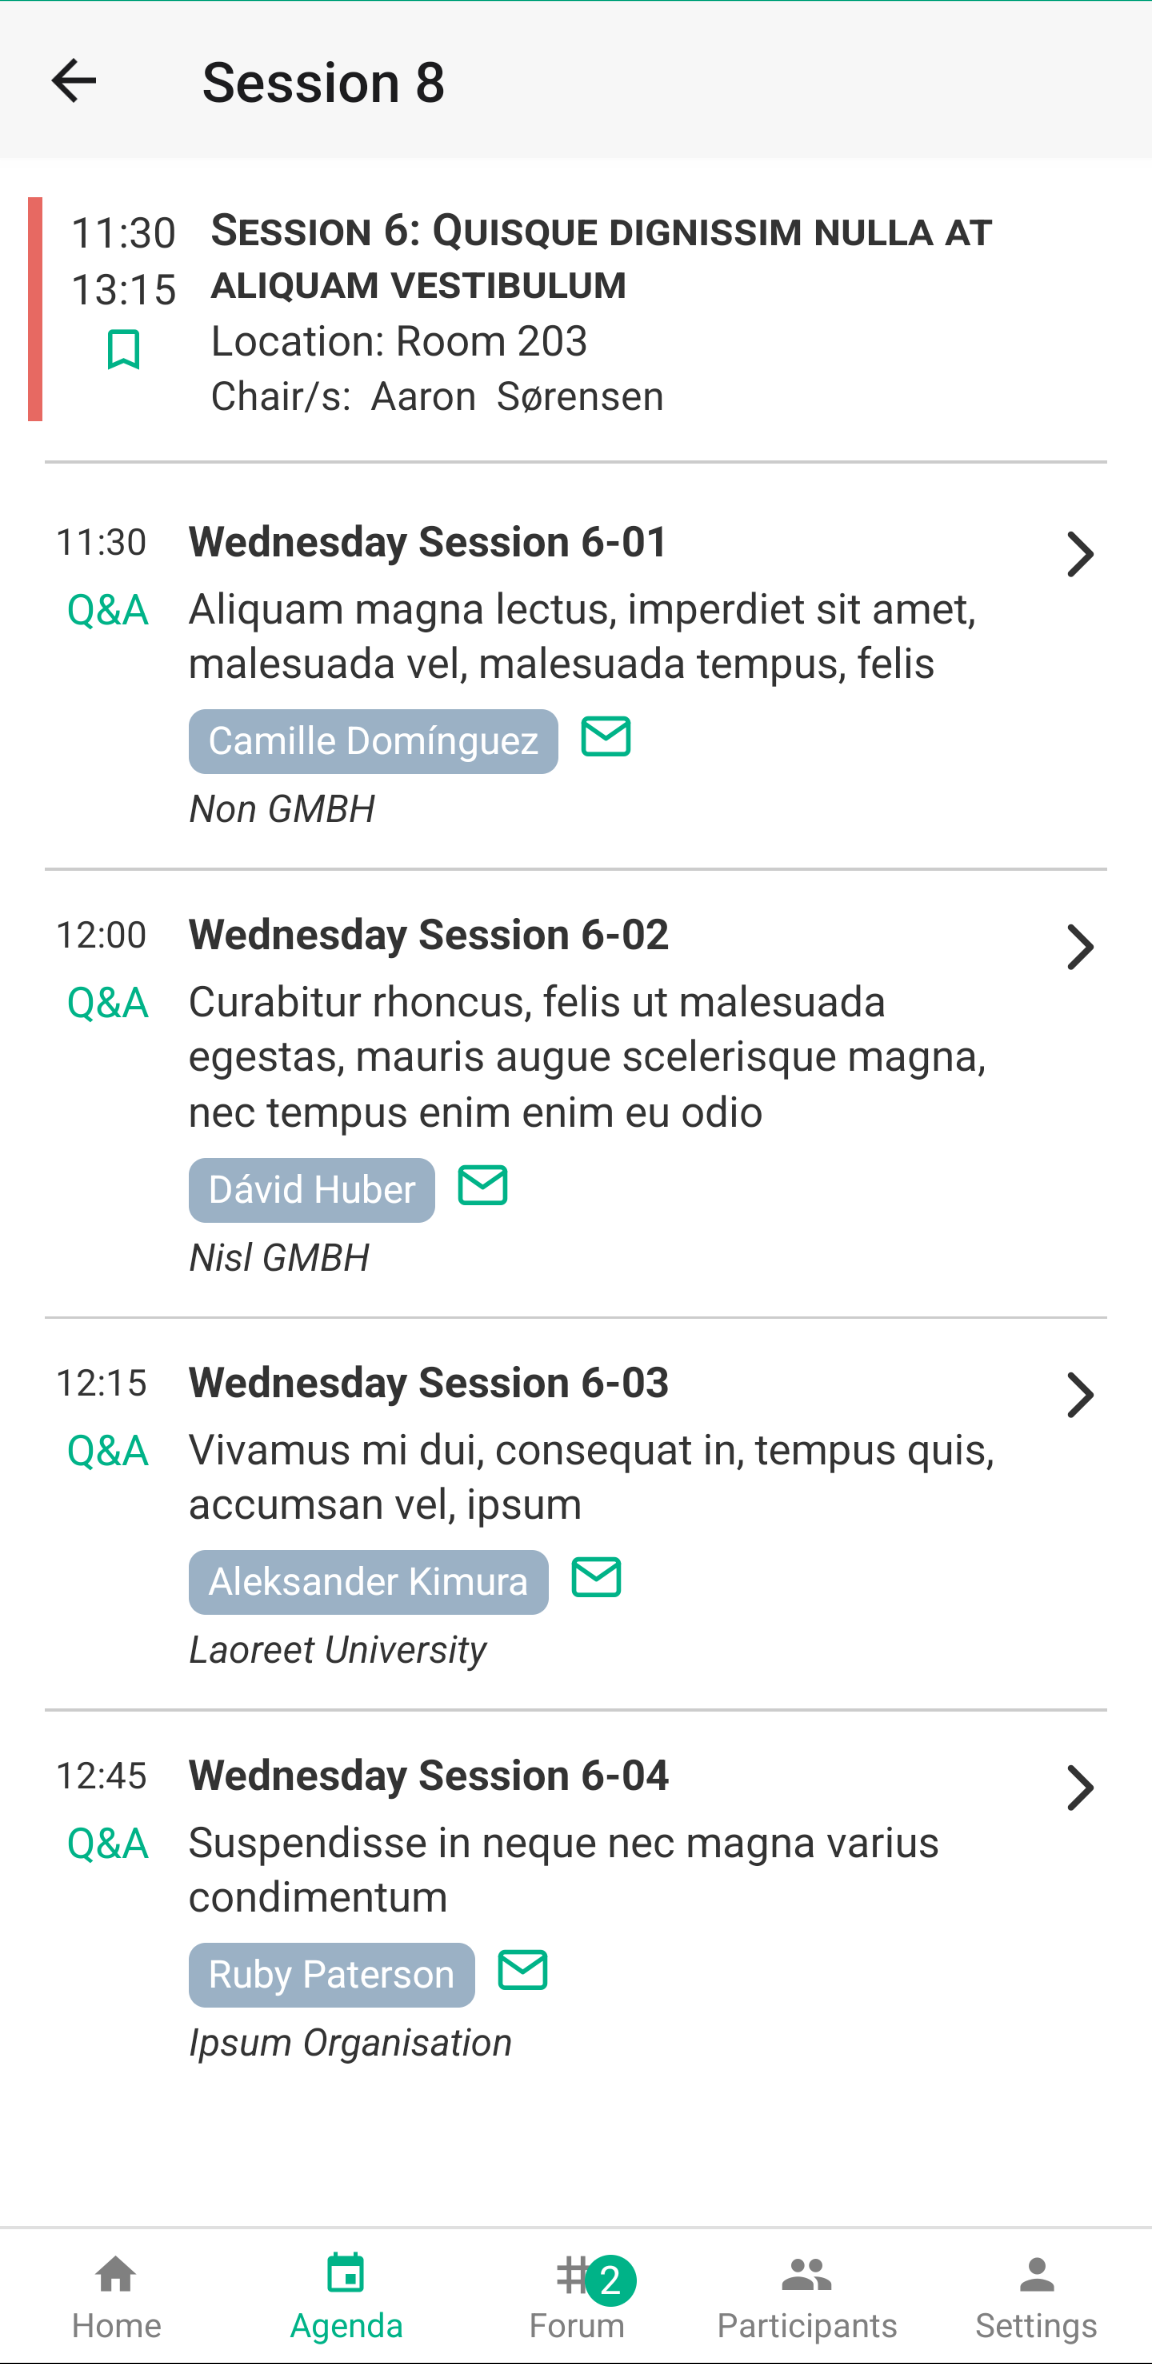
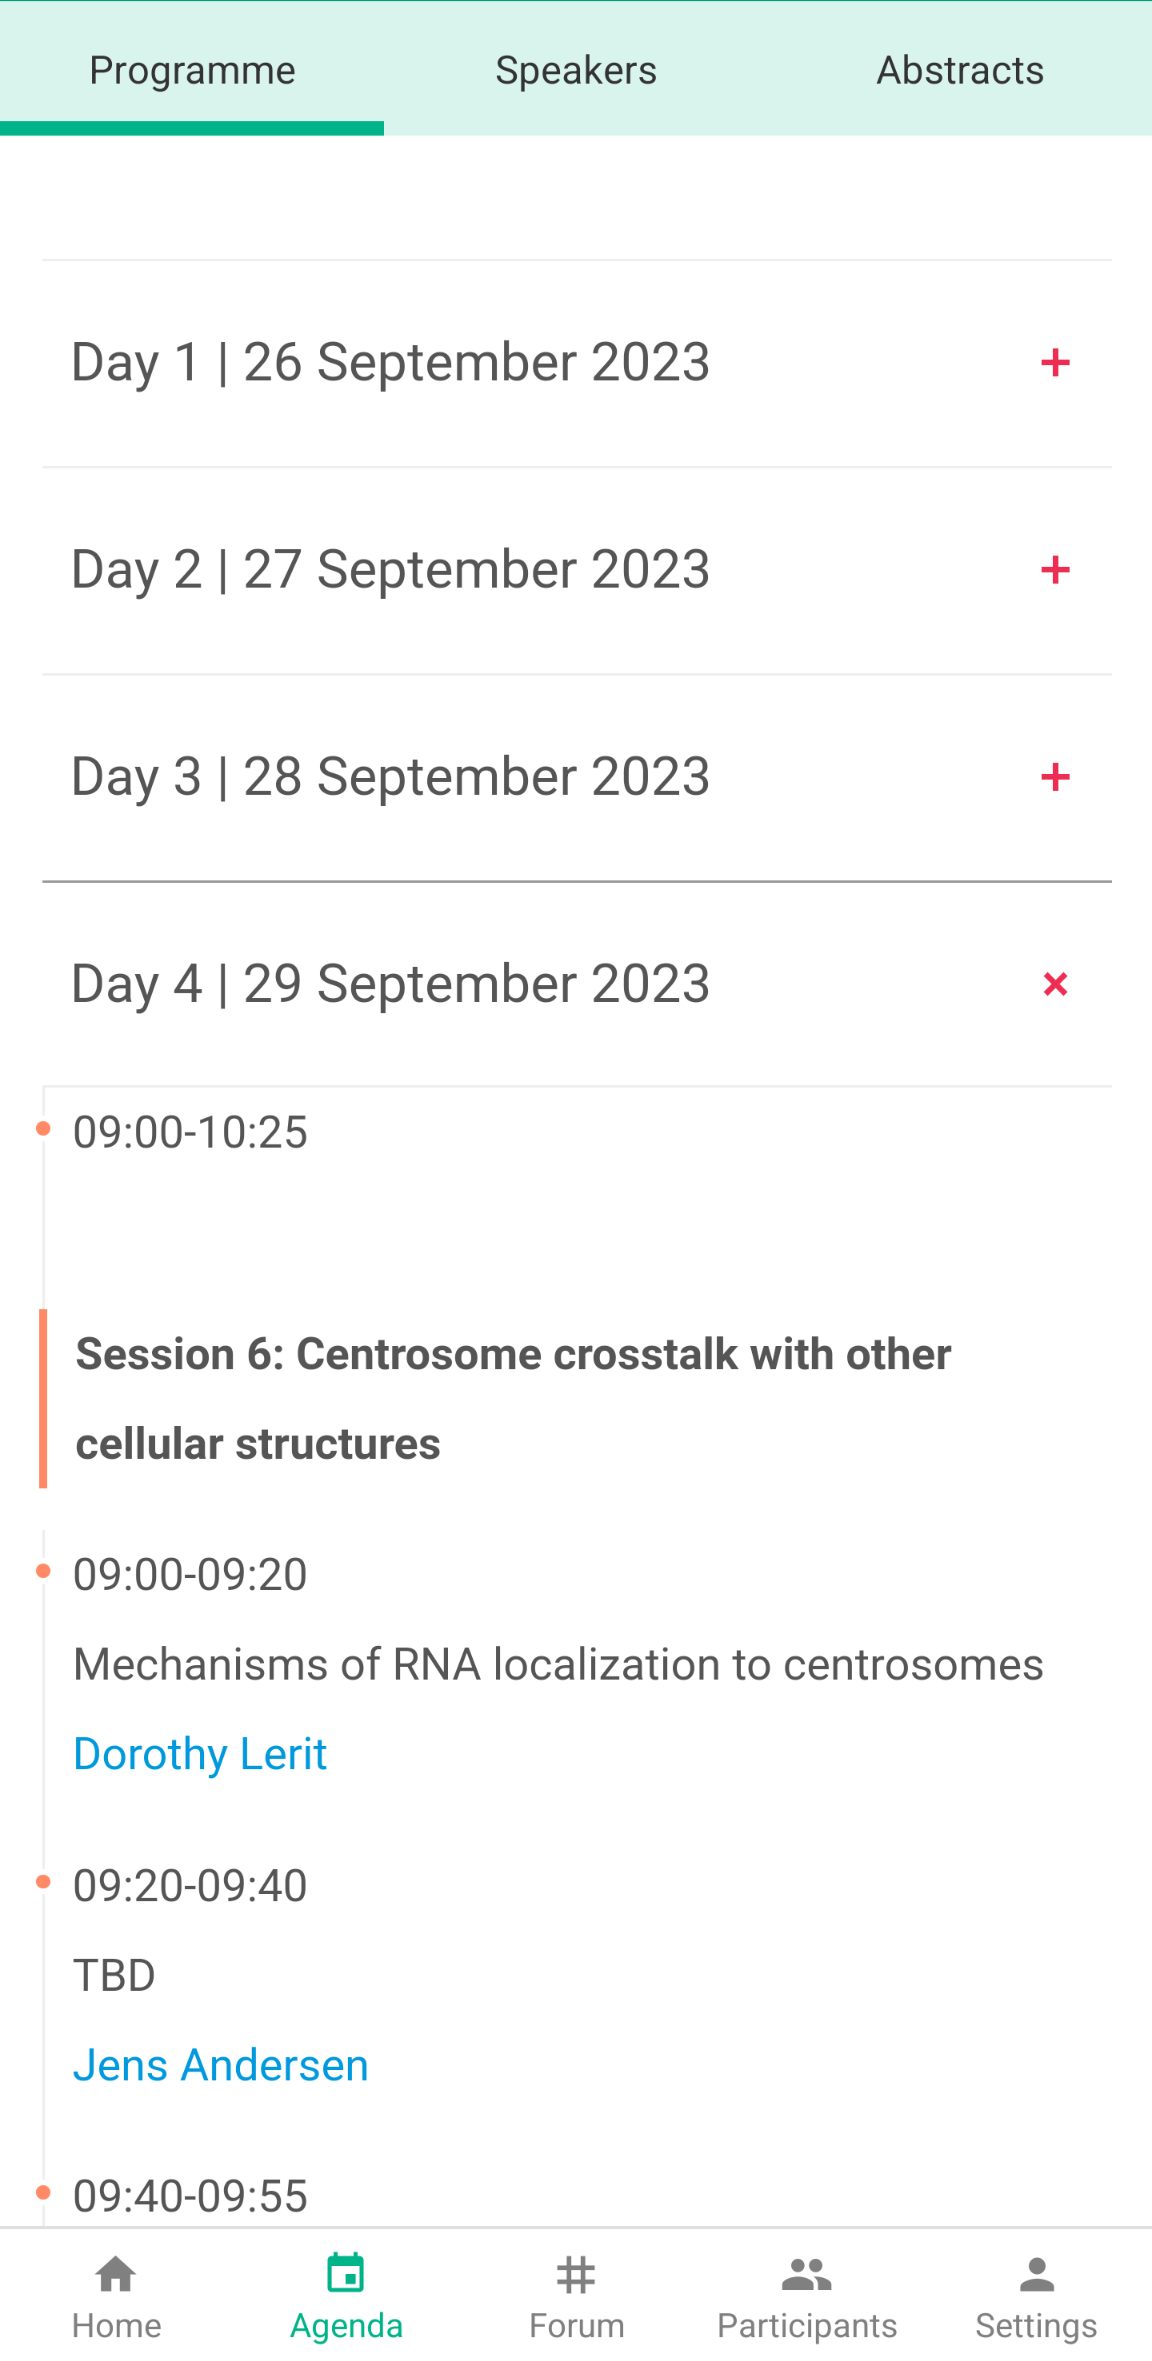
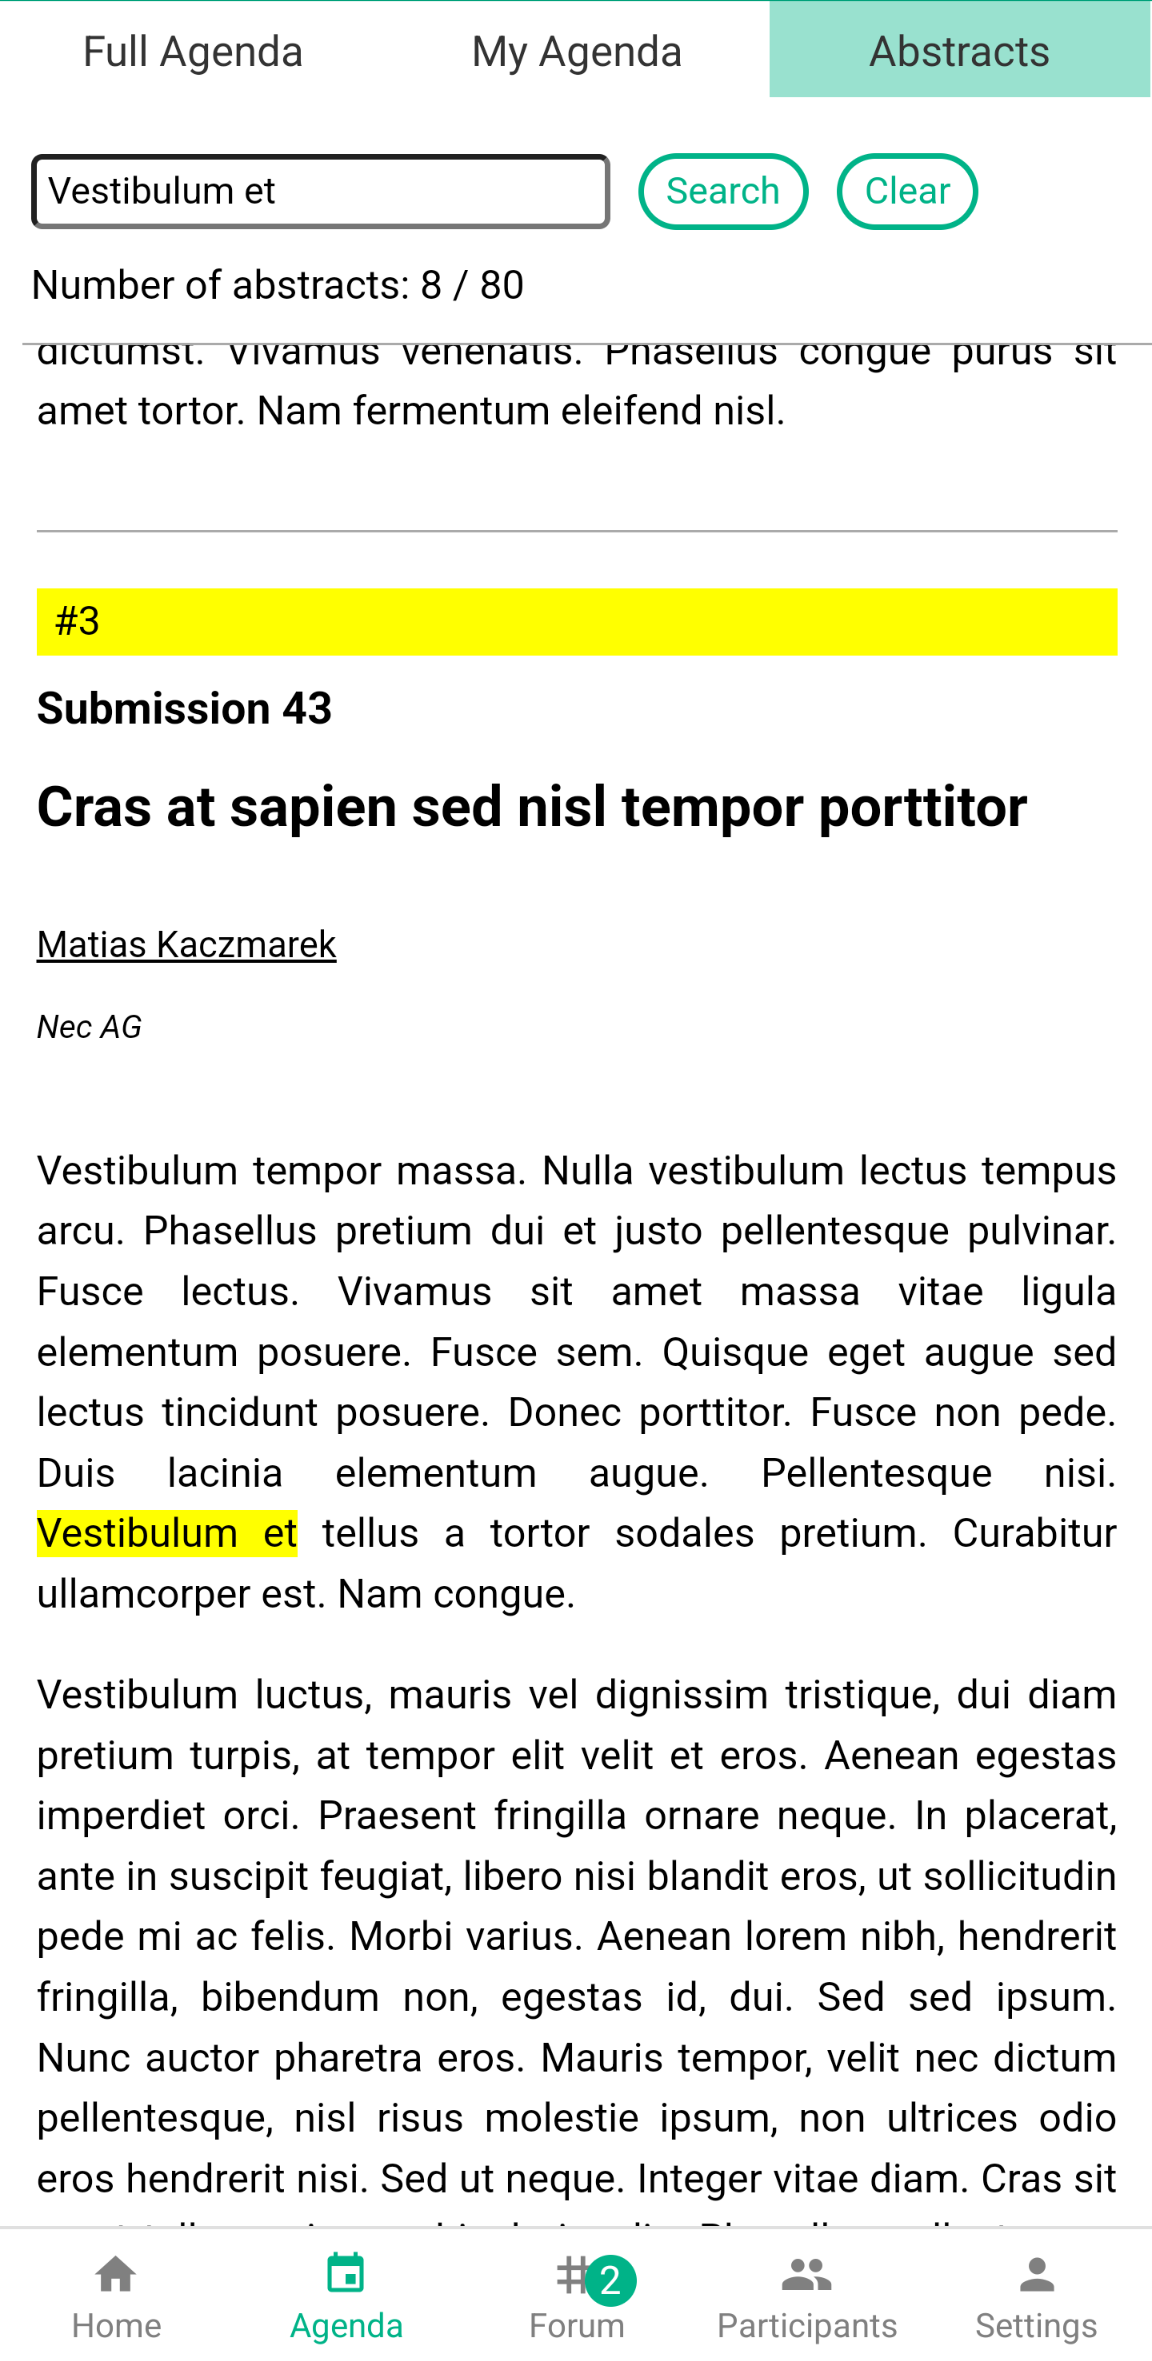
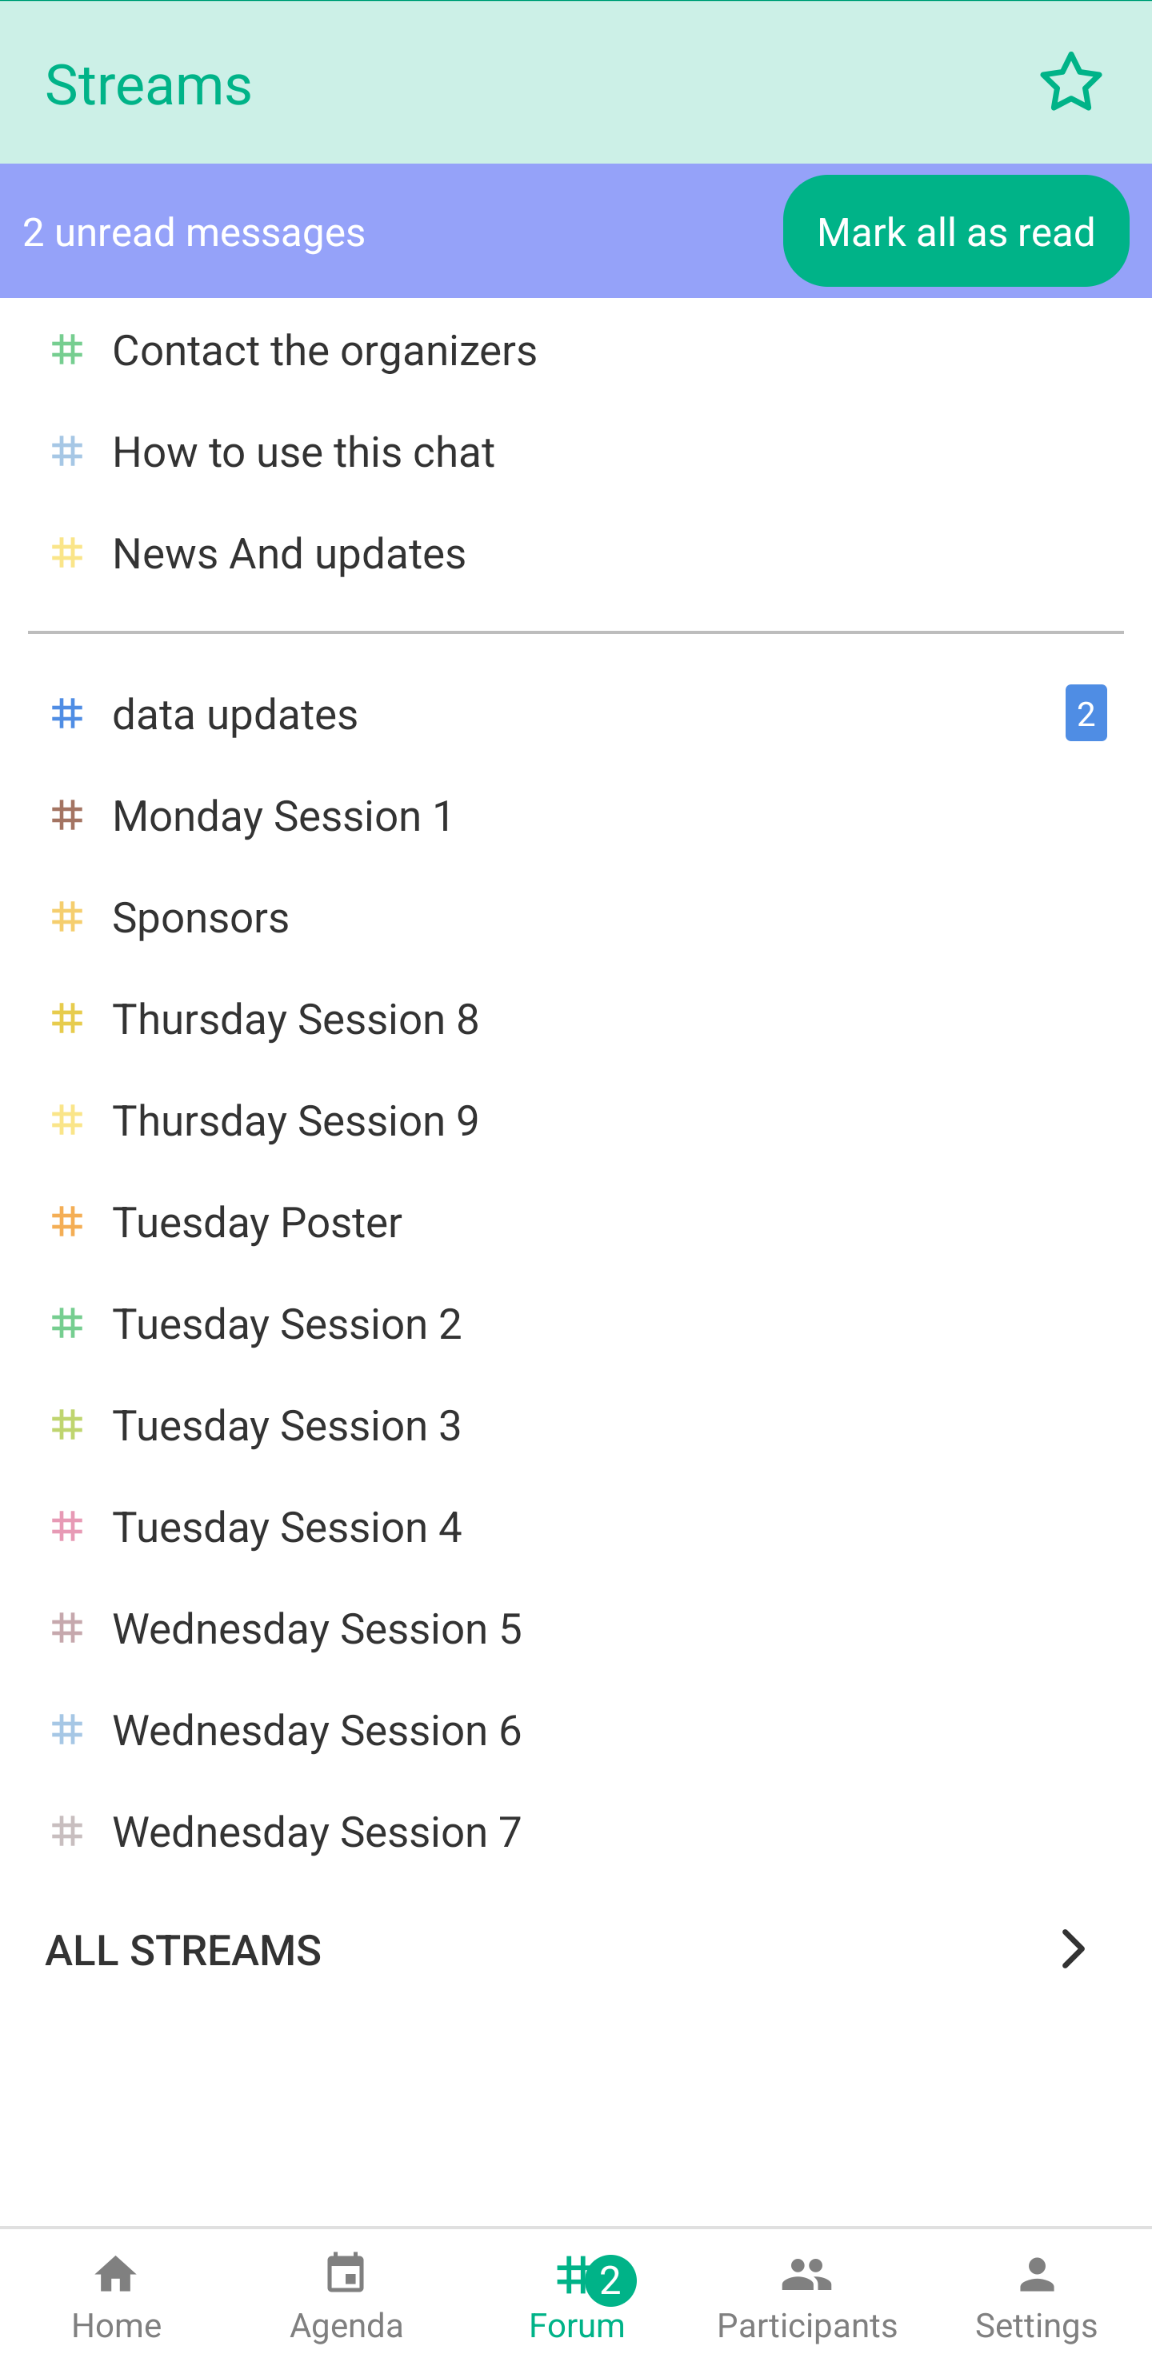
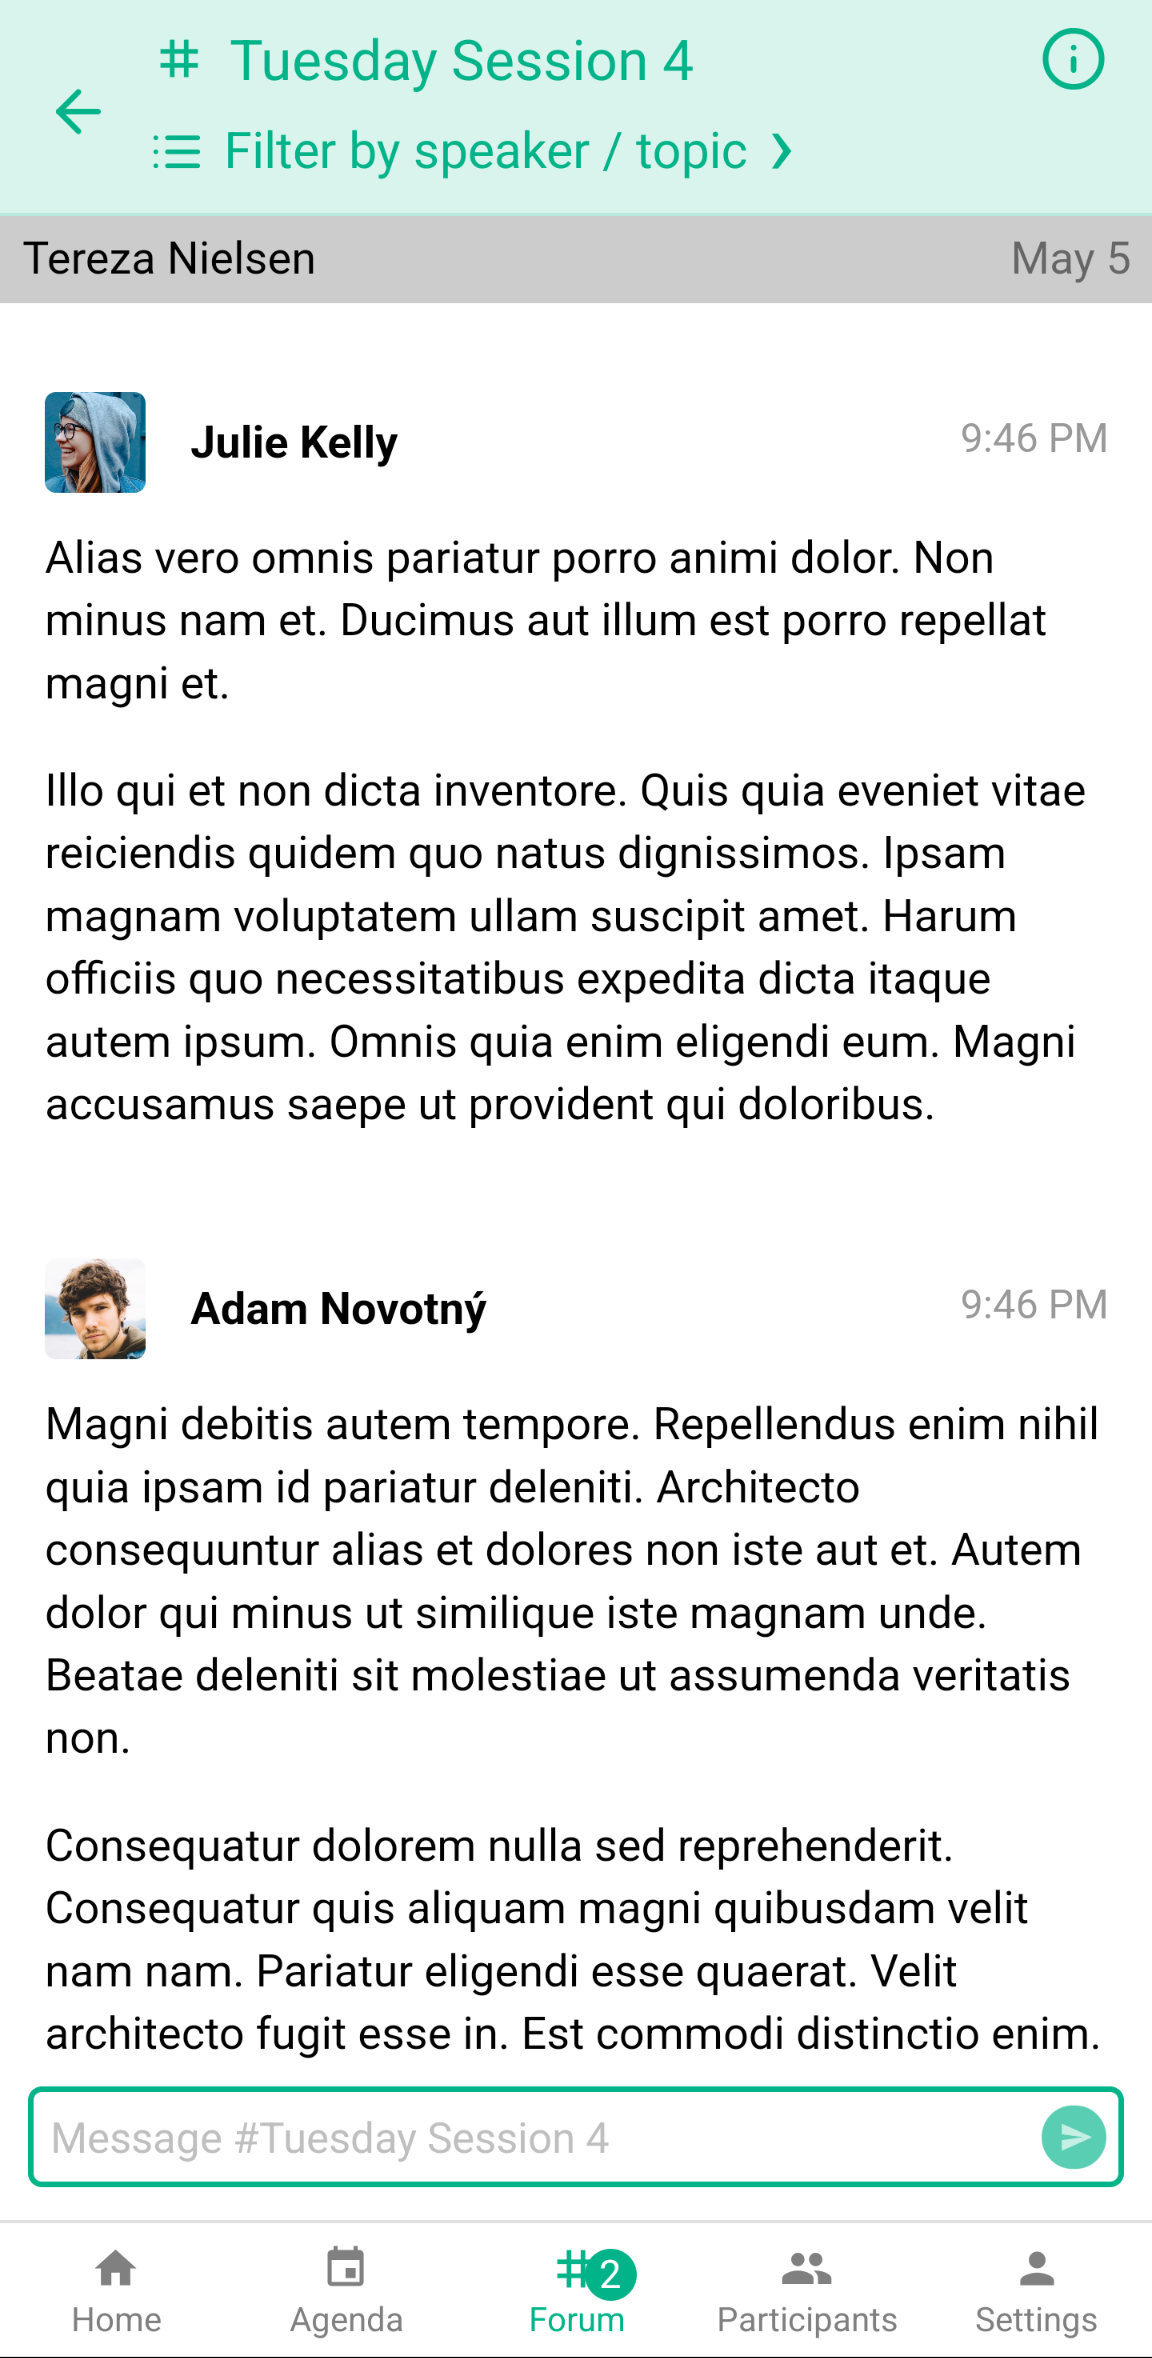
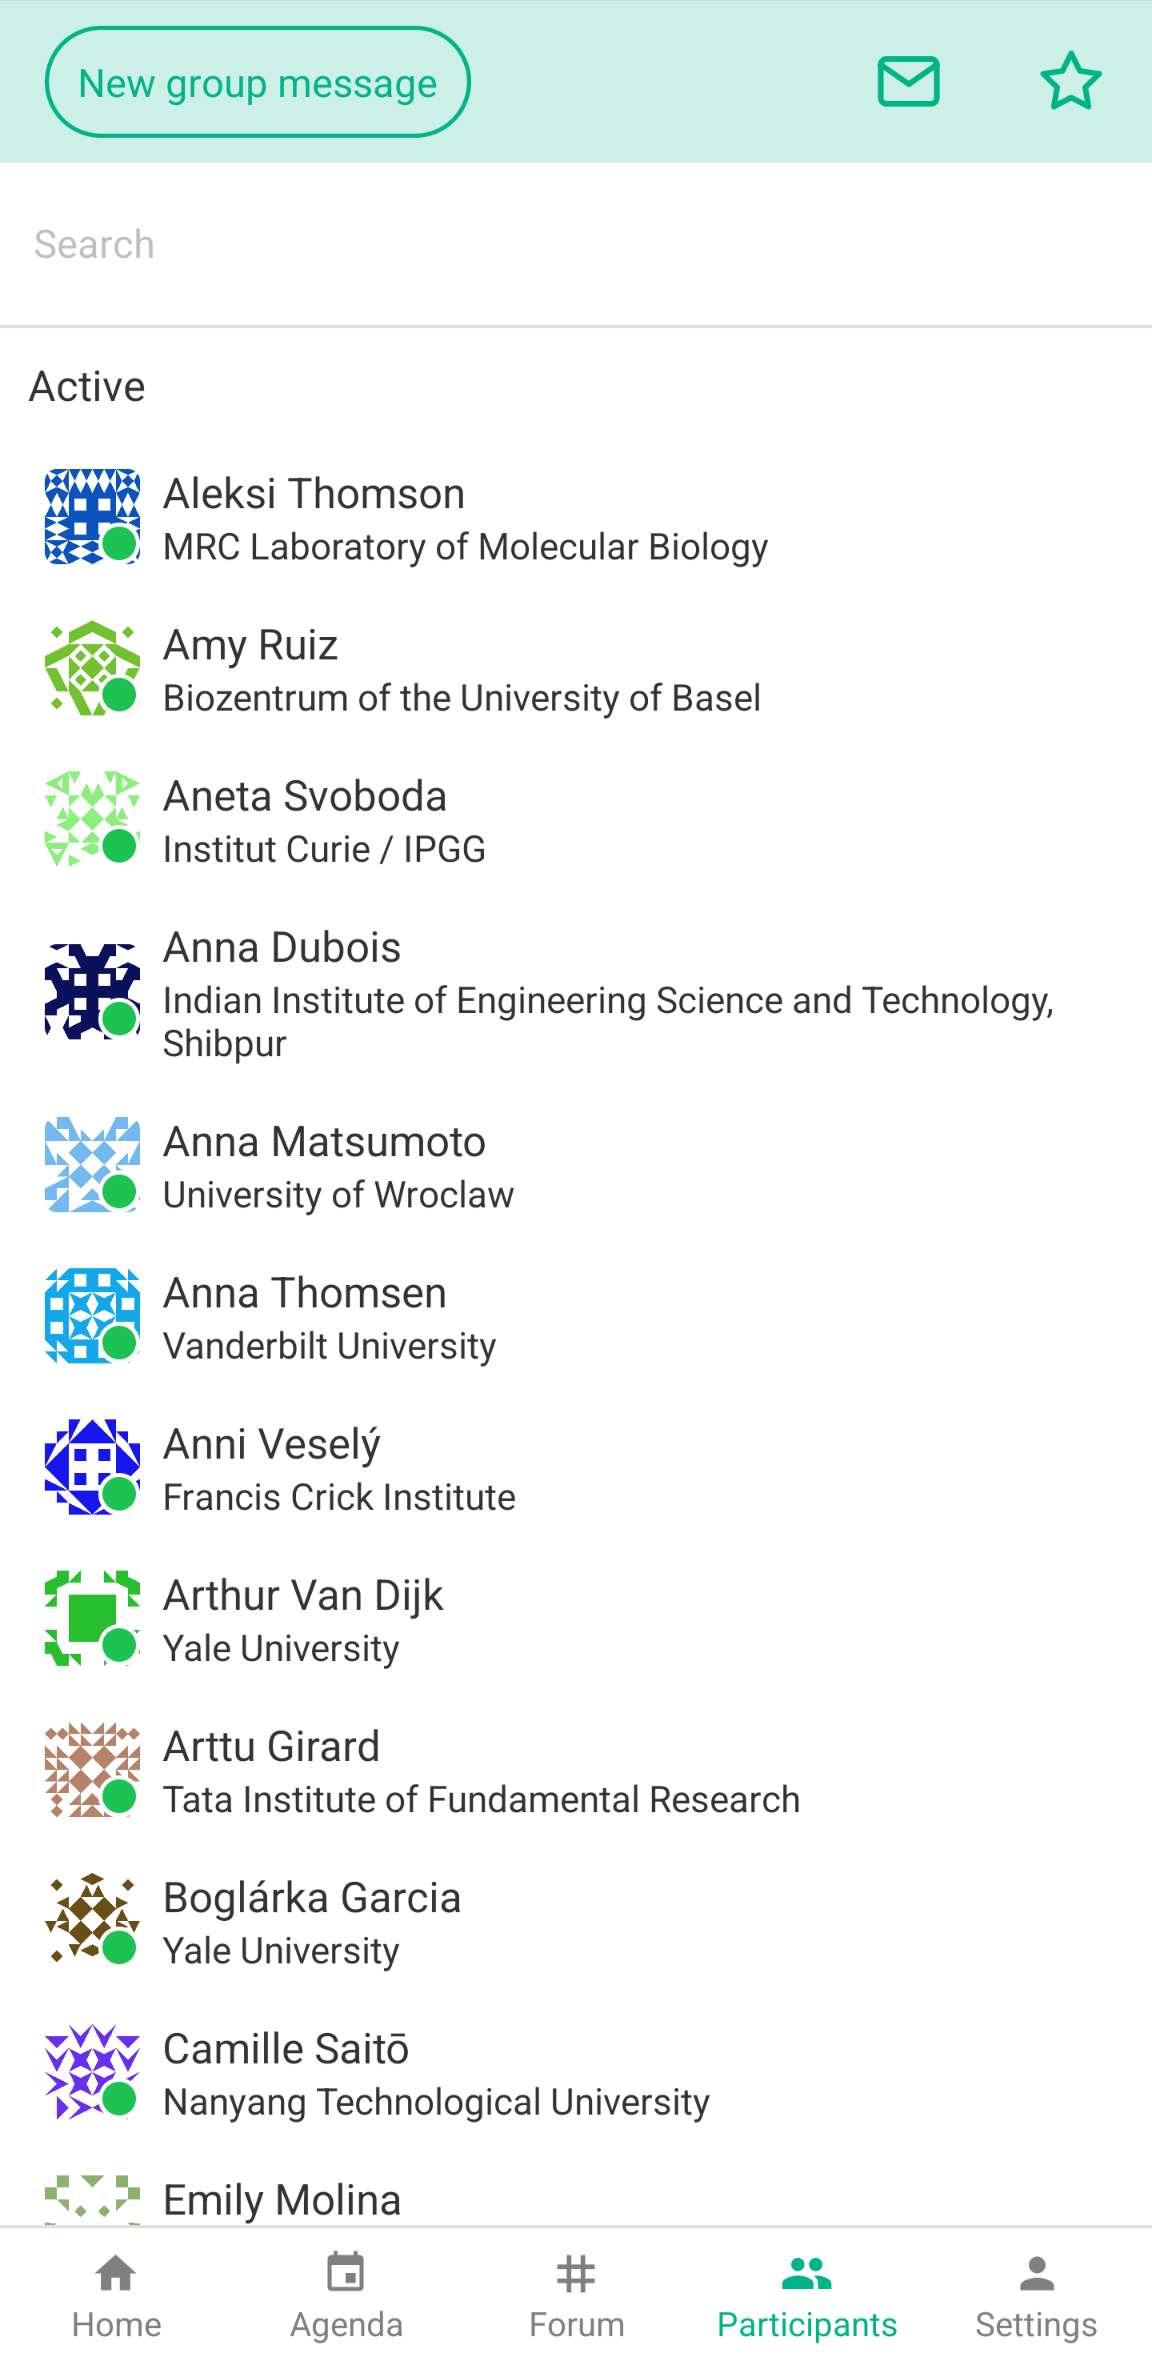
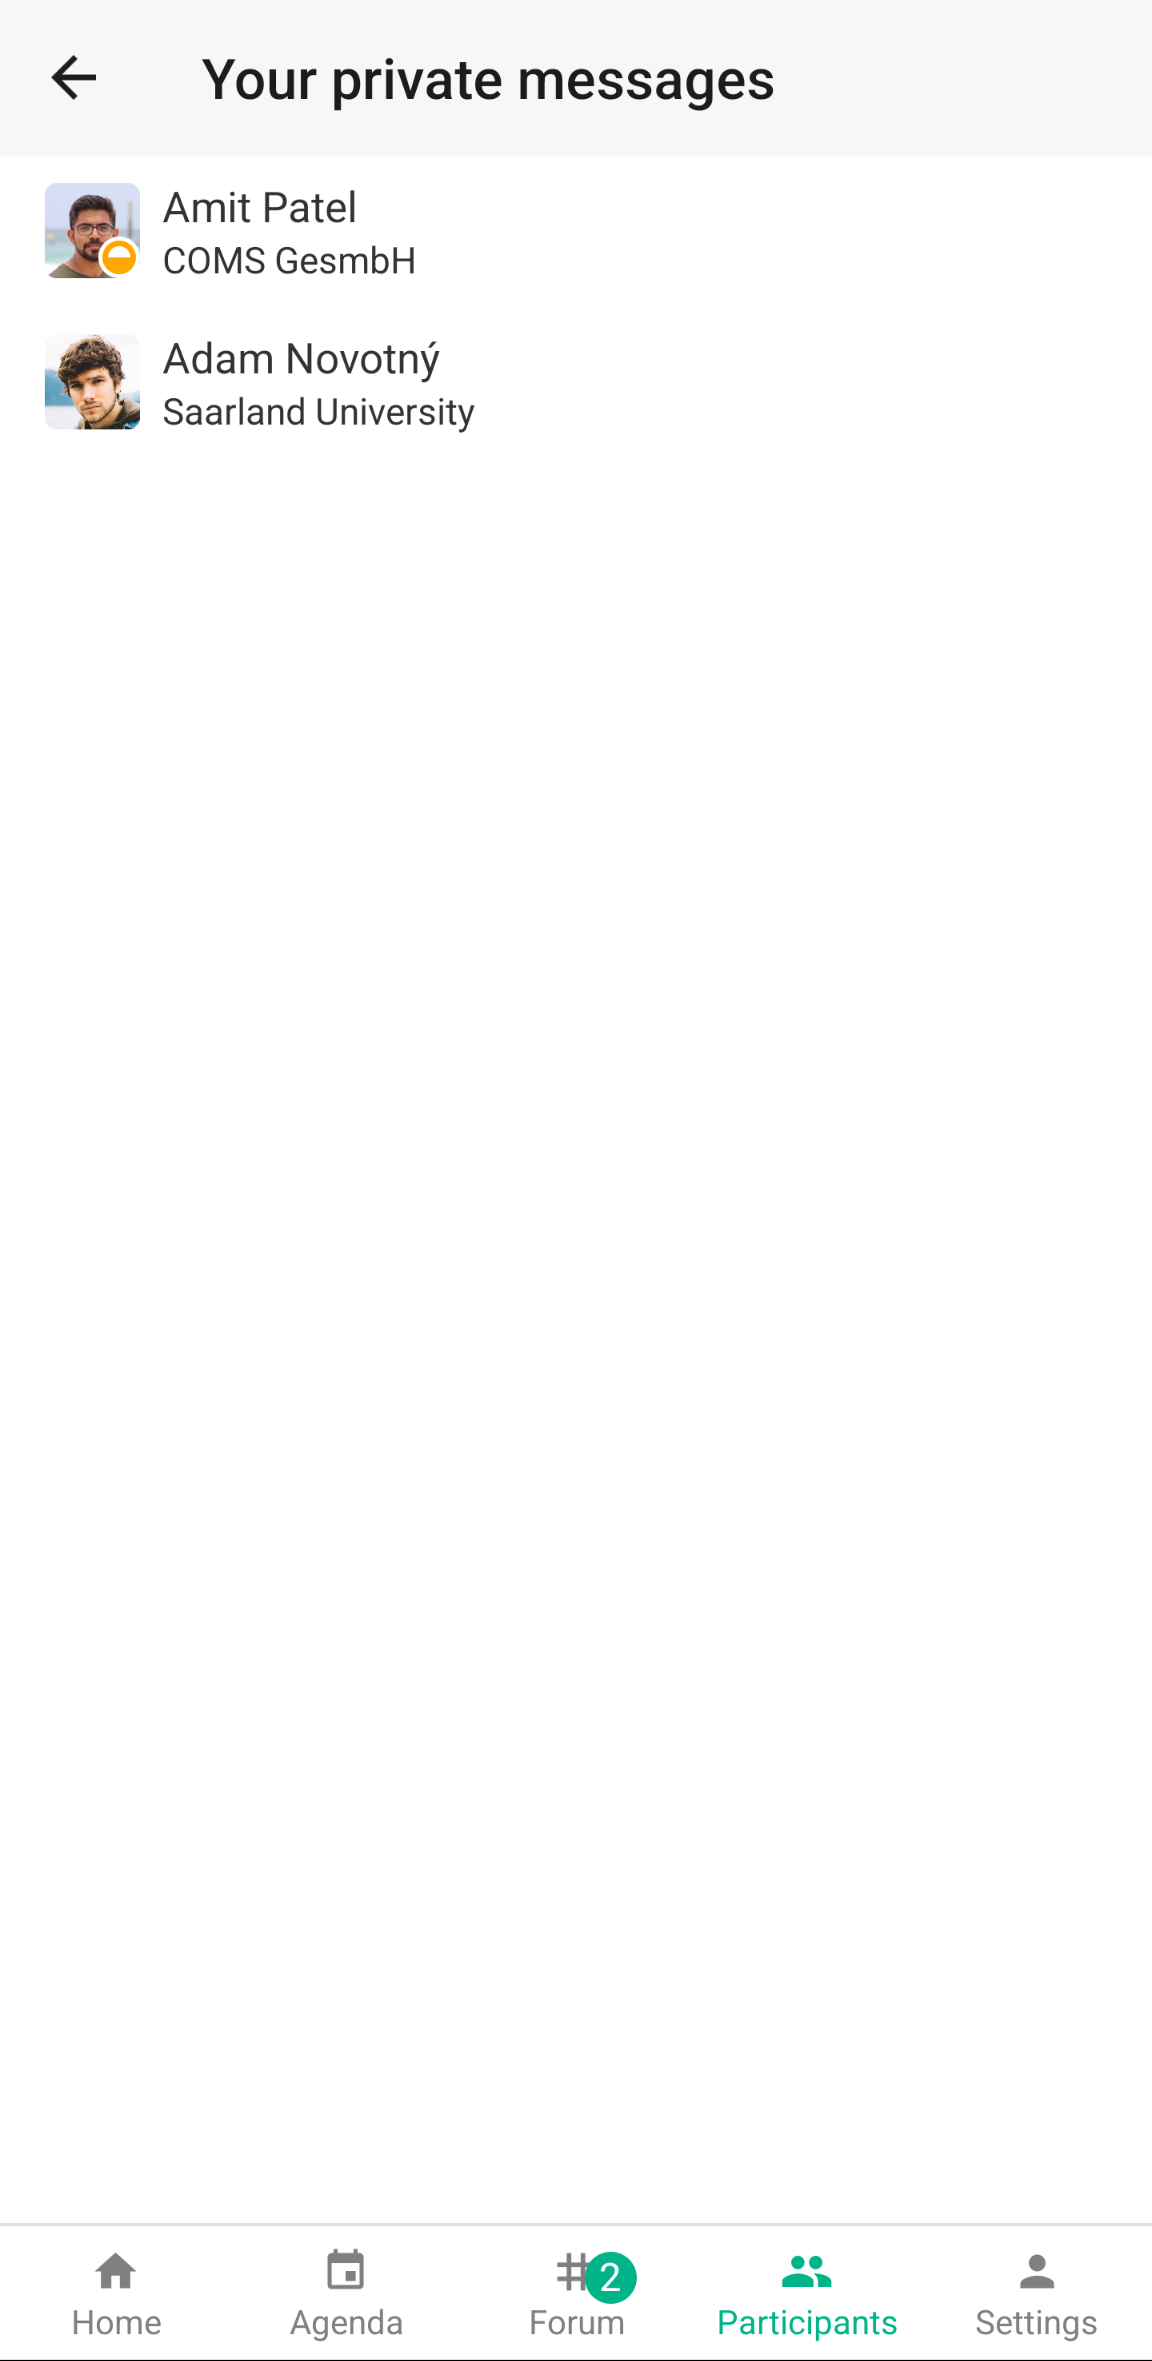
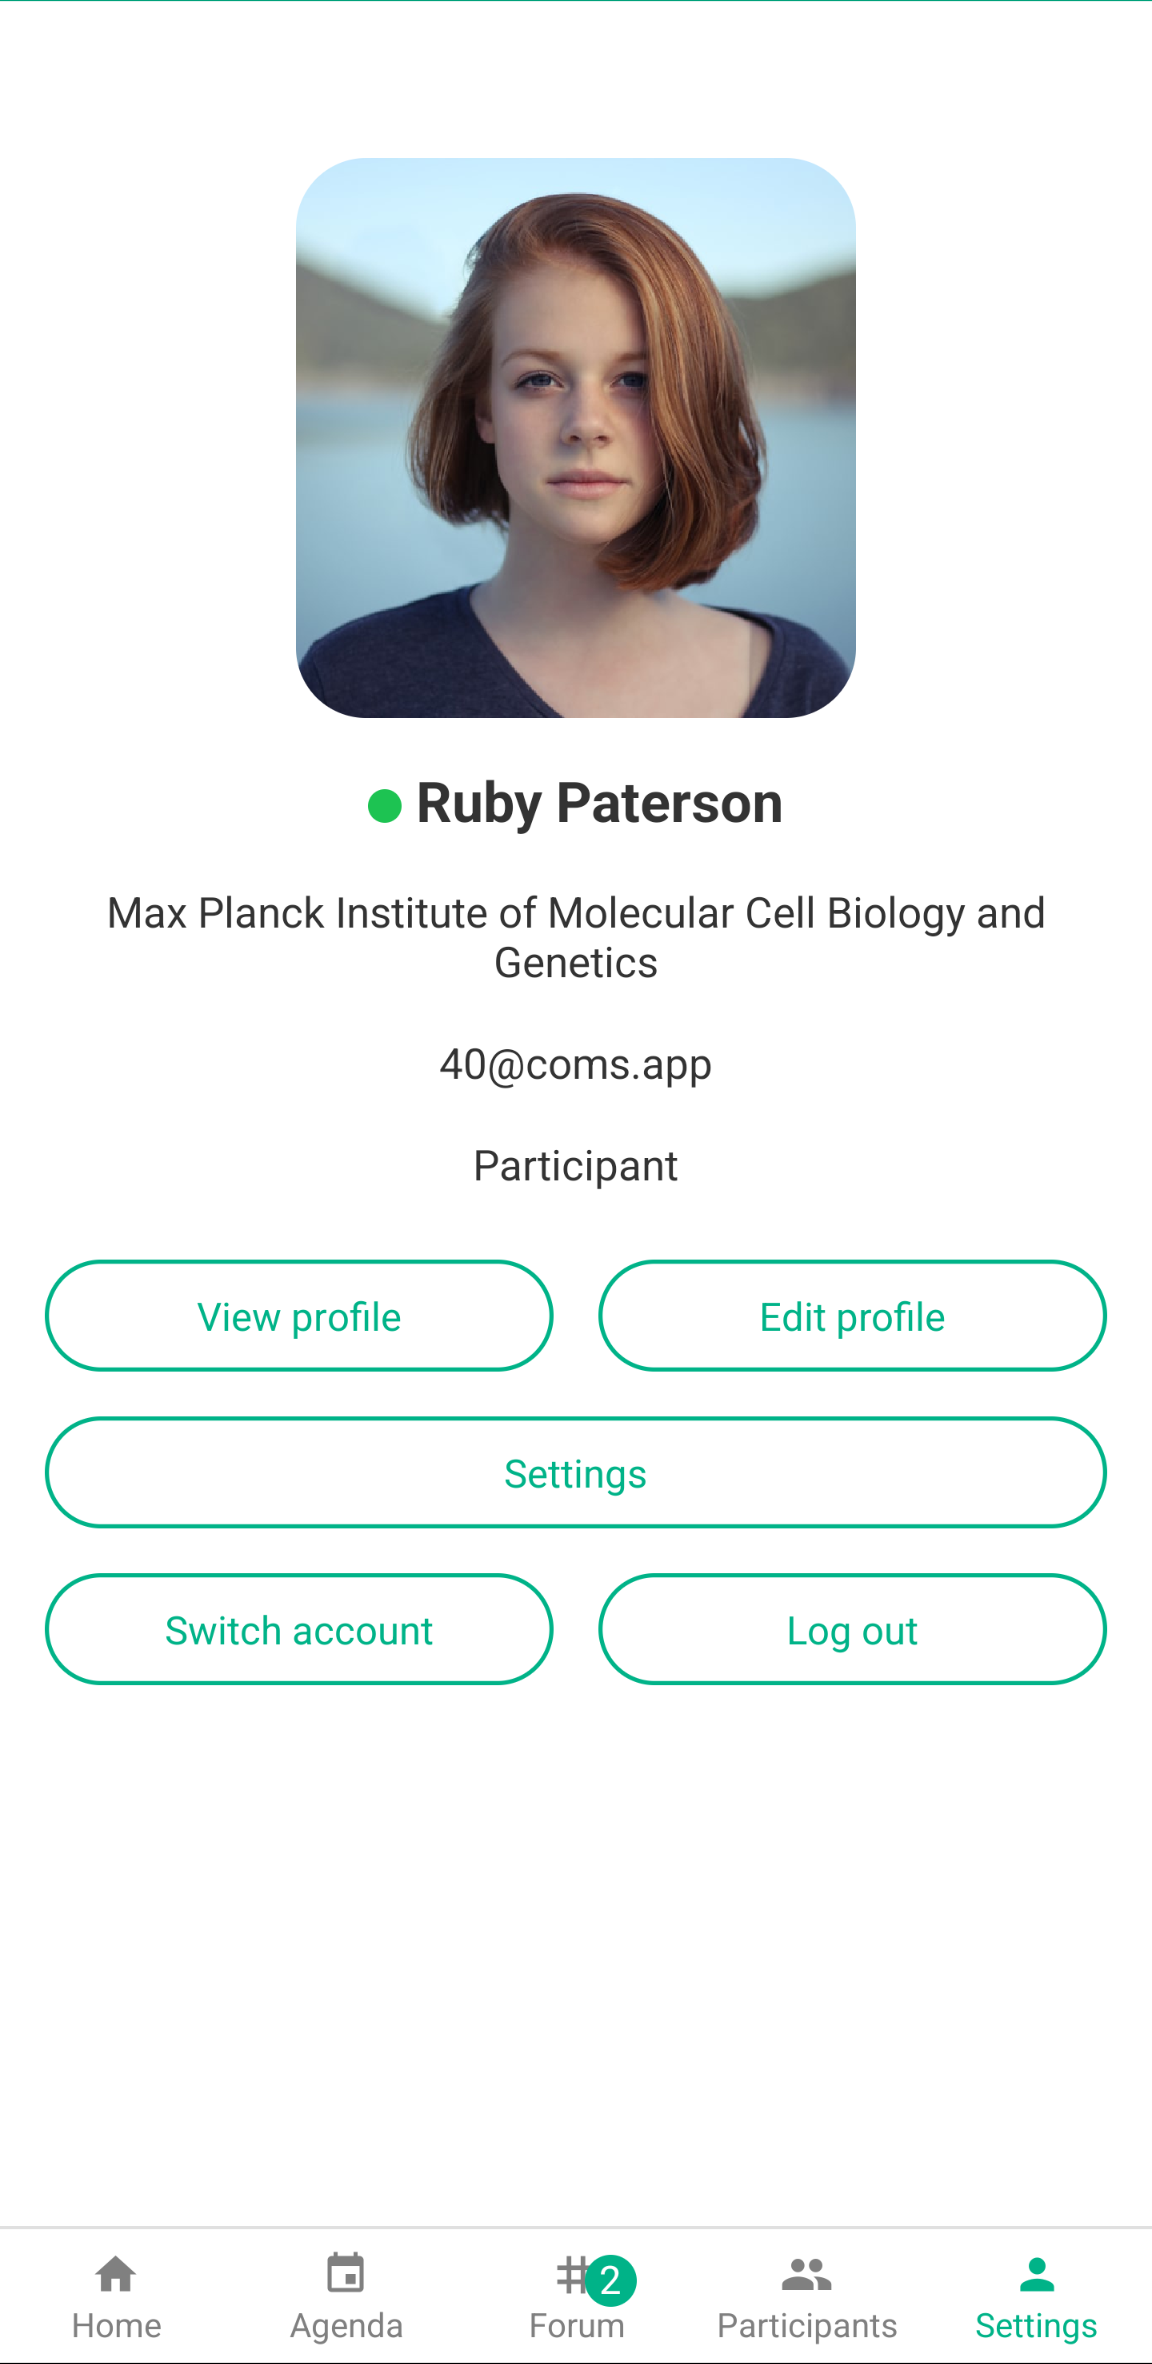
15.2. Donwload and test the app
Download the app


Access the demo
- Enter the name of the event: vdemo
- Enter the email and password of the test account. These are: 31@coms.app and obvious!
Using the app
The main navigation bar, at the bottom of the screen, presents 5 tabs, giving you access to the following functions:- Home: this page can be edited by the organizers to display useful information and news.
- Agenda: three functions are accessible on this page.
- The full agenda, which consists of daily overviews that lead to overviews of the sessions, which in turn lead to the presentations. You can bookmark sessions, send private messages and public questions to the presenters, directly from their entries in the agenda.
- Your personal agenda lists the sessions you bookmark.
- All the abstracts, with a search function.
- Forum: the forum lists all the public conversations, including Q&As for the presenters and updates from organisers. We use a two-level classification of the messages. The top level consists of streams corresponding to a broad partition of the conversations, for instance, the Q&As of a particular session or the updates provided by the organisers. Each stream contains one or more topics, which in turn contain the messages. For example, each session contains a list of topics named after the speakers of that session. Each topic is meant to receive the questions, comments and answers relating to the associated speaker. Note: all the conversations listed in the forum are also listed on the virtual platform, allowing seamless exchanges between on-site and virtual participants.
- Participants: this page lists all the attendees selected for participation in the event, whether they attend on-site or virtually. A filter at the top of the page allows you to fiind participants, based on their name or affiliation. You can exchange private messages with one or several participants (group message). You can view messages you have sent and received and you can view starred messages. Note that all private messages can be seen by their recipients on both the mobile app and the virtual platform. This means that you can reach participants via chat whether they used the mobile app or the virtual platform.
- Settings: this page allows you to upload a profile picture, edit your name and affiliation and set notifications.
Visual guide
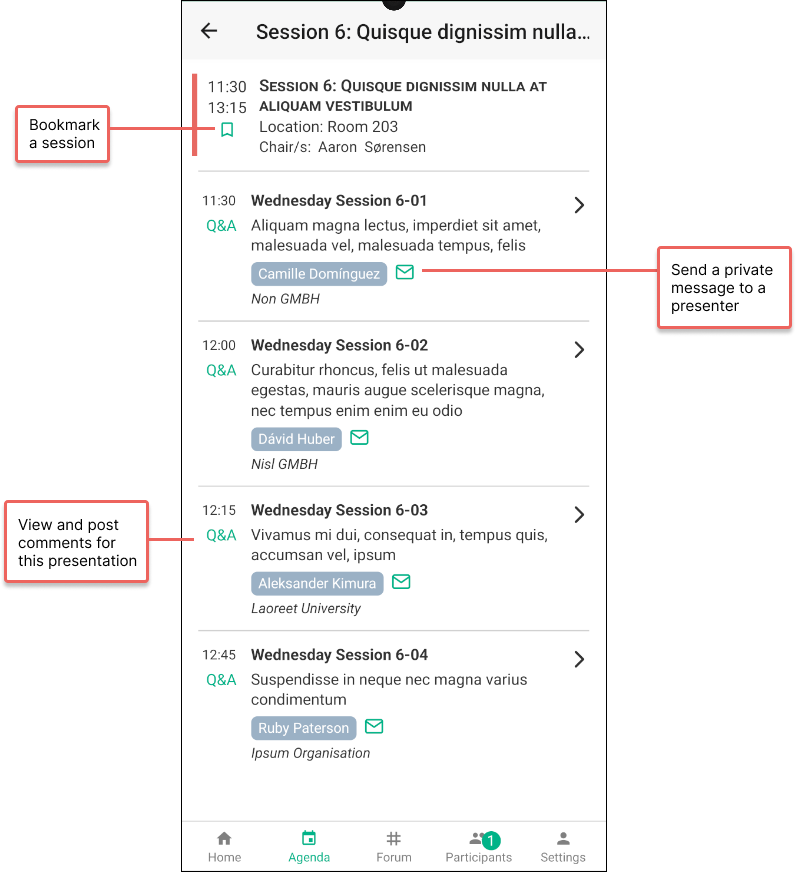
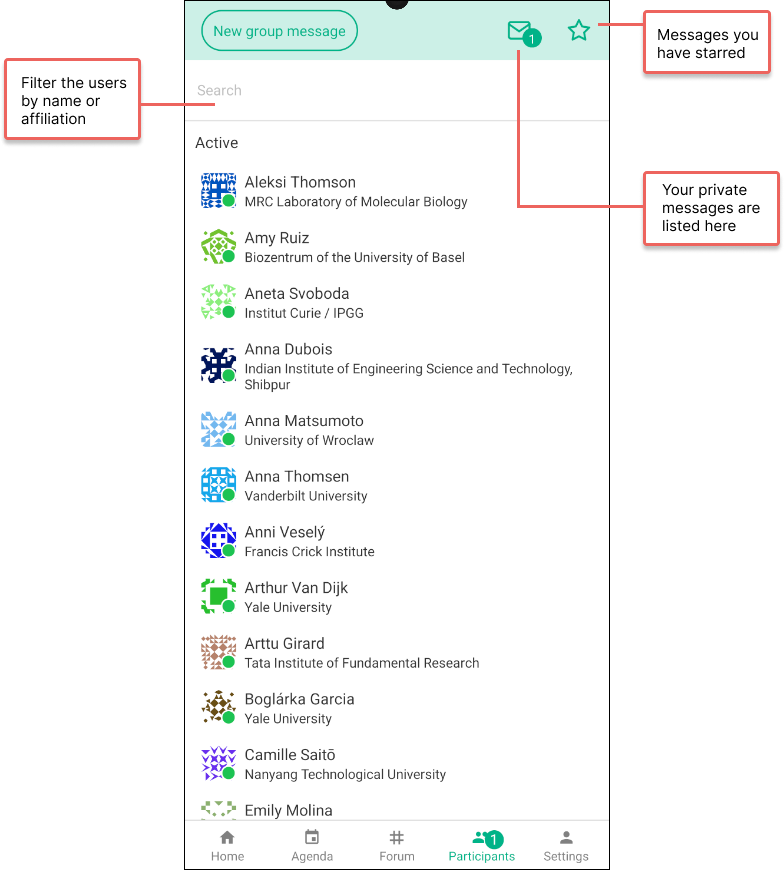
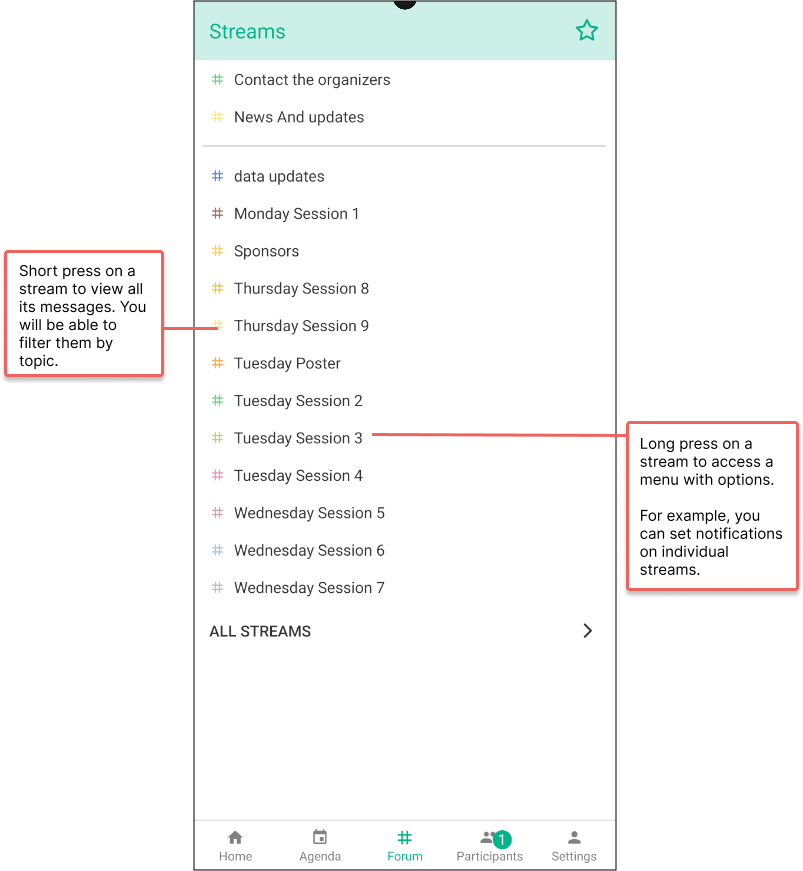
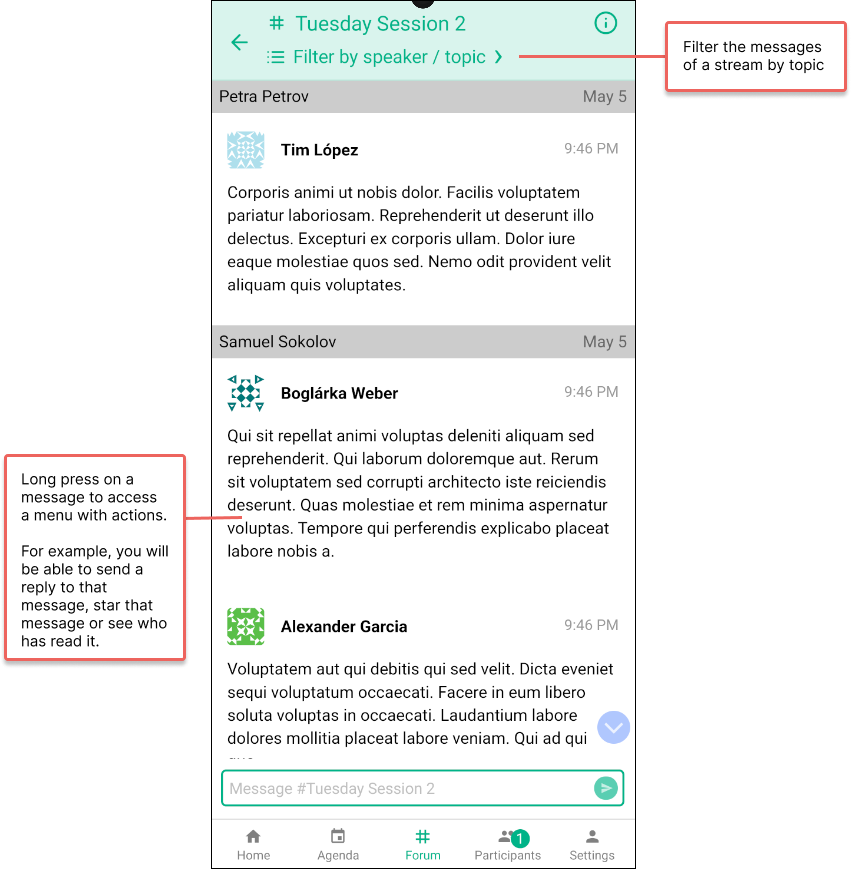
How to
- Navigate the forum messages: first, select a stream, then tap the filter at the top of the page to view its topics. Tap a topic to view its messages. You can also post a message to that topic.
- Access functions relating to a stream: long pressing a stream brings a context menu with a list of optional actions, for instance "Pin to top".
- Access functions relating to a message: long pressing a message brings a context menu with a list of optional actions (add an emoji, copy, quote, share or star a message, check who has read that message.