Handling local Zoom recordings in COMS
On this page
If you save a recording locally (to the host's computer) or need to download a cloud recording for editing, you will need to follow a different procedure to insert the recording in the agenda.
Saving a recording locally
- Option 1: save the recording to the Zoom cloud. COMS provide an easy procedure for inserting the cloud recordings into the agenda and then removing them, if needed. When feasible, this option should be the preferred option.
- Option 2: if cloud recordings are not an option, a manual procedure can be used to insert the recordings. This could be the case, for instance, if the recording was saved locally by mistake. Another use case might occur if a cloud recording needs to be downloaded and edited, for instance, if a speaker asks to be removed from an existing recording. Once downloaded, a recording cannot be reuploaded to the cloud and therefore needs to be handled manually-
Manually inserting recordings (first step: create a URL for the recording)
- Recordings saved to a host's computer are stored as a folder containing several files (a video + sound tracks, a separate sound track, the chat and possibly other files).
- The file to use as the recording is the file with the mp4 extension, which contains the video and its soundtrack.
- The mp4 file needs to be uploaded to a platform or website, so that it can be made available as a public URL. This URL can then be inserted in the agenda as a link.
- Websites suitable for hosting the mp4 files are, for instance:
- Vimeo: a good solution. COMS' Vimeo account can be used.
- Youtube: a good solution, but requires a Youtube account.
- Dropbox or your own cloud hosting solution. You will need to ensure that the URL is made public, which is often not the default.
- Your own website. You will need to ensure that the URL is made public.
Manually inserting recordings (second step: add a link to the agenda)
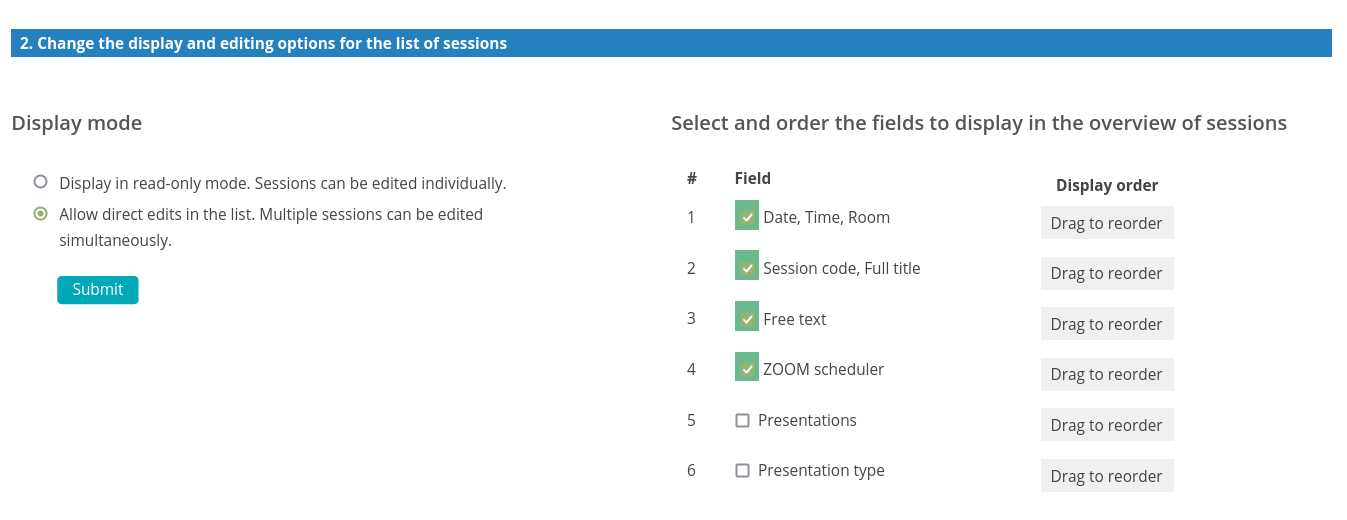
- Log in to your COMS account and navigate to Agenda & proceedings / Sessions / Define the sessions / 2. Change the display and editing options for the list of sessions (Fig. 1).
- Set the view as shown on the screenshot below. You need to activate the edit mode and select the fields to edit as shown. They will be displayed as columns in a list of sessions and will be directly editable, similarly to a spreadsheet.
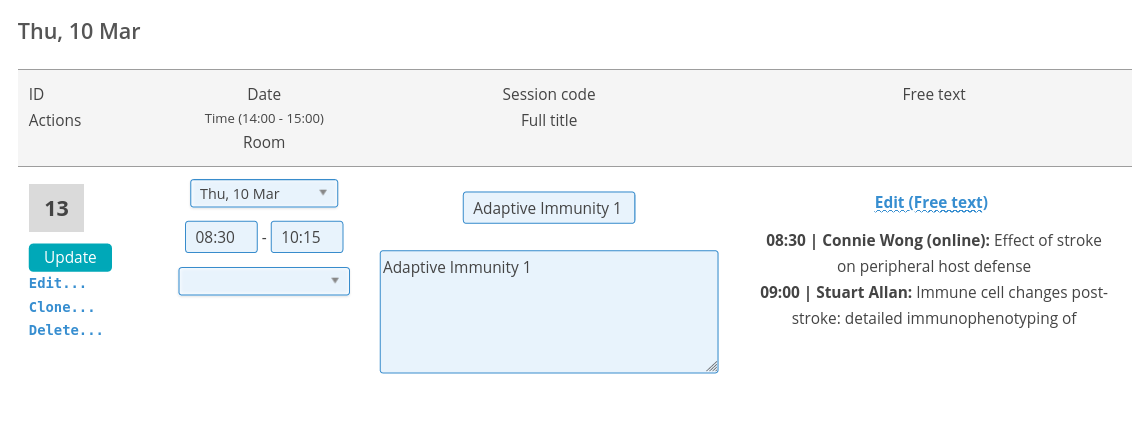
- Navigate to Agenda & proceedings / Sessions / Define the sessions / 1. Create , edit the list of sessions (above the previous section). There you will find the list of sessions, ready to be edited. (Fig. 2)
- Locate the session you need to work on. You can use its title. Edit the corresponding free text by clicking on the wavy blue link.
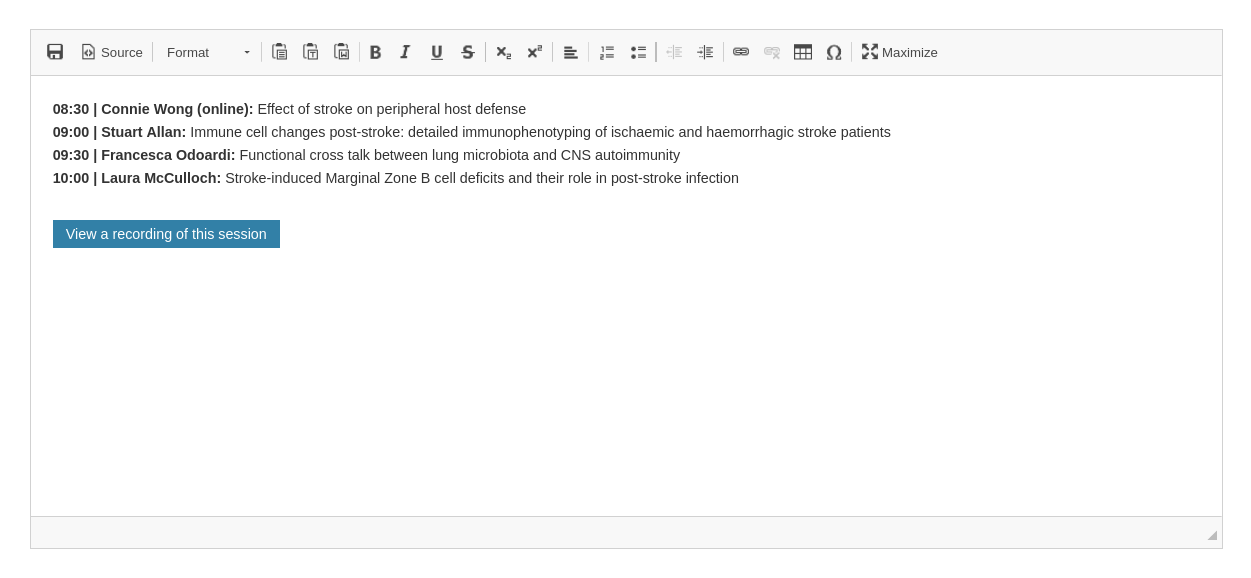
- The free text field opens as a modal box (Fig. 3).
- Click on the
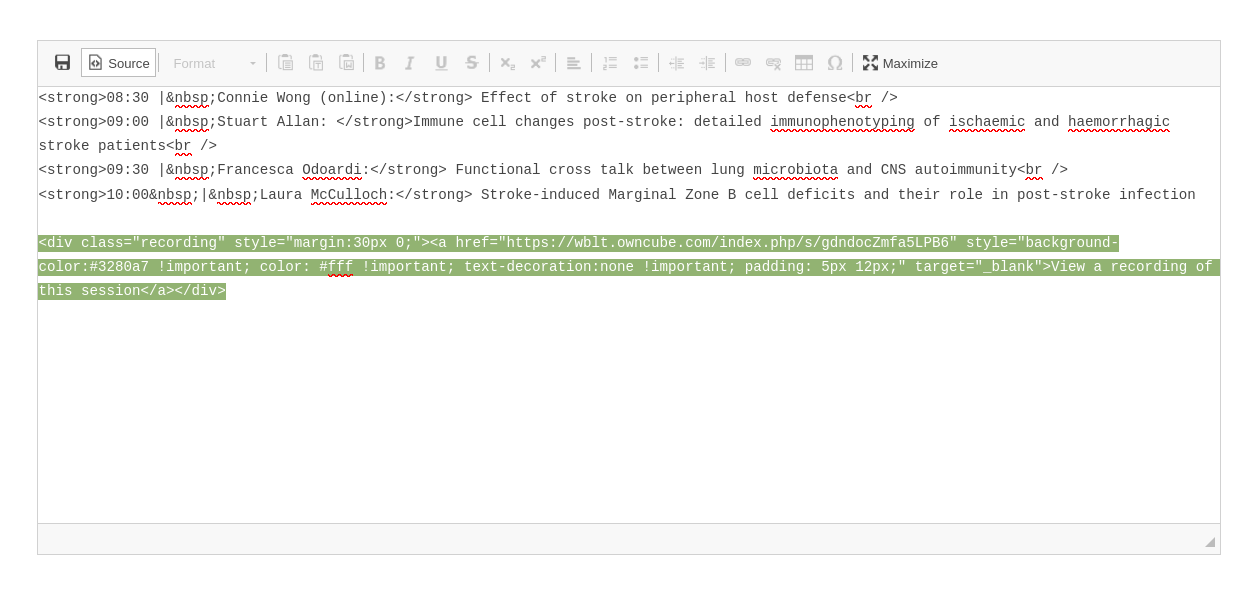
>Sourceicon to switch to HTML (important). The HTML snippet used to create the link is highlighted. You will need to paste a modified version in the free text of every session for which you want to add a recording. Only the URL will change (Fig. 4). - The HTML snippet to use is: You'll need to replace the
<a href="{URL}" style="background-color:#3280a7 !important; color: #fff !important; text-decoration:none !important; padding: 5px 12px;" target="_blank">View a recording of this session</a>{URL}bit (the href attribute), by the actual URL (e.g.https://example.com/video1.mp4), then paste it under the speakers in the free text boxin HTML modeand save. 8. When you save, the data are saved to the database, but the agenda is not automatically recreated. In order to do so, you'll need to click on the green button in the bottom left corner of the screen (Fig. 5).